Custom Domain
Given below are the steps to create your custom domain using AWS CloudFront.
The following are mandatory requirements to start creating the domain:
-
User must have AWS account.
-
User must have registered custom domain.
Preparations
-
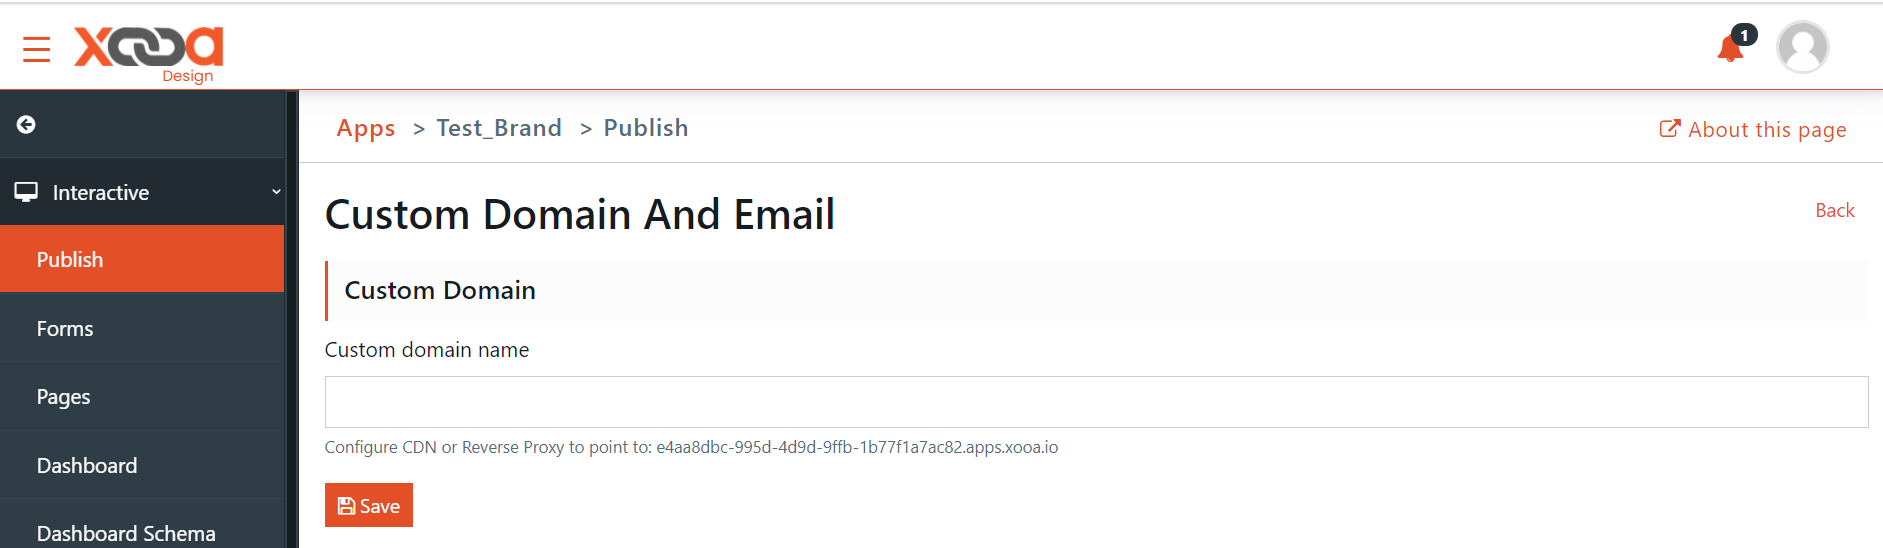
The app’s non-custom domain must be obtained when deploying and noted down. The URL can be copied from the tip under the custom domain field in publish.
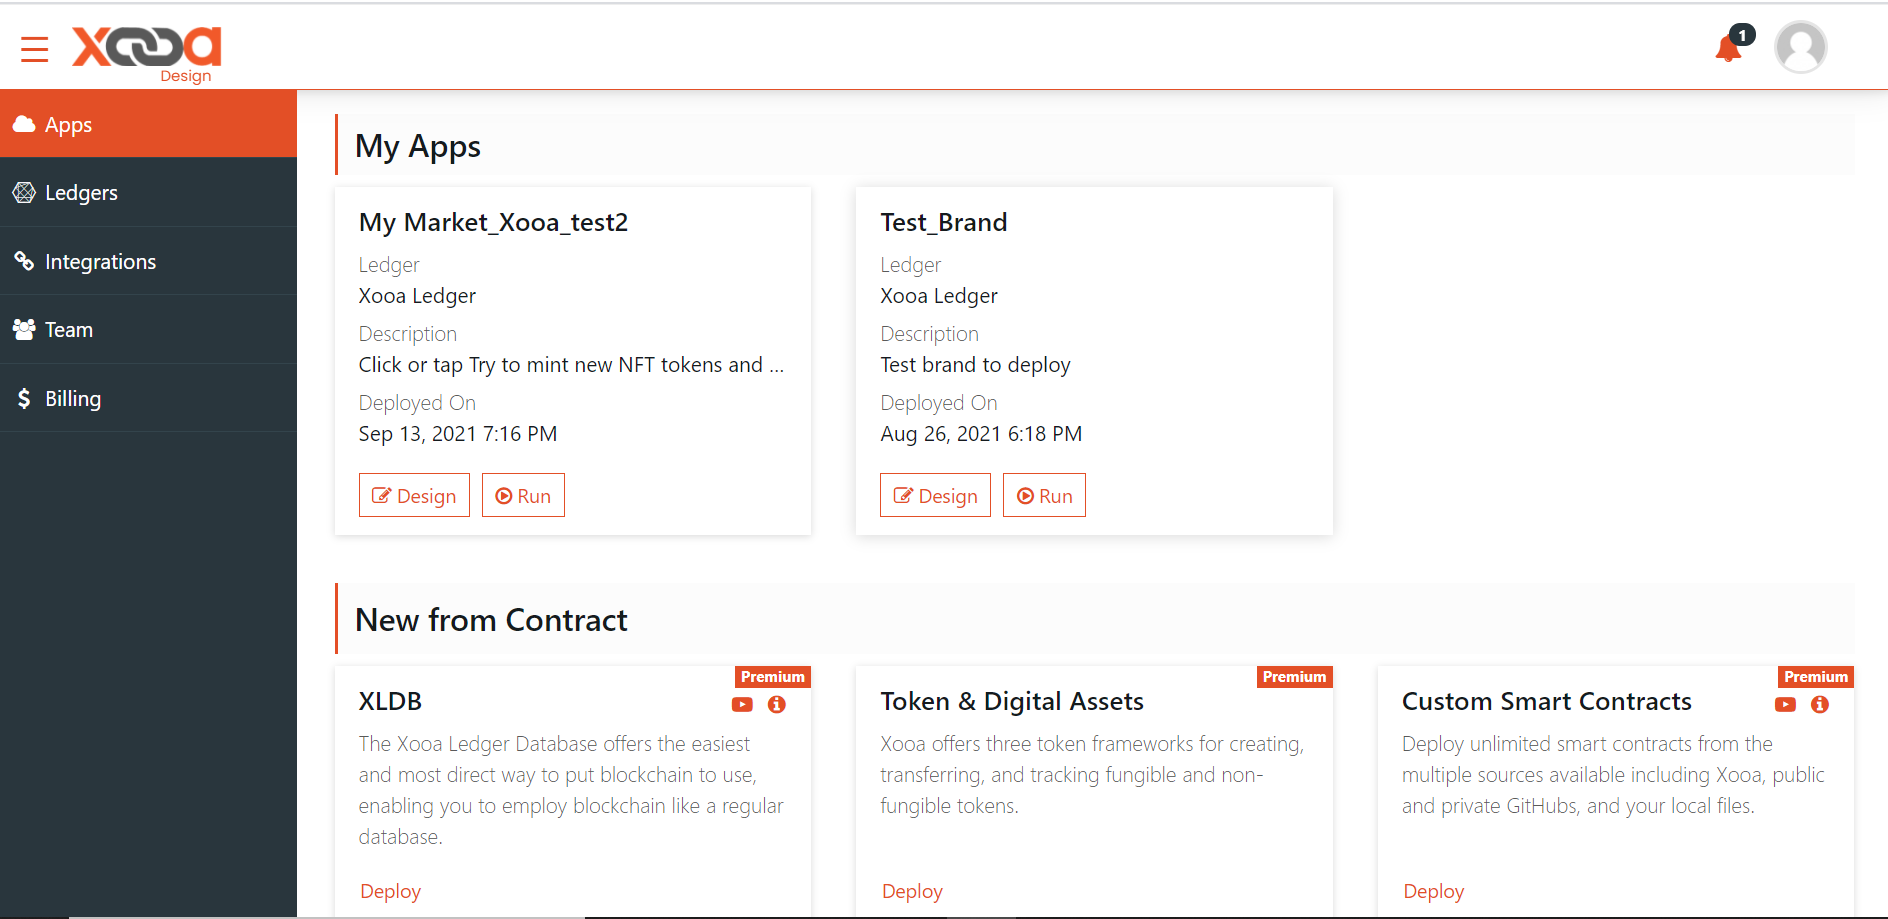
a. Go to your design console, Xooa.com/blockchain, and choose the application for which you want to create custom domain.
b. Click Design to open the application’s design console -> Publish -> click Modify on the Custom Domain and Email tile -> Copy the URL.
-
Decide the custom domain name.
How to create custom domain
Step 1: Go to https://docs.aws.amazon.com/Route53/latest/DeveloperGuide/domain-register.html to create Hosted Zones.
If the customer has an existing registered domain with a domain name service provider other than AWS then, following steps must be performed after the AWS CloudFront instance is created as mentioned in step 2 below:
a) A subdomain entry must be added in the current domain name service provider DNS to point to AWS cloud front instance URL
b) The subdomain must be added as ‘Alternate domain name (CNAME) - optional’ in the AWS cloud front instance.
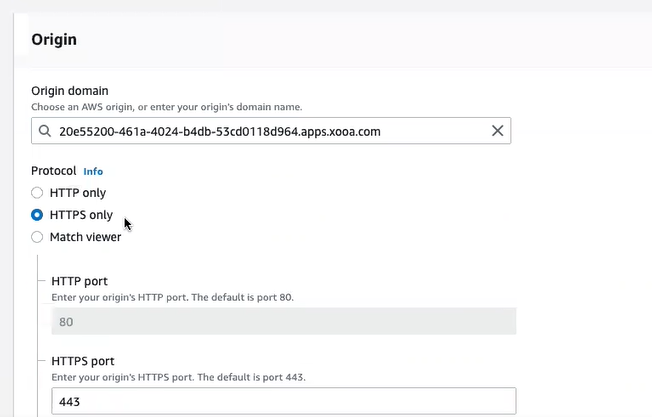
Step 2: Go to Create distribution page in CloudFront
- Paste the non-custom domain URL that you copied as step 1 in Preparations, in the Origin domain field.
-
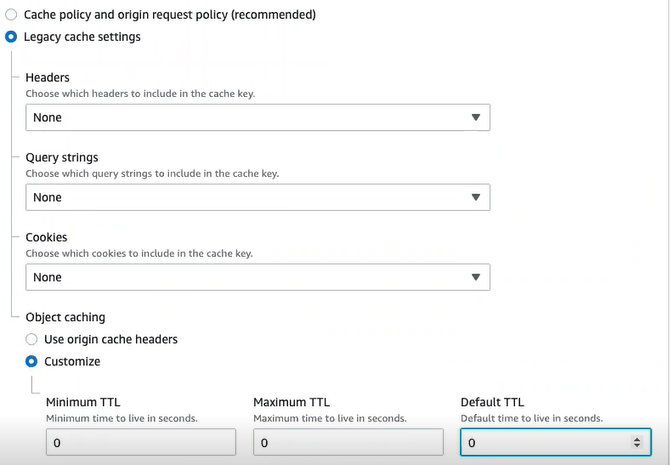
Scroll down to Cache key and origin requests section.
-
Legacy cache settings -> None.
-
Object caching -> Customize -> set Maximum TTL and Default TTL to 0.
-
- Click Create distribution. The page navigates to the Distributions home page.
Step 2: In the distributions page, click Origins tab -> Create origin.
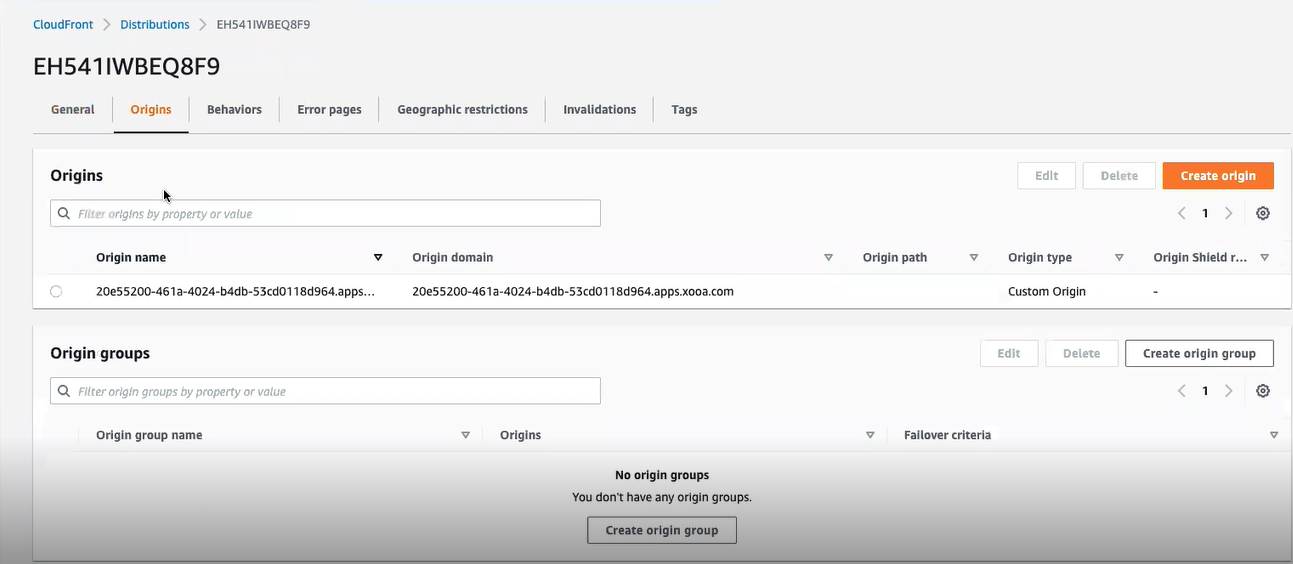
Step 3: In the Settings page:
-
In the Origin domain field, select: dashboardapi.Xooa.com.
-
In the Origin path field, enter: /blockchain.
-
Click Create Origin.

Step 4: In the distributions page, go to Behaviors tab -> Create behavior.
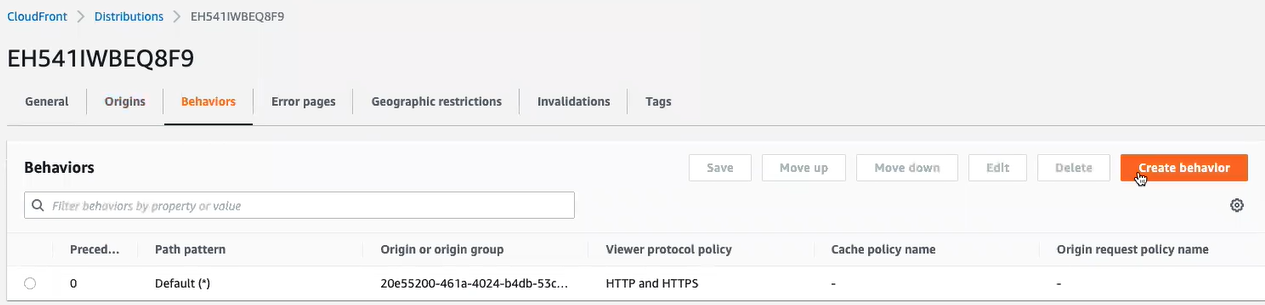
Step 5: In the Settings page.
-
In the Path pattern field, enter: /api/config.
-
In the origin and origin groups field, select: dashboardapi.Xooa.com.
-
Scroll to Legacy cache settings.
- Headers -> select Include the following headers -> select ‘Origin’ and ‘Referer’.
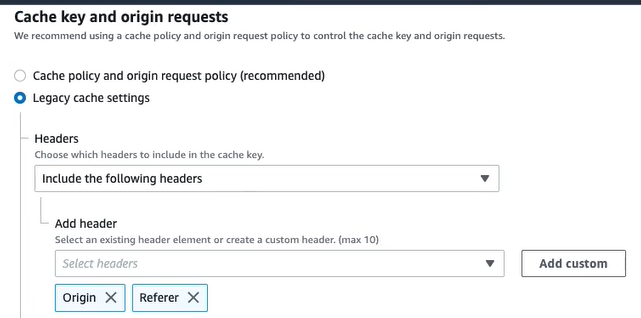
- Object caching -> Customize -> set Maximum TTL and Default TTL to 0.
- Click Create Behavior.
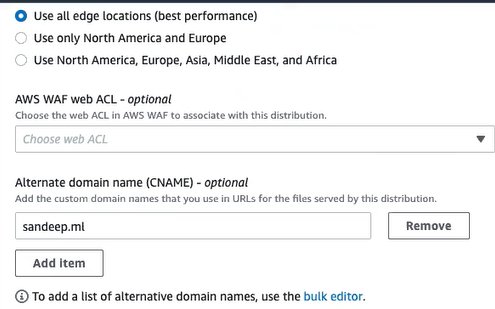
Step 6: In the distributions page, click the Edit button to point your custom domain.
- In the Alternate domain name field, enter your custom domain name. Refer below screenshot.
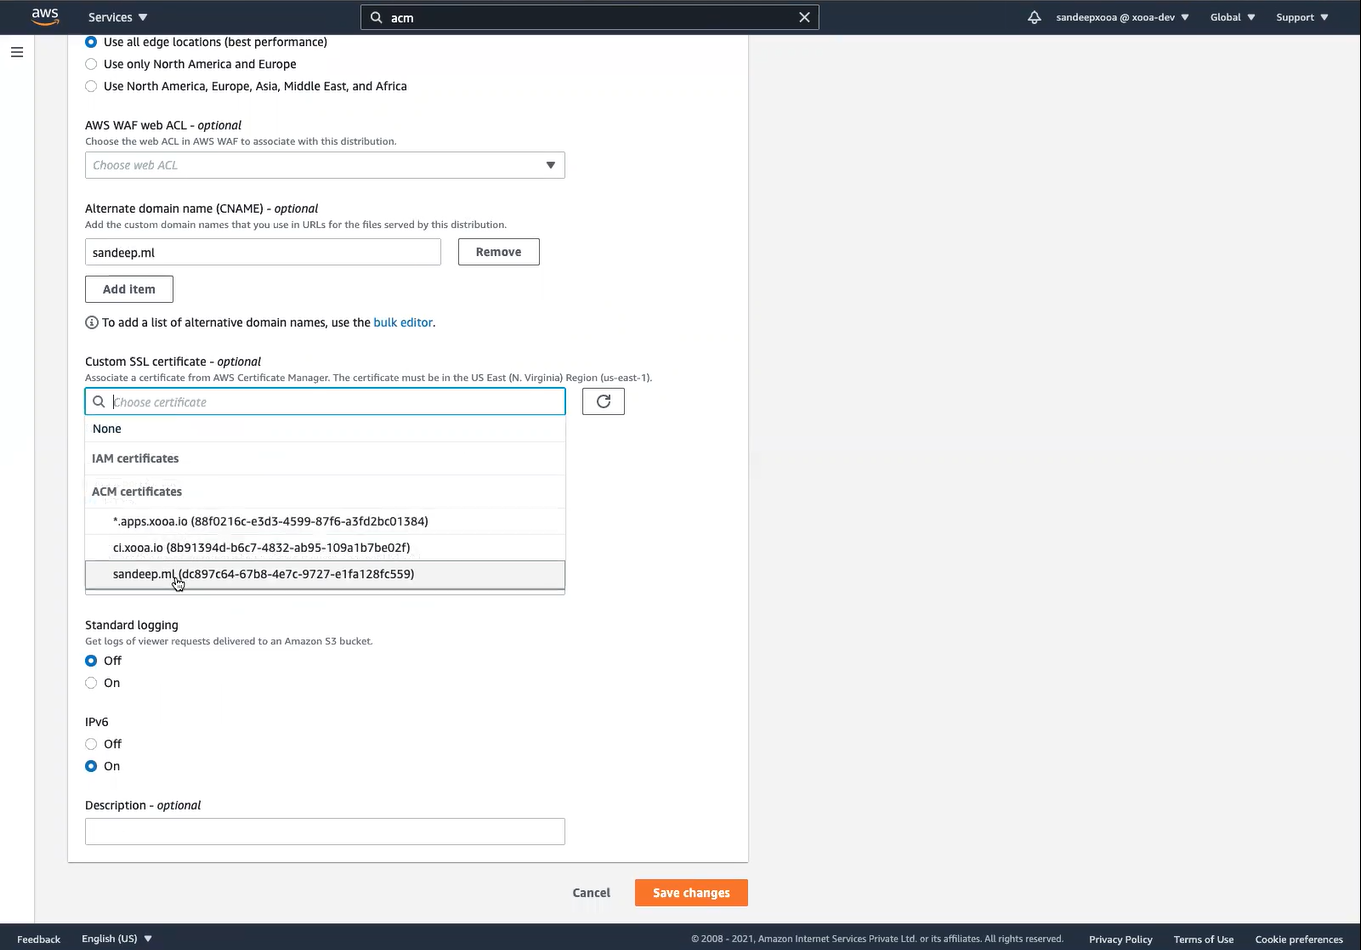
- In the Custom SSL certificate field, in the dropdown, select your certificate to associate. If you cannot find your certificate, request certificate using ACM.
- Click Save changes.
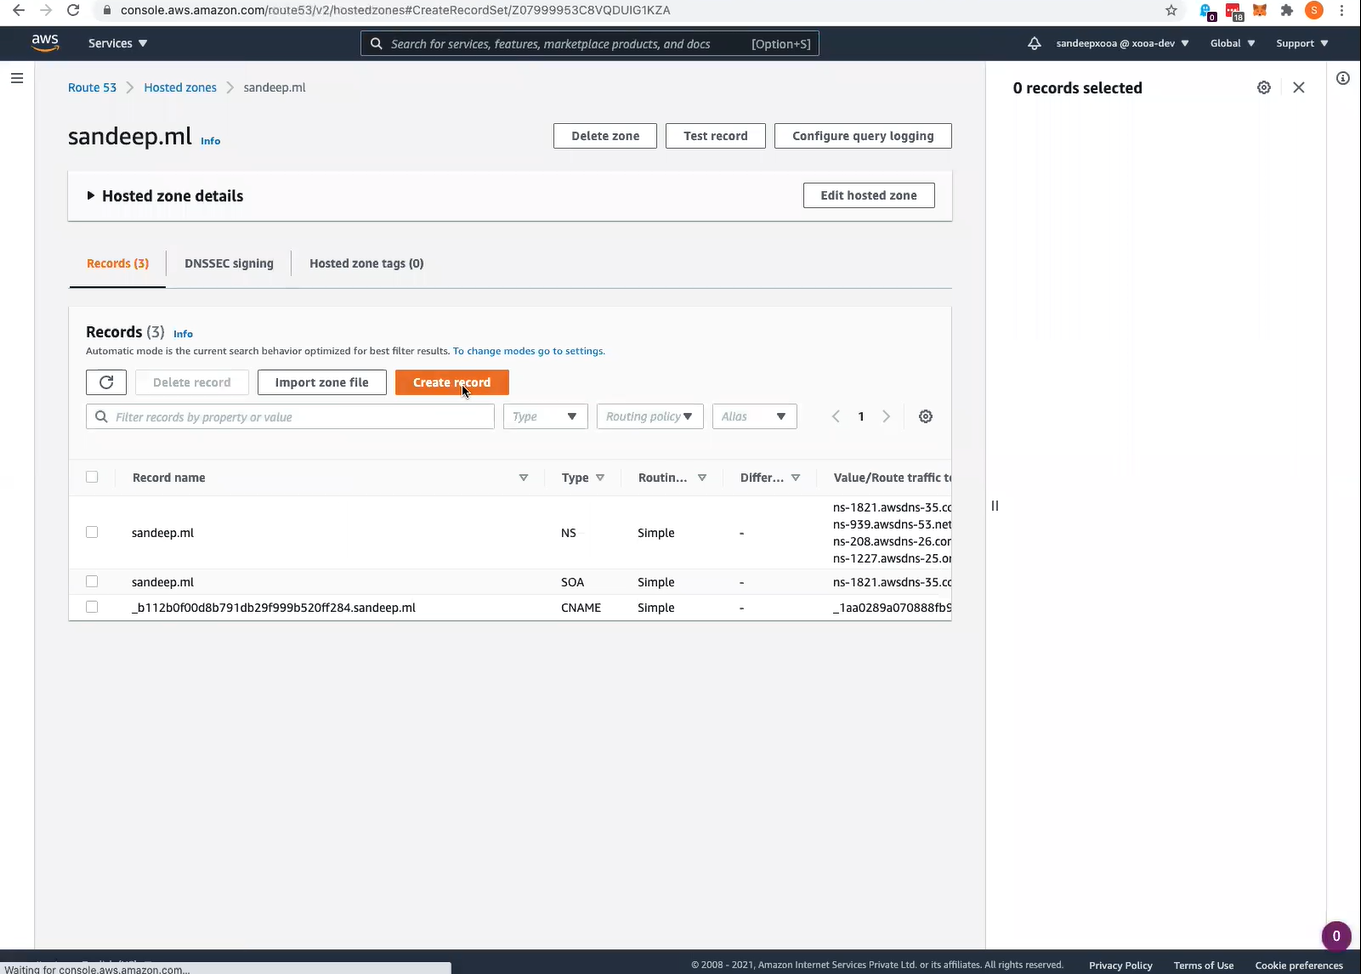
Step 7: Go to Route 53 -> Hosted Zones -> click your domain name in the hosted zone -> Create record. Refer below screenshot.
Step 8: In the Quick create record page:
-
Enable Alias.
-
Select your distribution endpoint in Route traffic to drop-down list.
-
Select your distribution. Refer below screenshot.
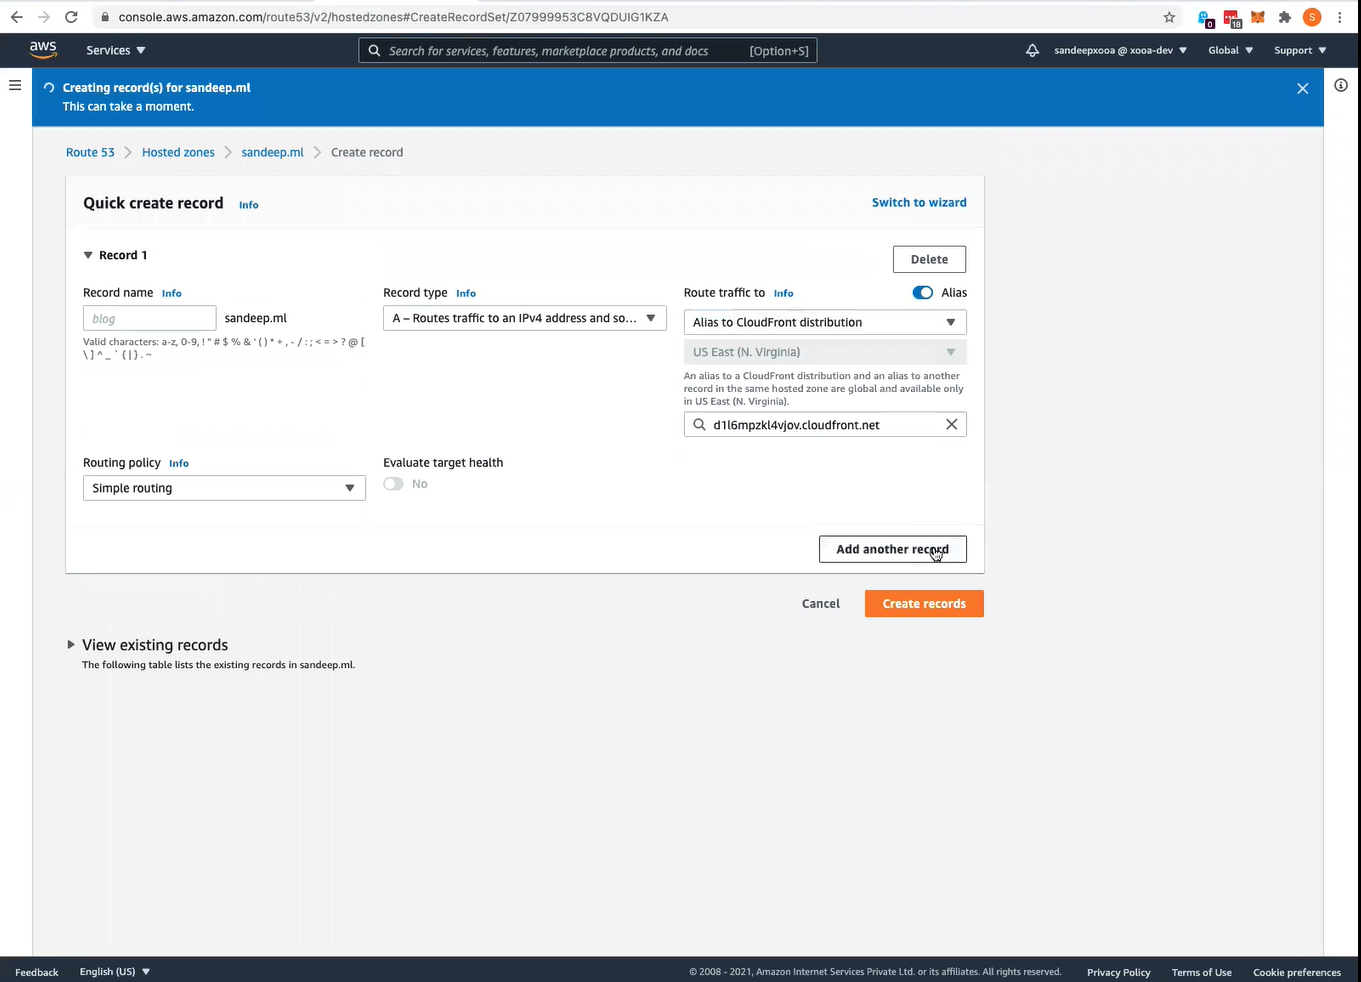
- Click Create records. The custom log domain is created.
Step 9: In a new browser tab, enter the custom log domain name -> copy the domain name from the URL field.
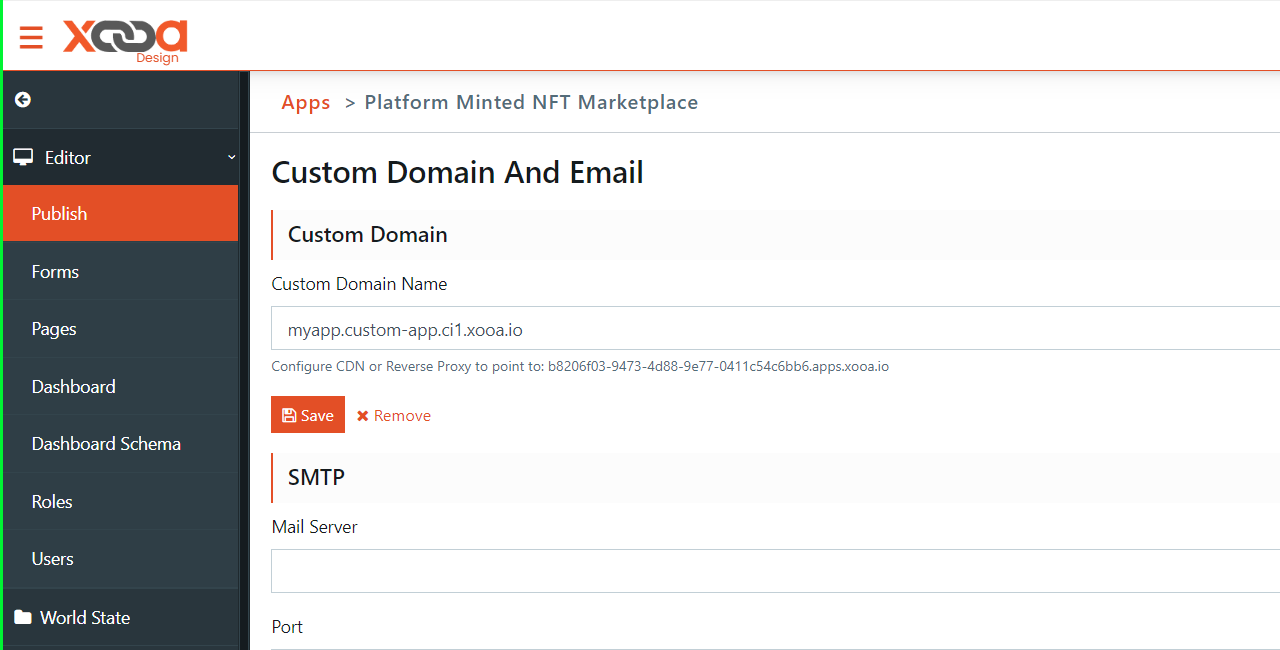
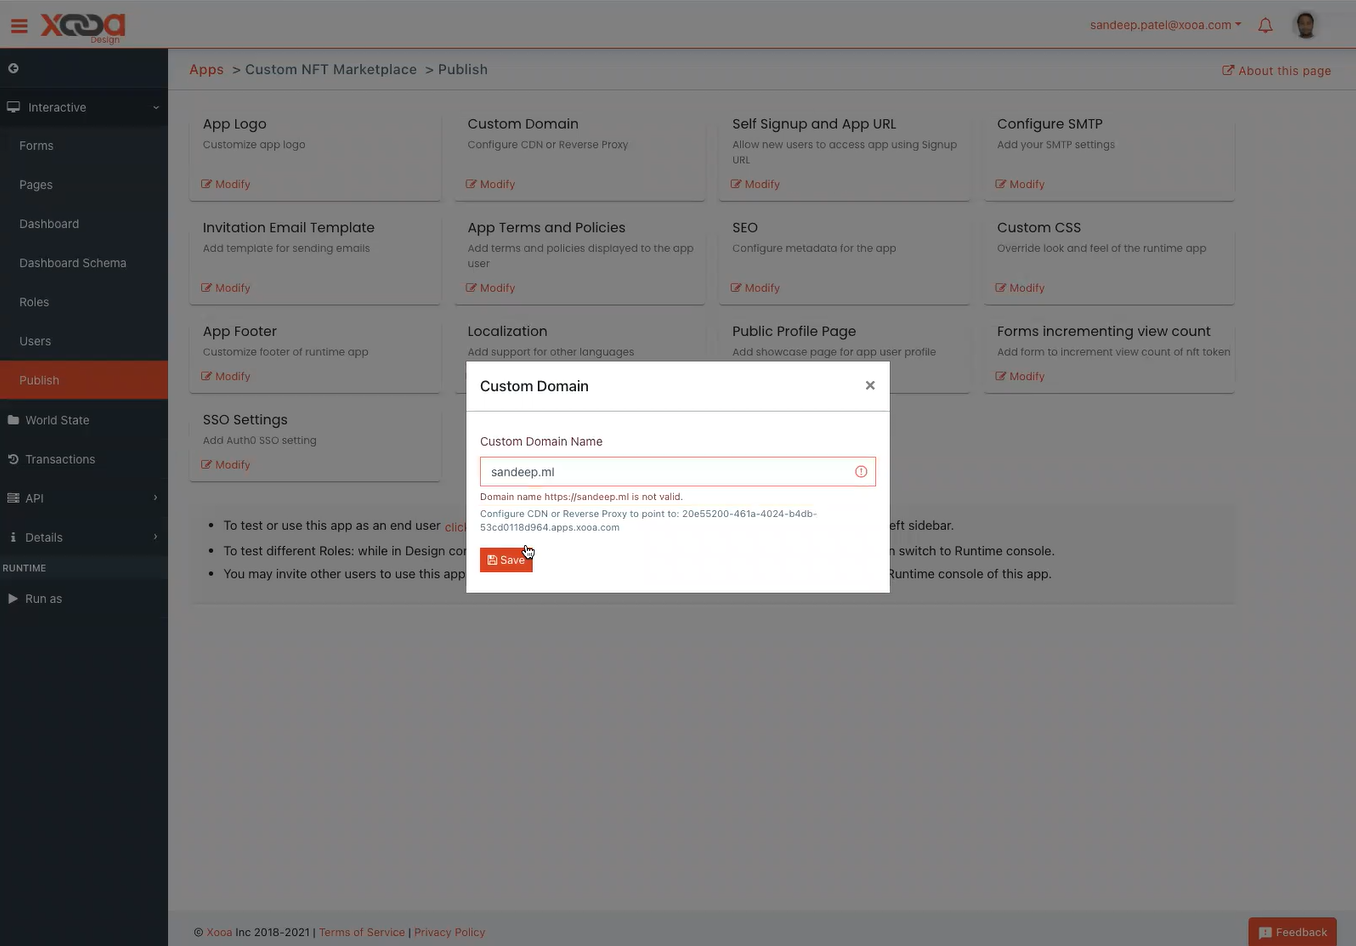
Step 10: Go to your application console -> click Modify on Custom Domain tile.
Step 11: In the popup window, enter the domain name -> click Save. Refer below screenshot.
Step 12: Go back to the newly opened tab with your domain name and reload the page.
Your application will be available in the newly created custom domain name.
Setting up custom domain on AWS
Prerequisites
The following are mandatory requirements to start creating the domain:
-
User must have AWS account.
-
User must have registered custom domain.
How to create custom domain
Step 1: Go to https://docs.aws.amazon.com/Route53/latest/DeveloperGuide/domain-register.html to create Hosted Zones.
If the customer has an existing registered domain with a domain name service provider other than AWS then, following steps must be performed after the AWS CloudFront instance is created as mentioned in step 2 below:
a) A subdomain entry must be added in the current domain name service provider DNS to point to AWS cloud front instance URL
b) The subdomain must be added as ‘Alternate domain name (CNAME) - optional’ in the AWS cloud front instance.
Step 2: Go to Create distribution page in CloudFront
-
Paste the non-custom domain URL that you copied as step 1 in Preparations, in the Origin domain field.
-
Scroll down to Cache key and origin requests section.
-
Legacy cache settings -> None.
-
Object caching -> Customize -> set Maximum TTL and Default TTL to 0.
-
-
Click Create distribution. The page navigates to the Distributions home page.
Step 3: In the distributions page, click Origins tab -> Create origin.
Step 4: In the Settings page:
-
In the Origin domain field, select: dashboardapi.xooa.com.
-
In the Origin path field, enter: /blockchain.
-
Click Create Origin.
Step 5: In the distributions page, go to Behaviors tab -> Create behavior.
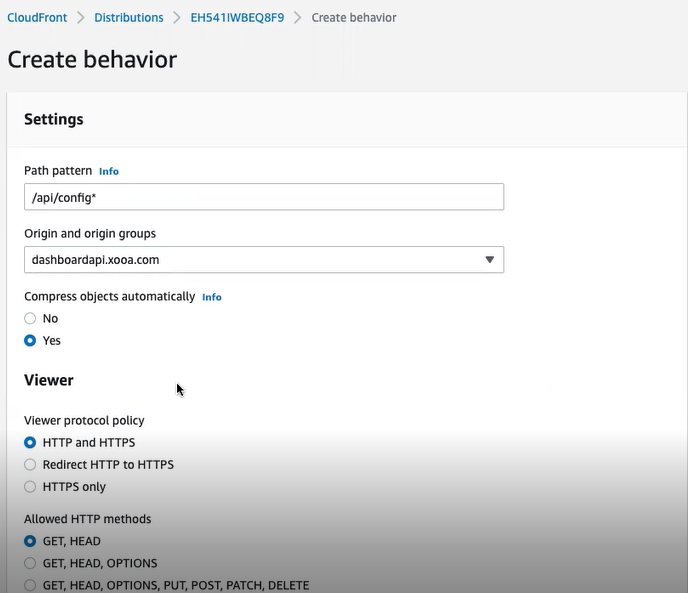
Step 6: In the Settings page.
-
In the Path pattern field, enter: /api/config*.
-
In the origin and origin groups field, select: dashboardapi.Xooa.com.
-
Scroll to Legacy cache settings.
- Headers -> select Include the following headers -> select ‘Origin’ and ‘Referer’.
- Object caching -> Customize -> set Maximum TTL and Default TTL to 0.
- Click Create Behavior.
Step 7: In the distributions page, click Origins tab -> Create origin.
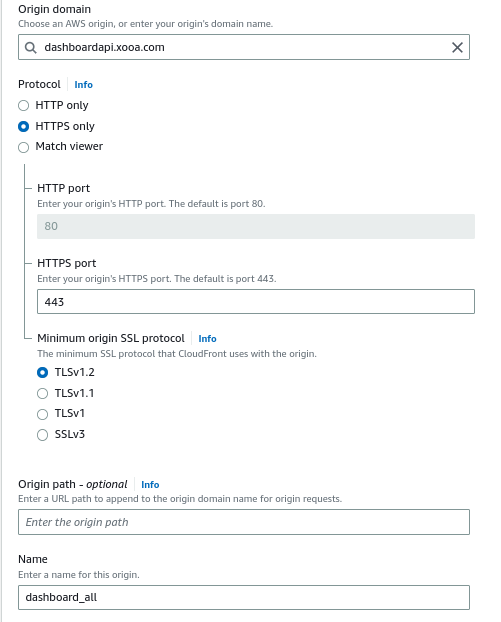
Step 8: In the Settings page:
-
In the Origin domain field, select: dashboardapi.xooa.com.
-
Protocol -> HTTPS only.
-
Keep Origin path field blank.
-
In the Name field, enter: dashboard_all.
-
Click Create Origin.
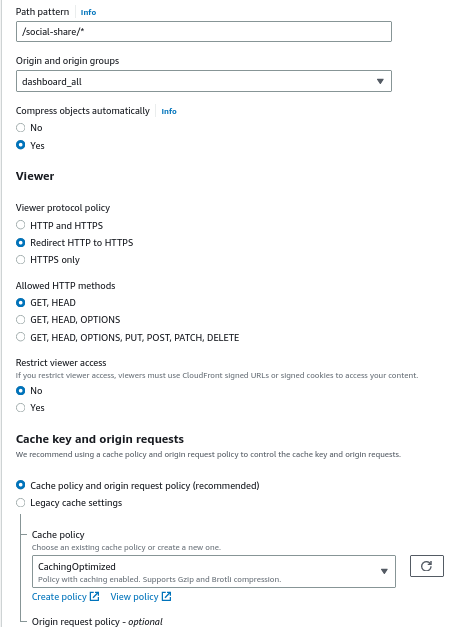
Step 9: In the distributions page, go to Behaviors tab -> Create behavior.
Step 10: In the Settings page.
-
In the Path pattern field, enter: /social-share*.
-
In the origin and origin groups field, select: dashboard_all.
-
Scroll down to Cache key and origin requests section.
-
Select Cache policy and origin request policy (recommended).
-
Under Cache policy -> select CachingOptimized
-
-
Click Create Behavior.
Step 11: In the distributions page, click the Edit button to point your custom domain.
- In the Alternate domain name field, enter your custom domain name. Refer below screenshot.
- In the Custom SSL certificate field, in the dropdown, select your certificate to associate. If you cannot find your certificate, request certificate using ACM.
- Click Save changes.
Step 12: Go to Route 53 -> Hosted Zones -> click your domain name in the hosted zone -> Create record. Refer below screenshot.
Step 13: In the Quick create record page:
-
Enable Alias.
-
Select your distribution endpoint in Route traffic to drop-down list.
-
Select your distribution. Refer below screenshot.
- Click Create records. The custom log domain is created.
Step 14: In a new browser tab, enter the custom log domain name -> copy the domain name from the URL field.
Step 15: Go to your application console -> click Modify on Custom Domain tile.
Step 16: In the popup window, enter the domain name -> click Save. Refer below screenshot.
Step 17: Go back to the newly opened tab with your domain name and reload the page.
Your application will be available in the newly created custom domain name.
Setting up custom domain on Azure
Prerequisites
The following are mandatory requirements to start creating the domain:
-
User must have Azure account.
-
User must have registered custom domain.
How to create custom domain
Step 1: Navigate to “Front Door and CDN profiles” service from Azure portal and click on create 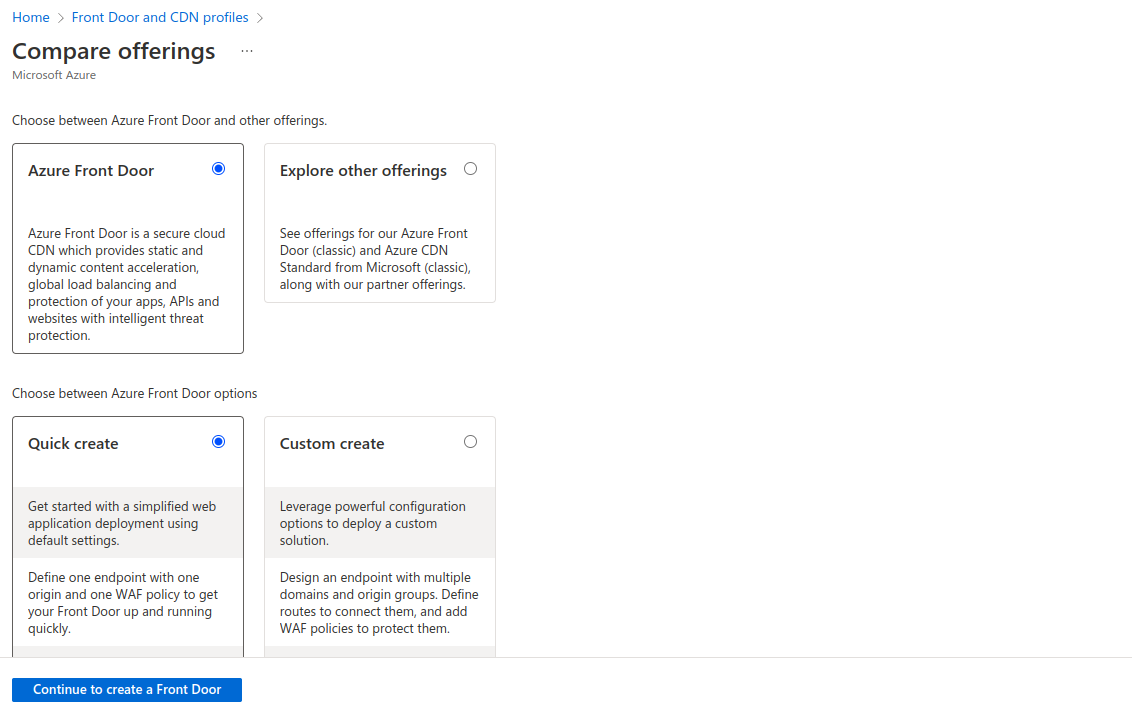
Step 2: Keep default options selected as present in above image and then click on “Continue to create a Front Door”
Step 3: Select your Azure subscription and Resource group. Further enter a name for the endpoint 
Step 4: In the “Origin type” dropdown list, select “Custom”
Step 5: In the “Origin host name” textbox, paste the non-custom domain URL that you copied in step 1 of Preparations. 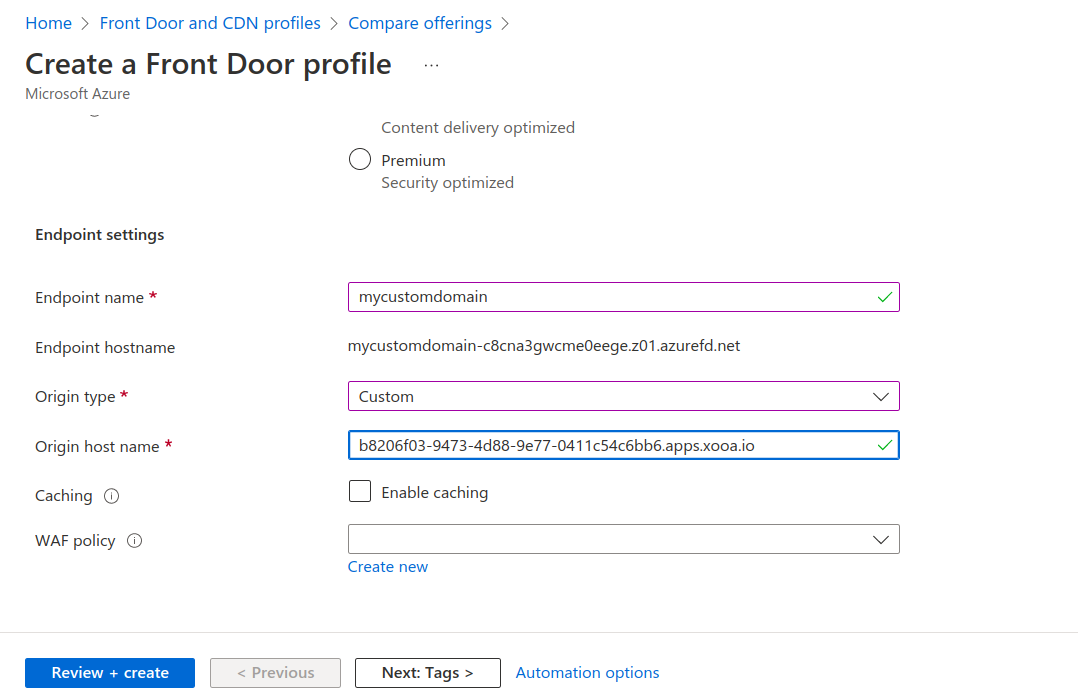
Step 6: Click on “Review + create” -> “Create”. Wait till the resource gets deployed. 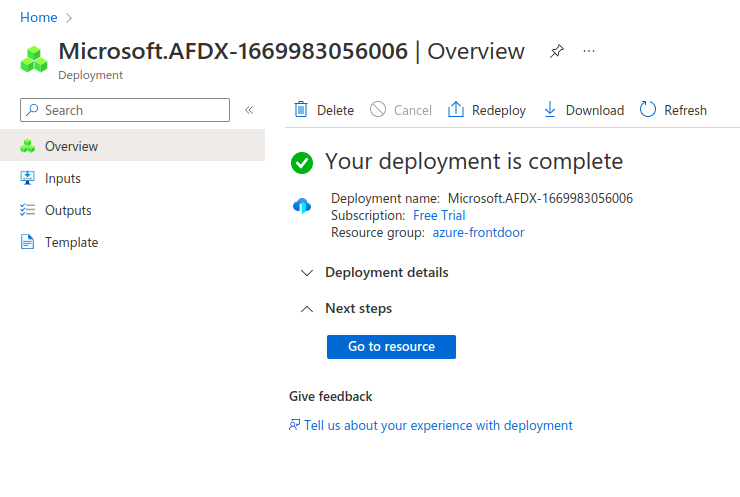
Step 7: Once the deployment is completed, navigate to “Domains” settings.
Step 8: Click on “Add a domain” to map this resource with a custom domain name. In the domain addition wizard, select your Azure DNS zone. Select an existing or create a new custom domain. Click on “Add” and wait till provisioning is successful. 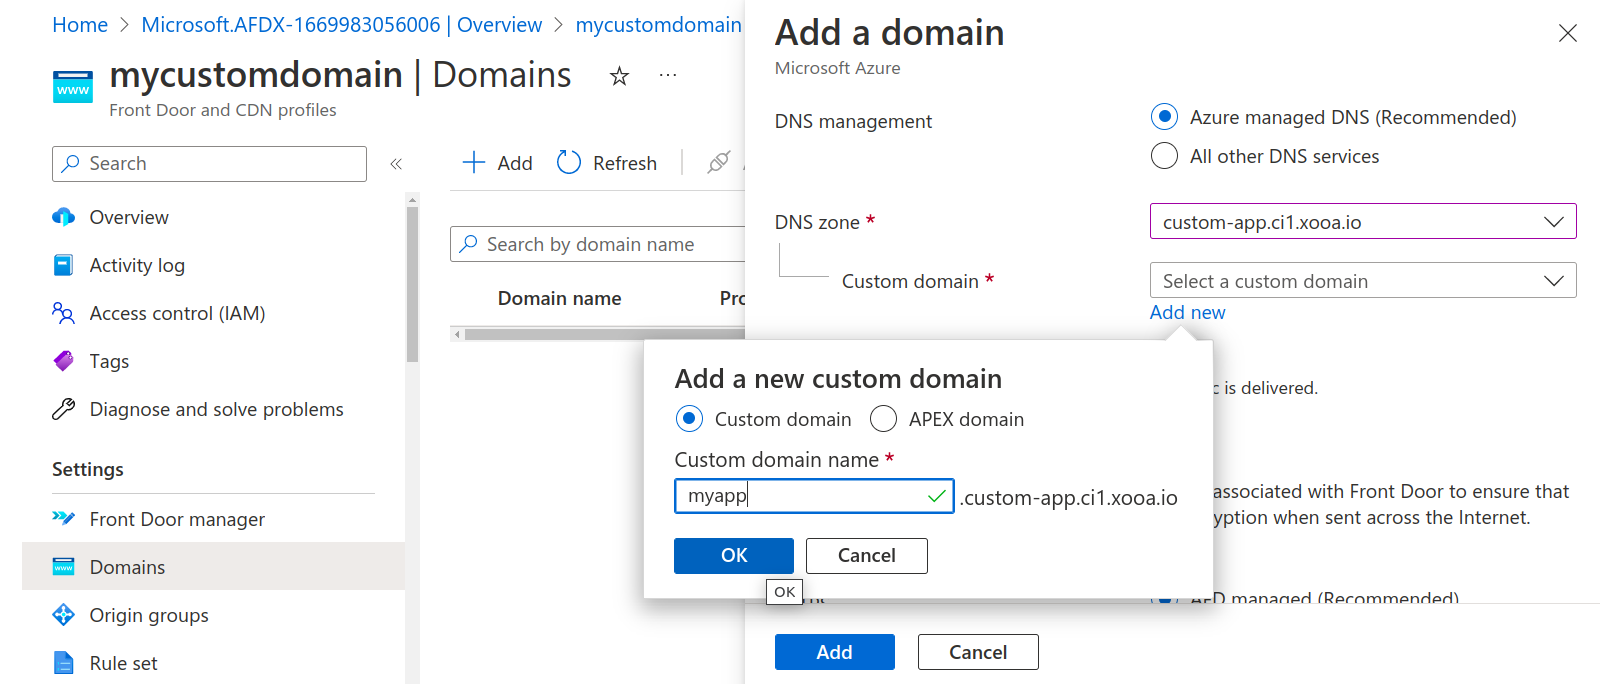
Step 9: Click on “unassociated” to associate Azure Front Door endpoint with your custom domain 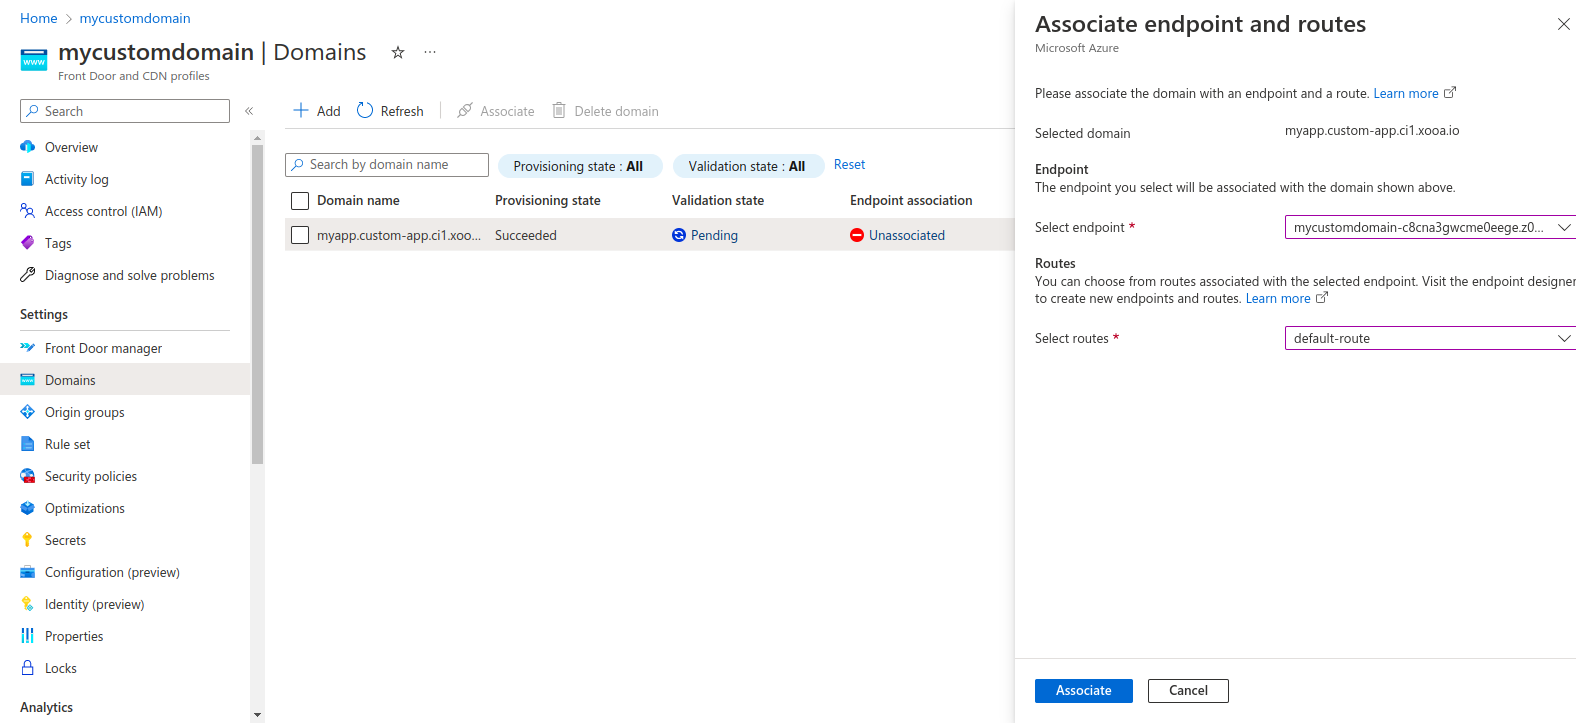
Step 10: Click on “Pending” and click on Add to add TXT record to the domain DNS for the validation. 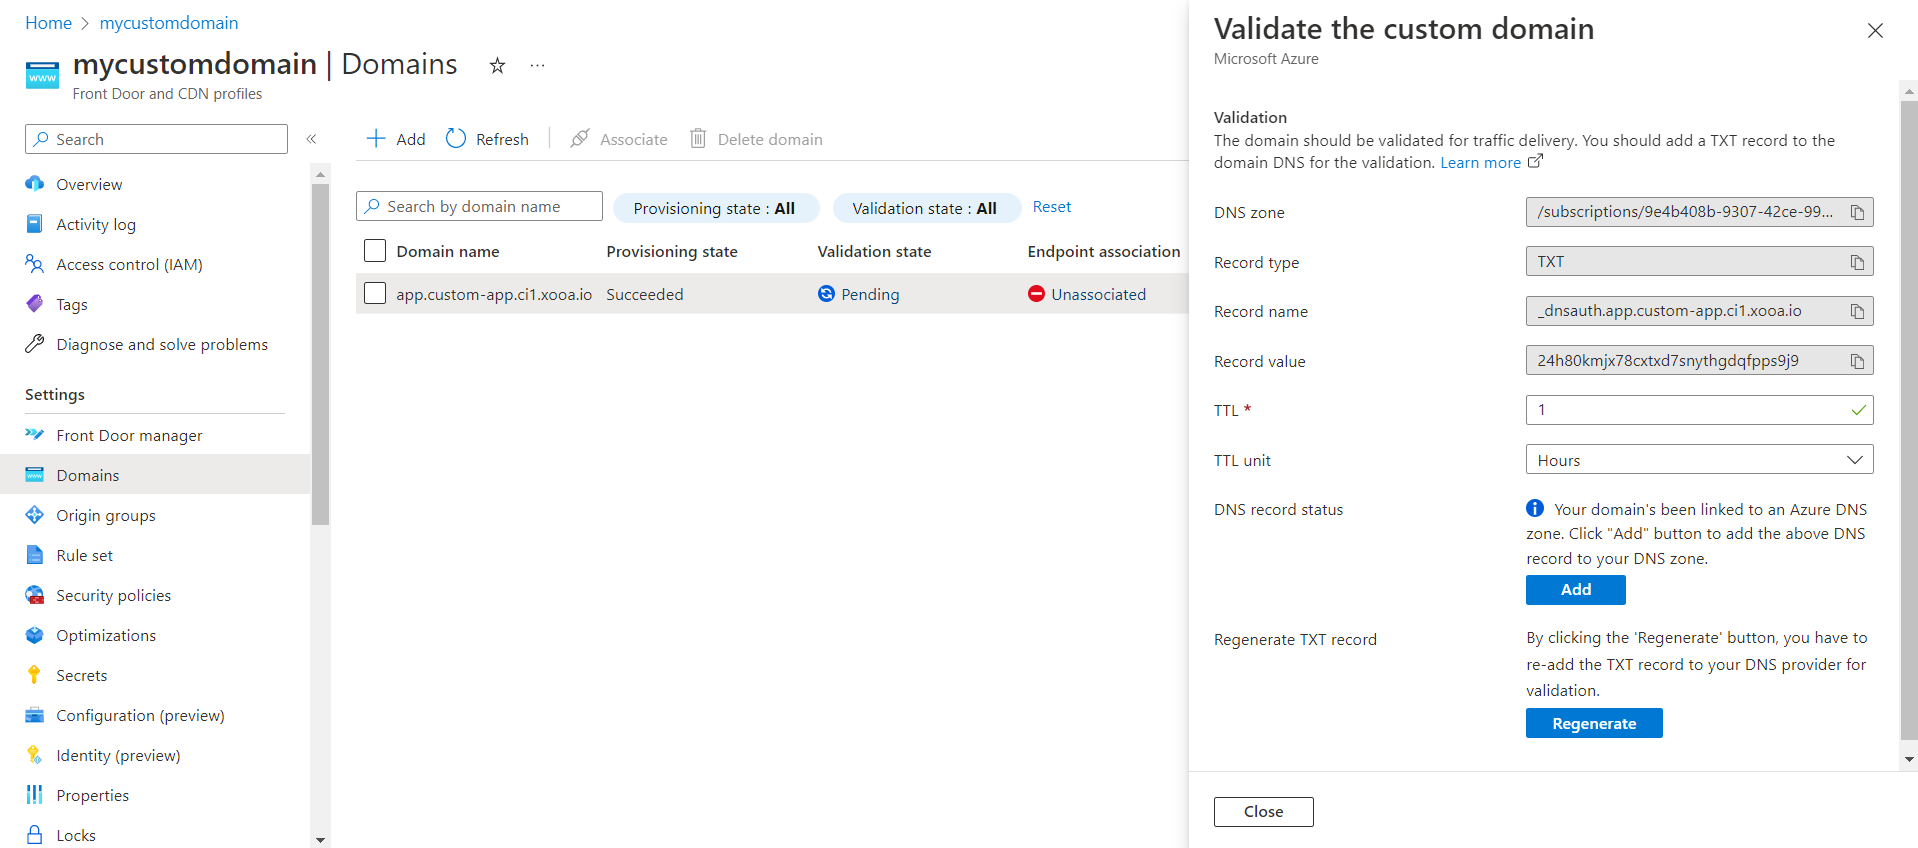
Step 11: Wait till validation is approved and a CNAME record in your DNS zone. 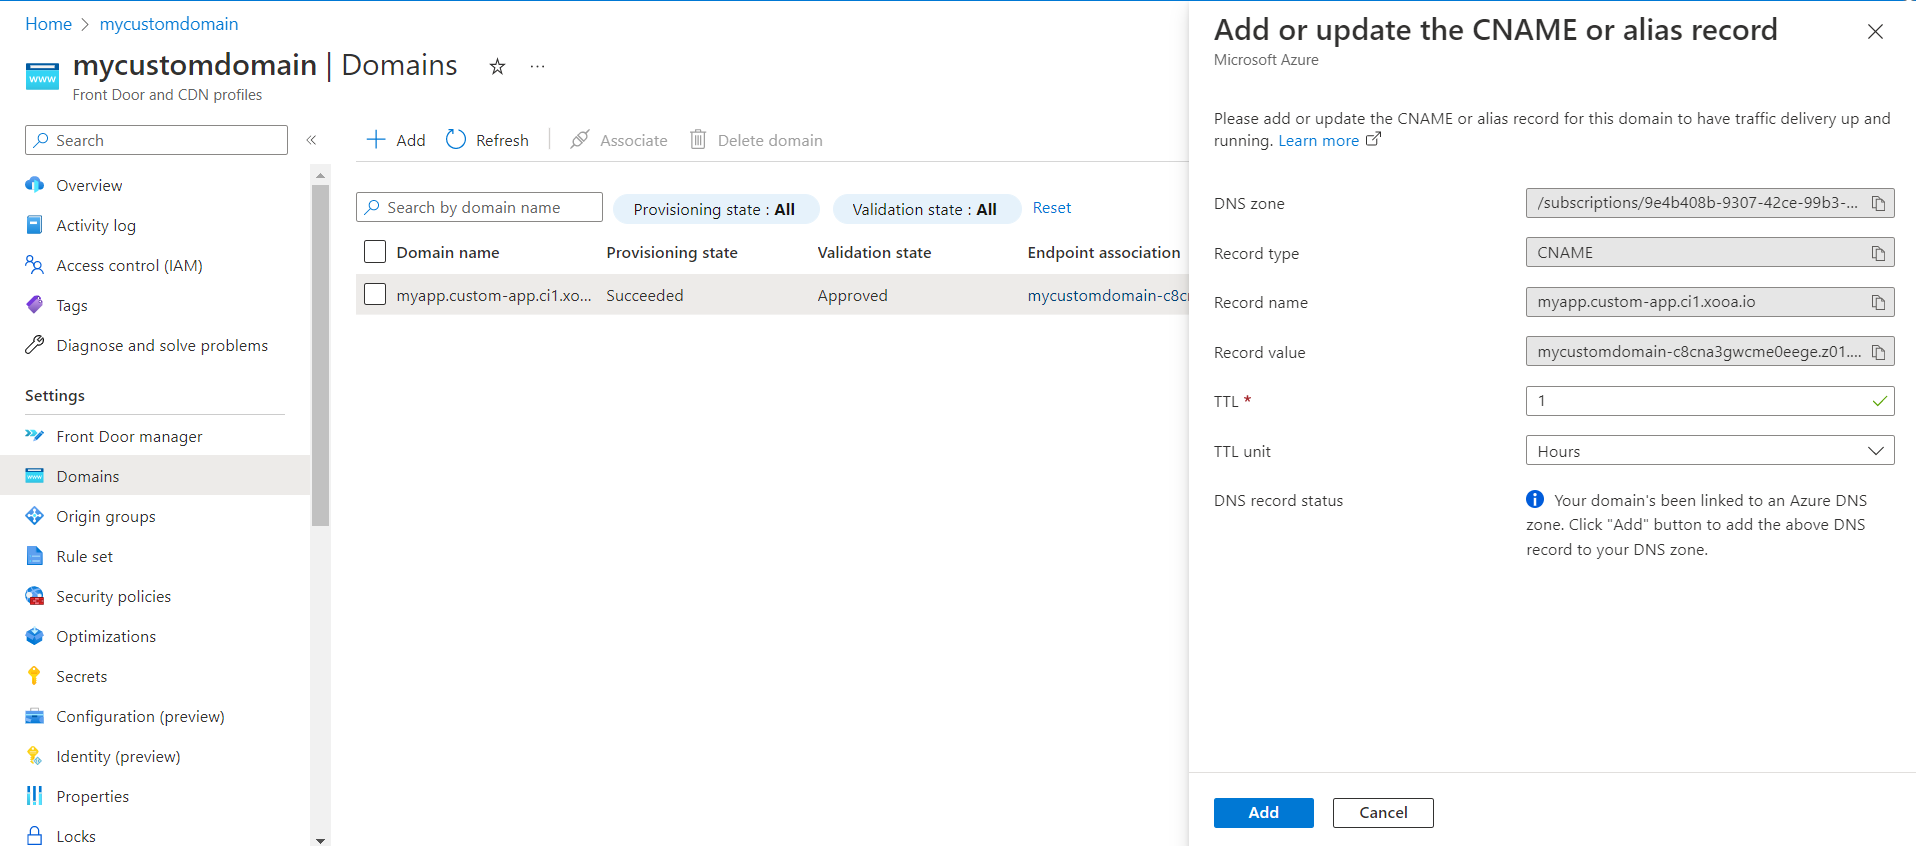
Step 12: Go to your application console -> click Modify on the Custom Domain tile. Click on Save.