Multiple Plugins Support
The feature allows the Admins to customize and add multiple plugins to any of the pages on their app. A single page can be designed to render different types of data. For example; On Drop page, we can have different sections of live drop, upcoming drop, early access drop etc. The Admin can give role-based access and modify the view rights for each role, for that page.
-
In the design console, go to Pages -> click Design on any of the existing page or click Add New to add a page
-
Select Plugins in the Page type section -> the Add Plugin option will be enabled
-
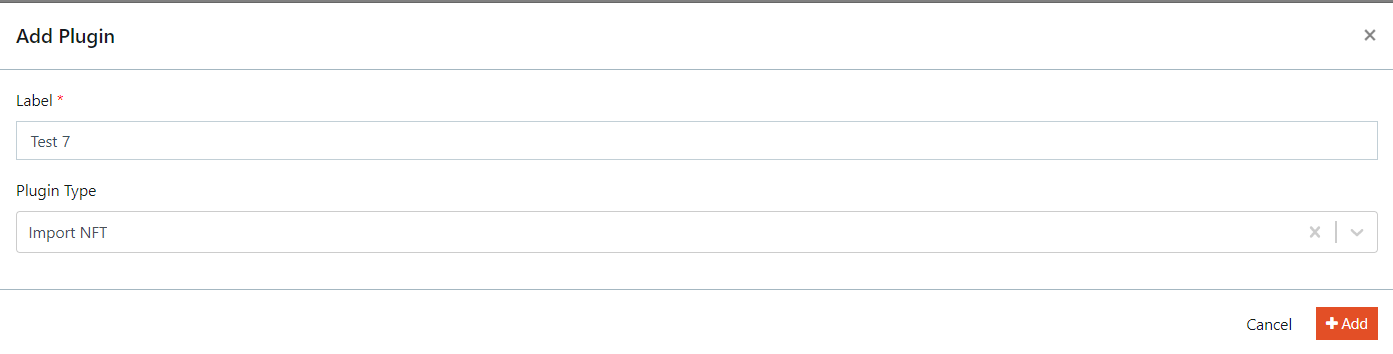
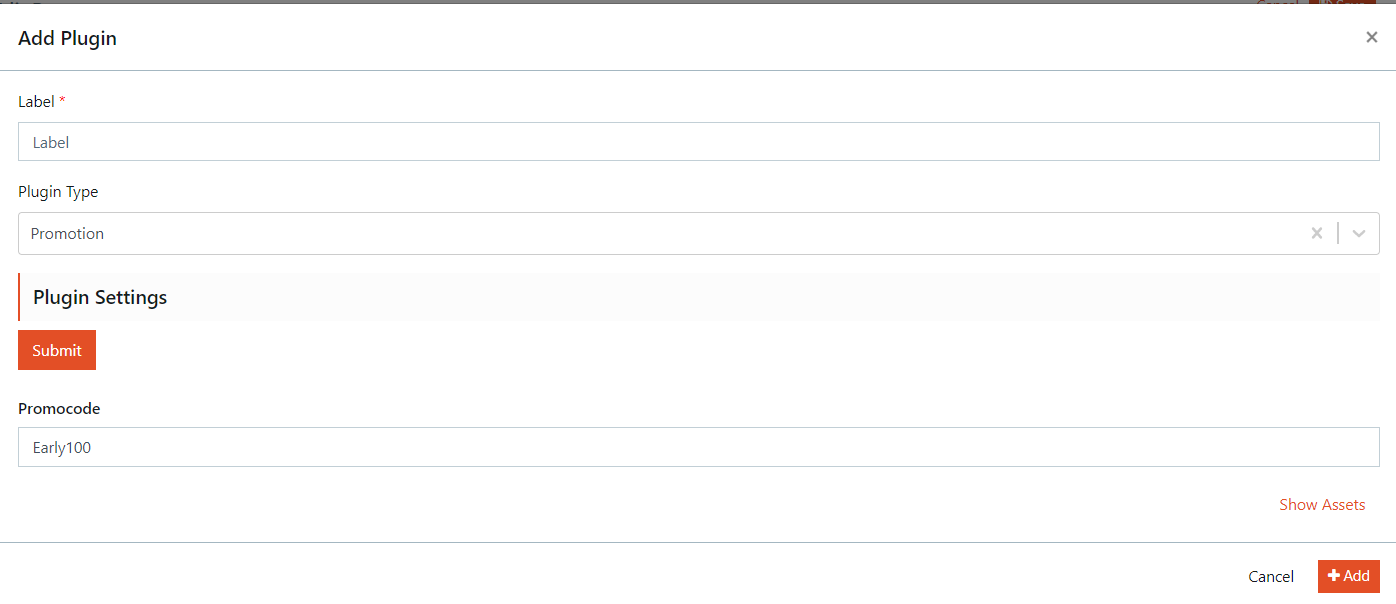
On the Add plugin popup, enter the label and select the plugin type(s)
Currently the app supports the following plugins, select any as per requirement. The screenshots are samples of how you can add plugins and how it will be rendered on the UI:
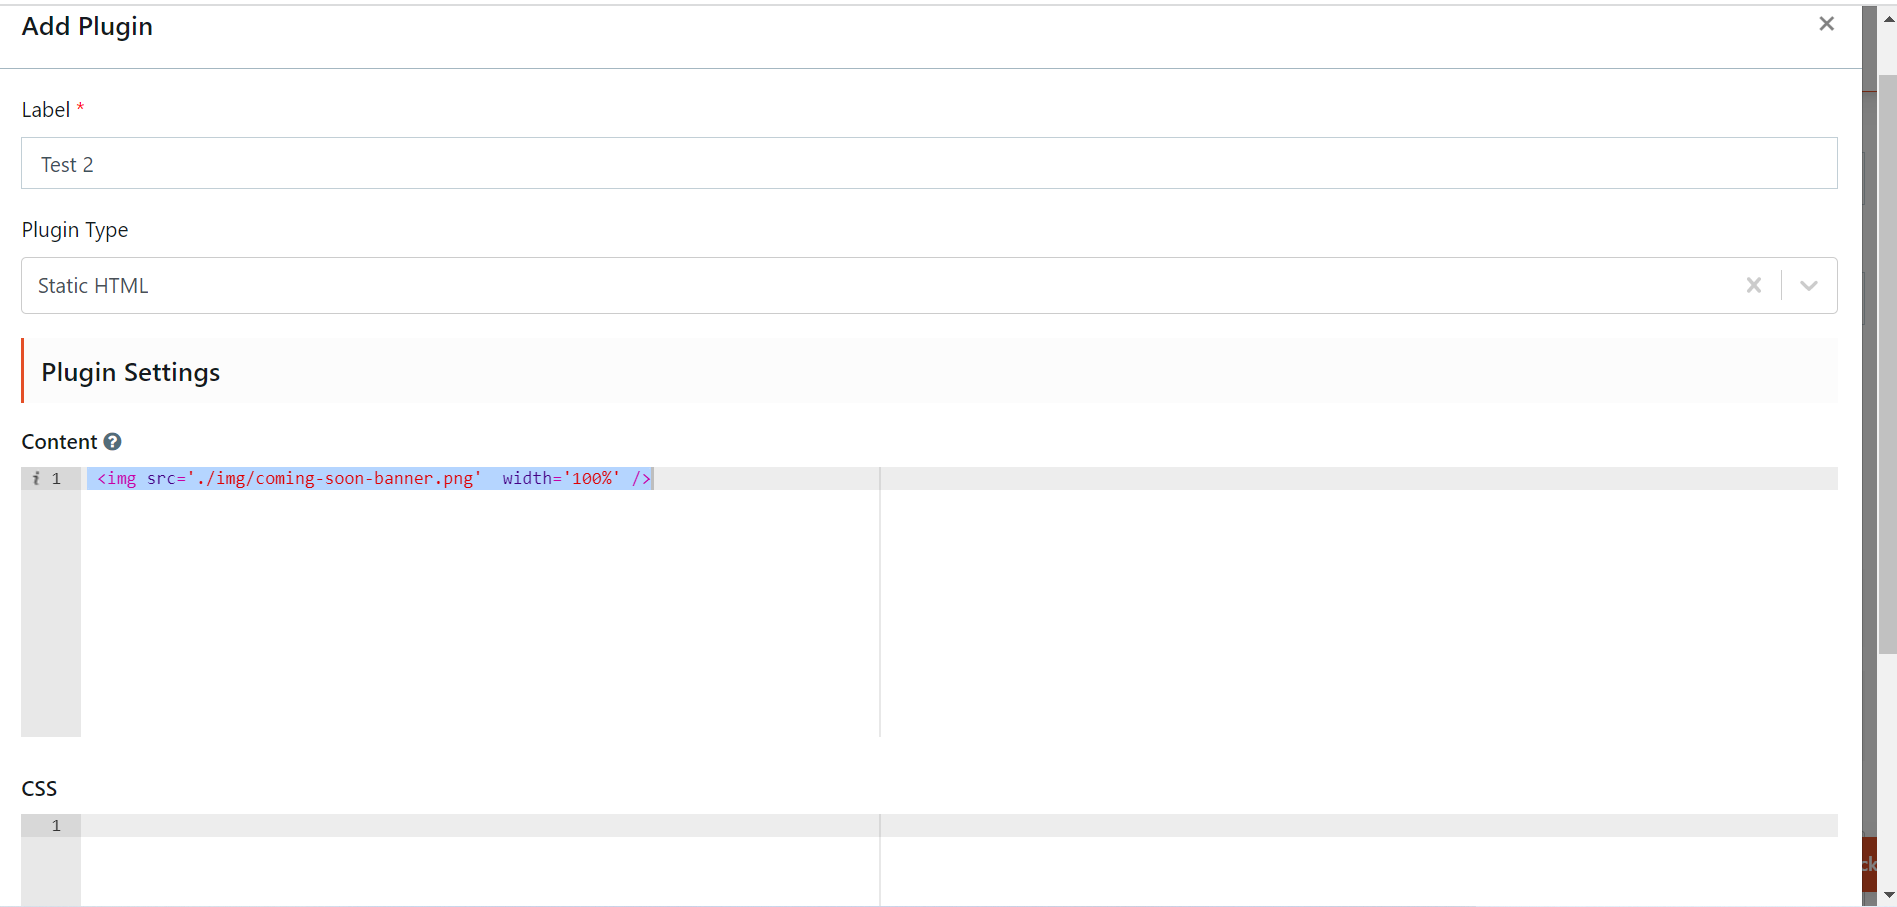
a. Static HTML - You can enter raw html and style it.
Plugin
Rendered

b. Static HTML with Wysiwyg - What you see is what you get. Choose your html element and style it. The tags and the styling are visible in realtime thus, reducing the need to toggle between runtime and the app settings.
Plugin

Rendered

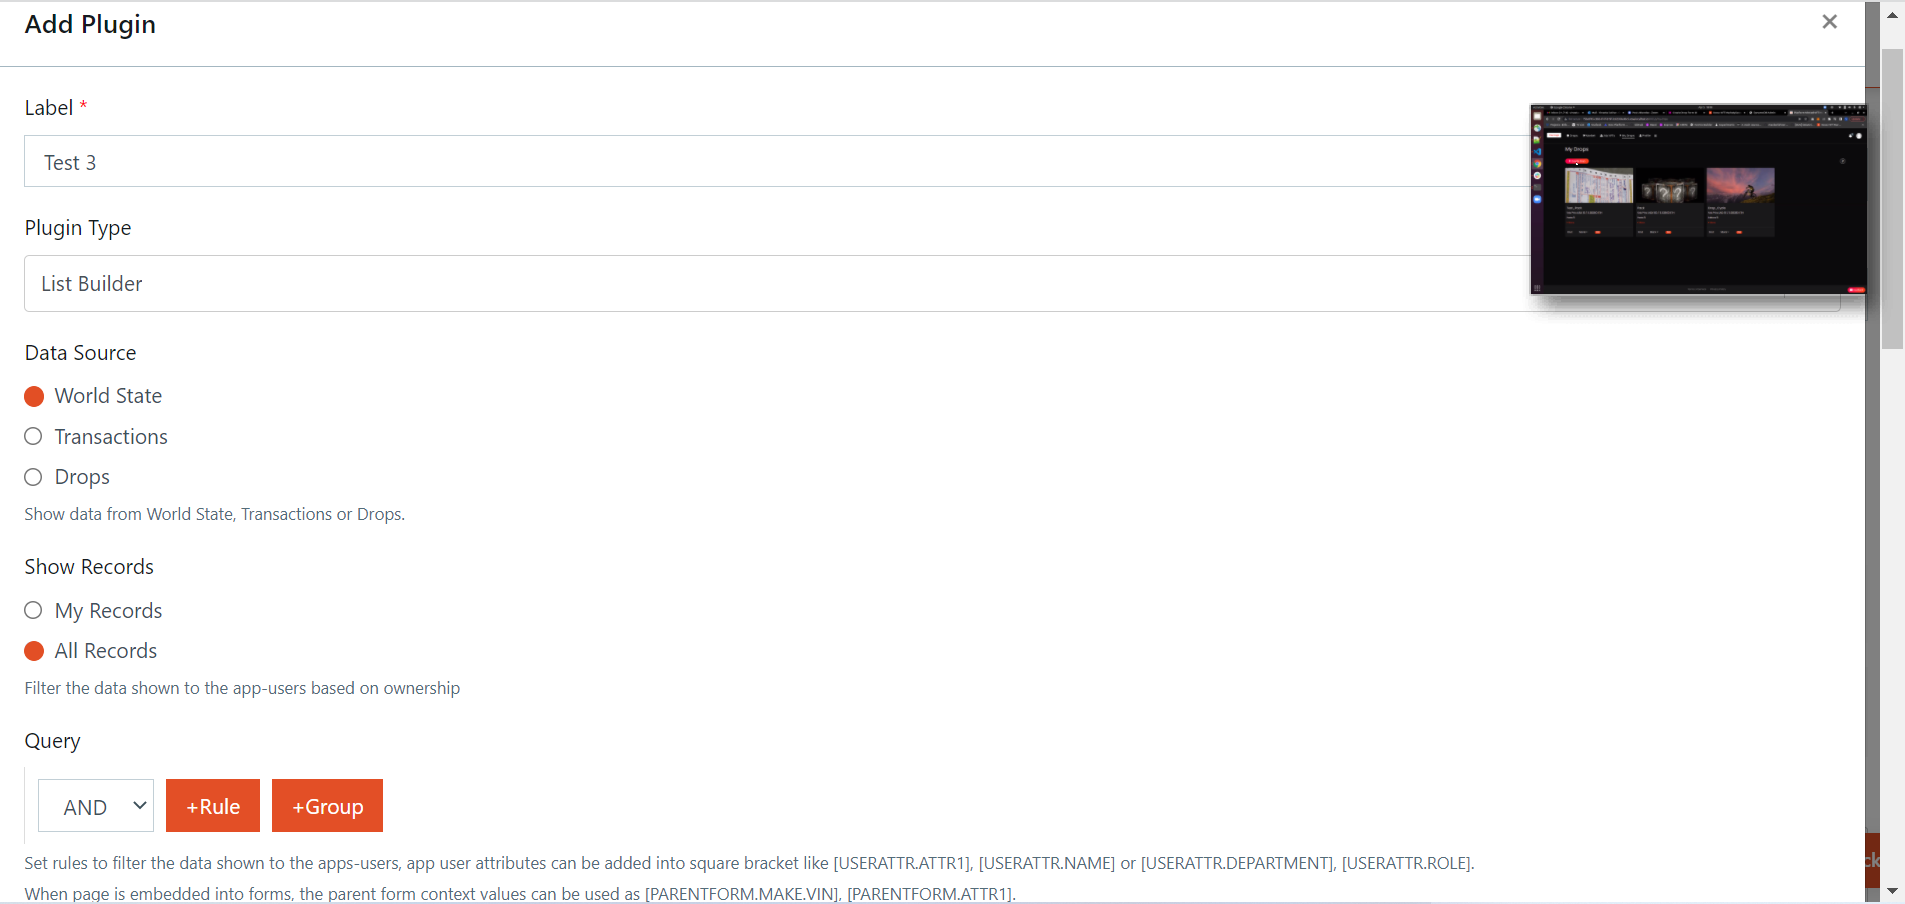
c. List Builder - This plugin helps to configure your data source and manage records. You can query the data source and add different context operations. Select the Data Source from where the data will be pulled (World State, Transactions Drops).
Select the Show Records to filter and display the data to the app owners based on ownership (My Records, All Records)
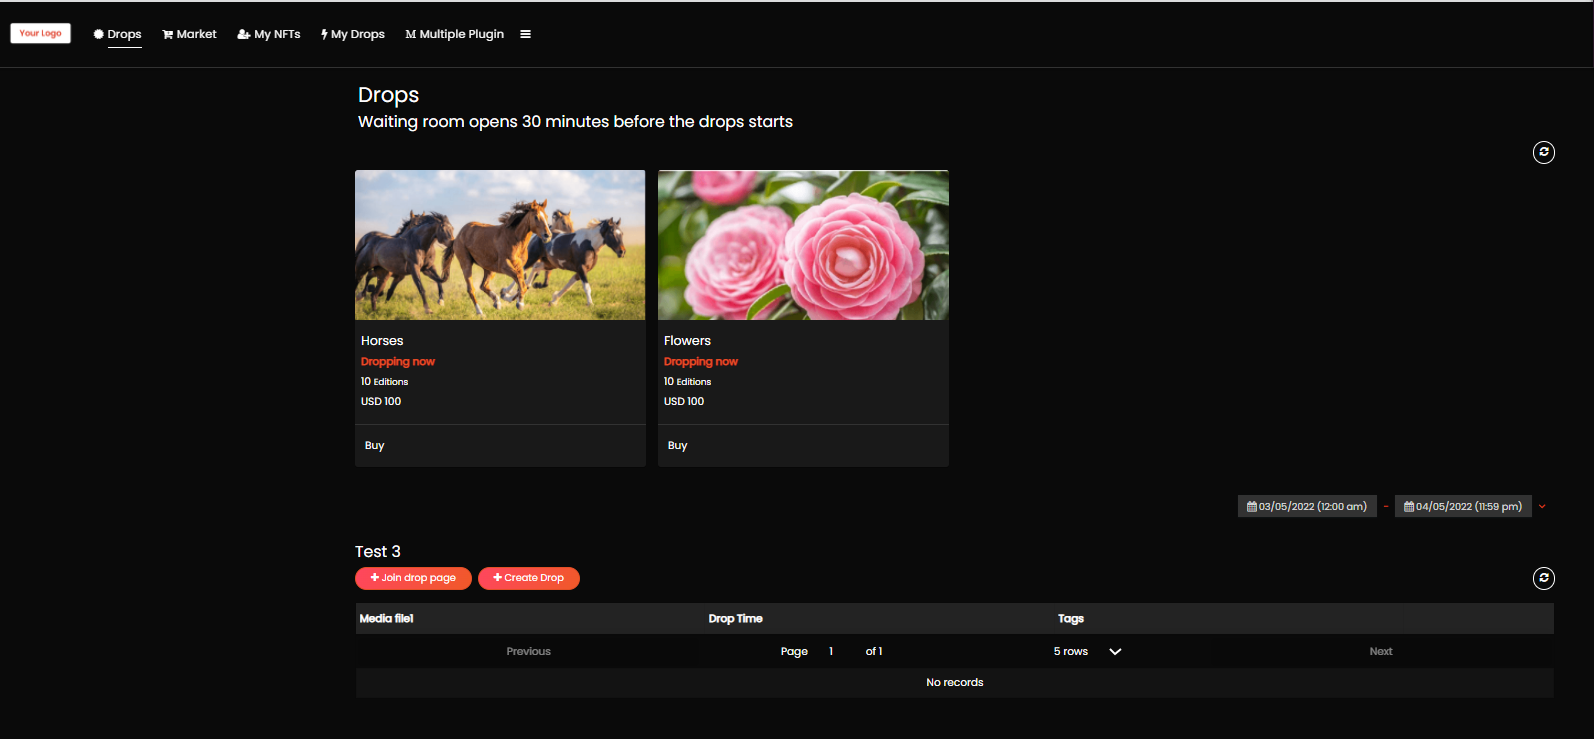
Query: To get multiple information and to filter the data shown to the app owners, the “AND” or “OR” conditions query is used. A top-level group is created first and whatever rule is set inside the group, will be evaluated first. The information will be rendered based on the AND or OR condition selected. Plugin
Rendered
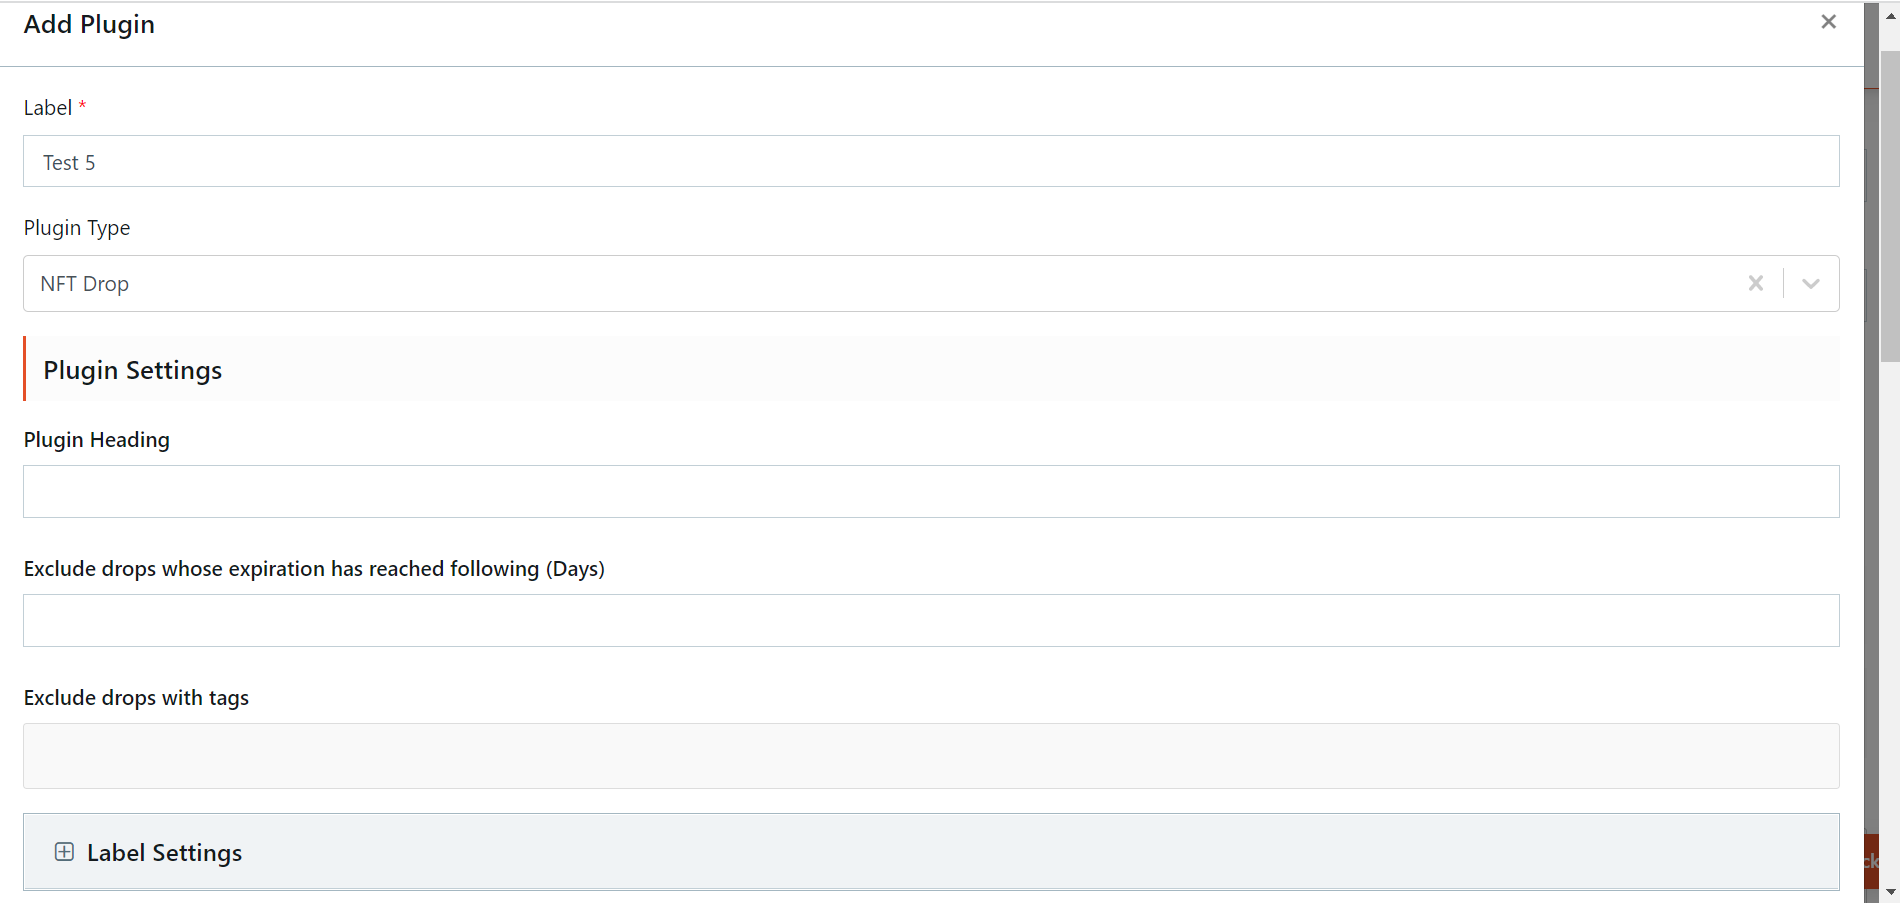
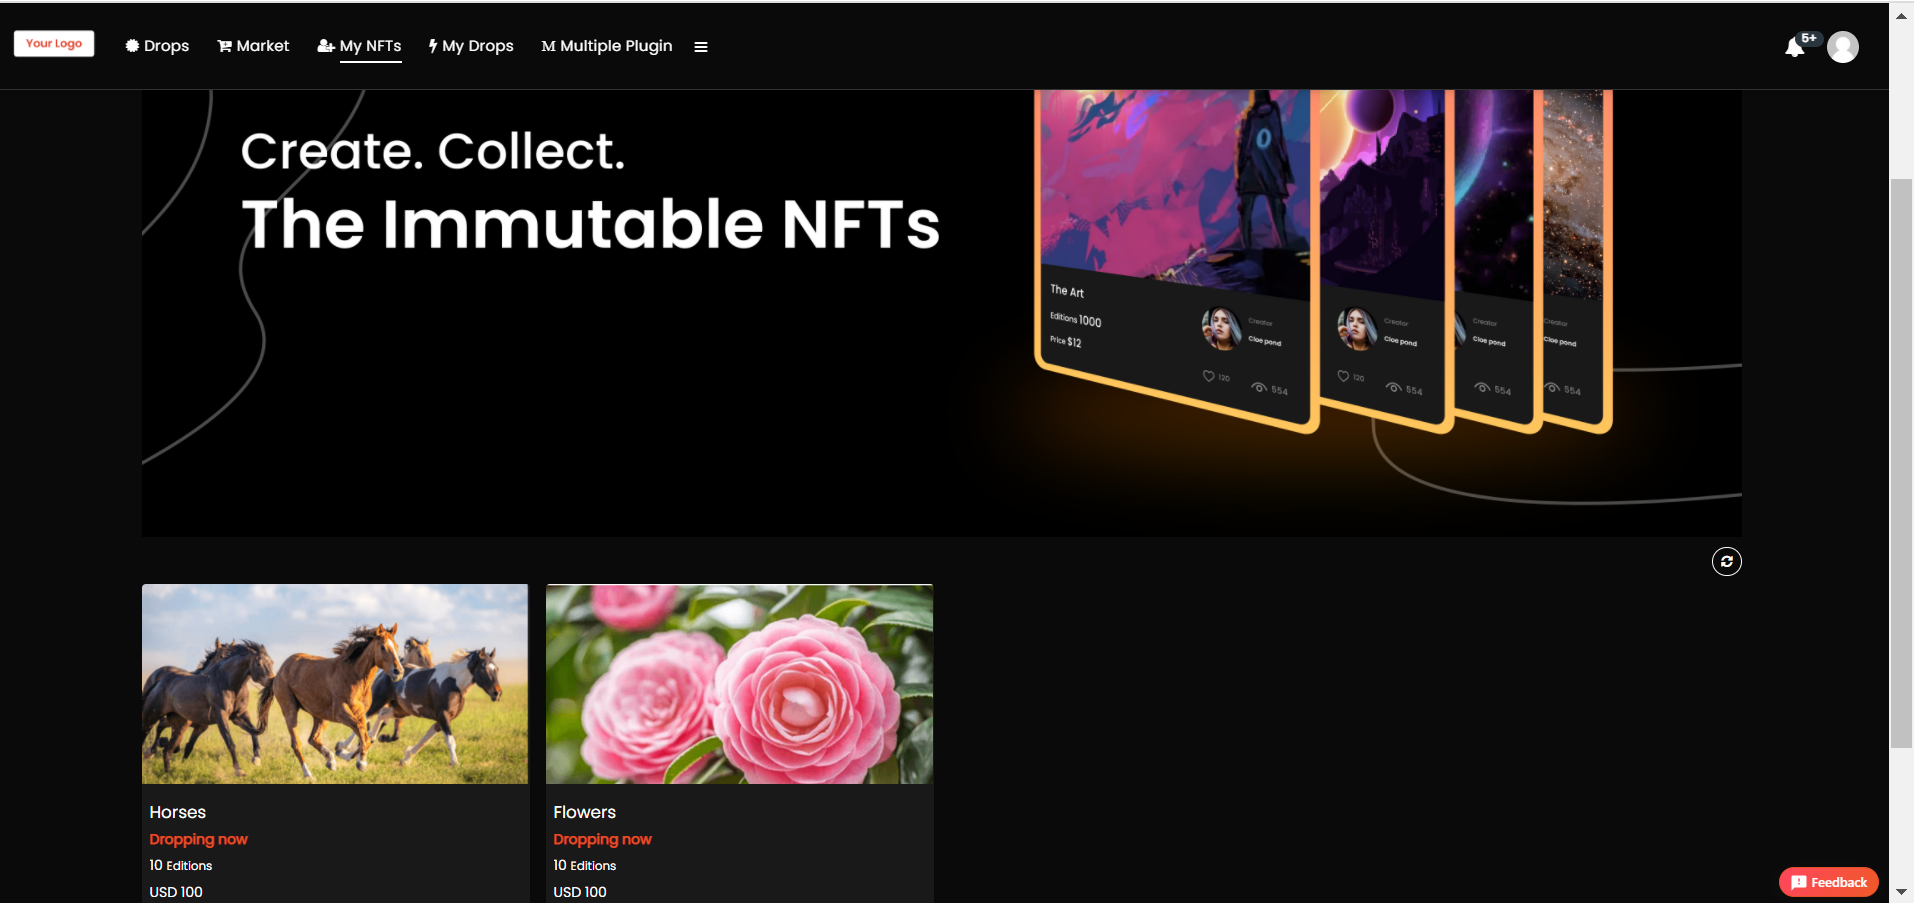
d. NFT Drop - This plugin is specific to drops where you can configure the drop card content, style it, change labels and manage the result set by specifying the query.
Plugin
Rendered
Plugin Header - Enter the header that will appear on the screen when rendered.
Exclude drops whose expiration has reached following days - Enter a number here and the system will not display the drops whose expiration has reached those many days.
Exclude drops with tags - Multiple tags can be configured and those mentioned in this field will be excluded in the drops accordingly. To know more, click here
Use Recaptcha (optional) - Check this to protect your app from spam and abuse and ensure only genuine users can buy the NFTs with ease.
In the Label Settings, set desired labels for each field. This will be displayed in the drop page during the drop.
The screenshots given below are for reference only.
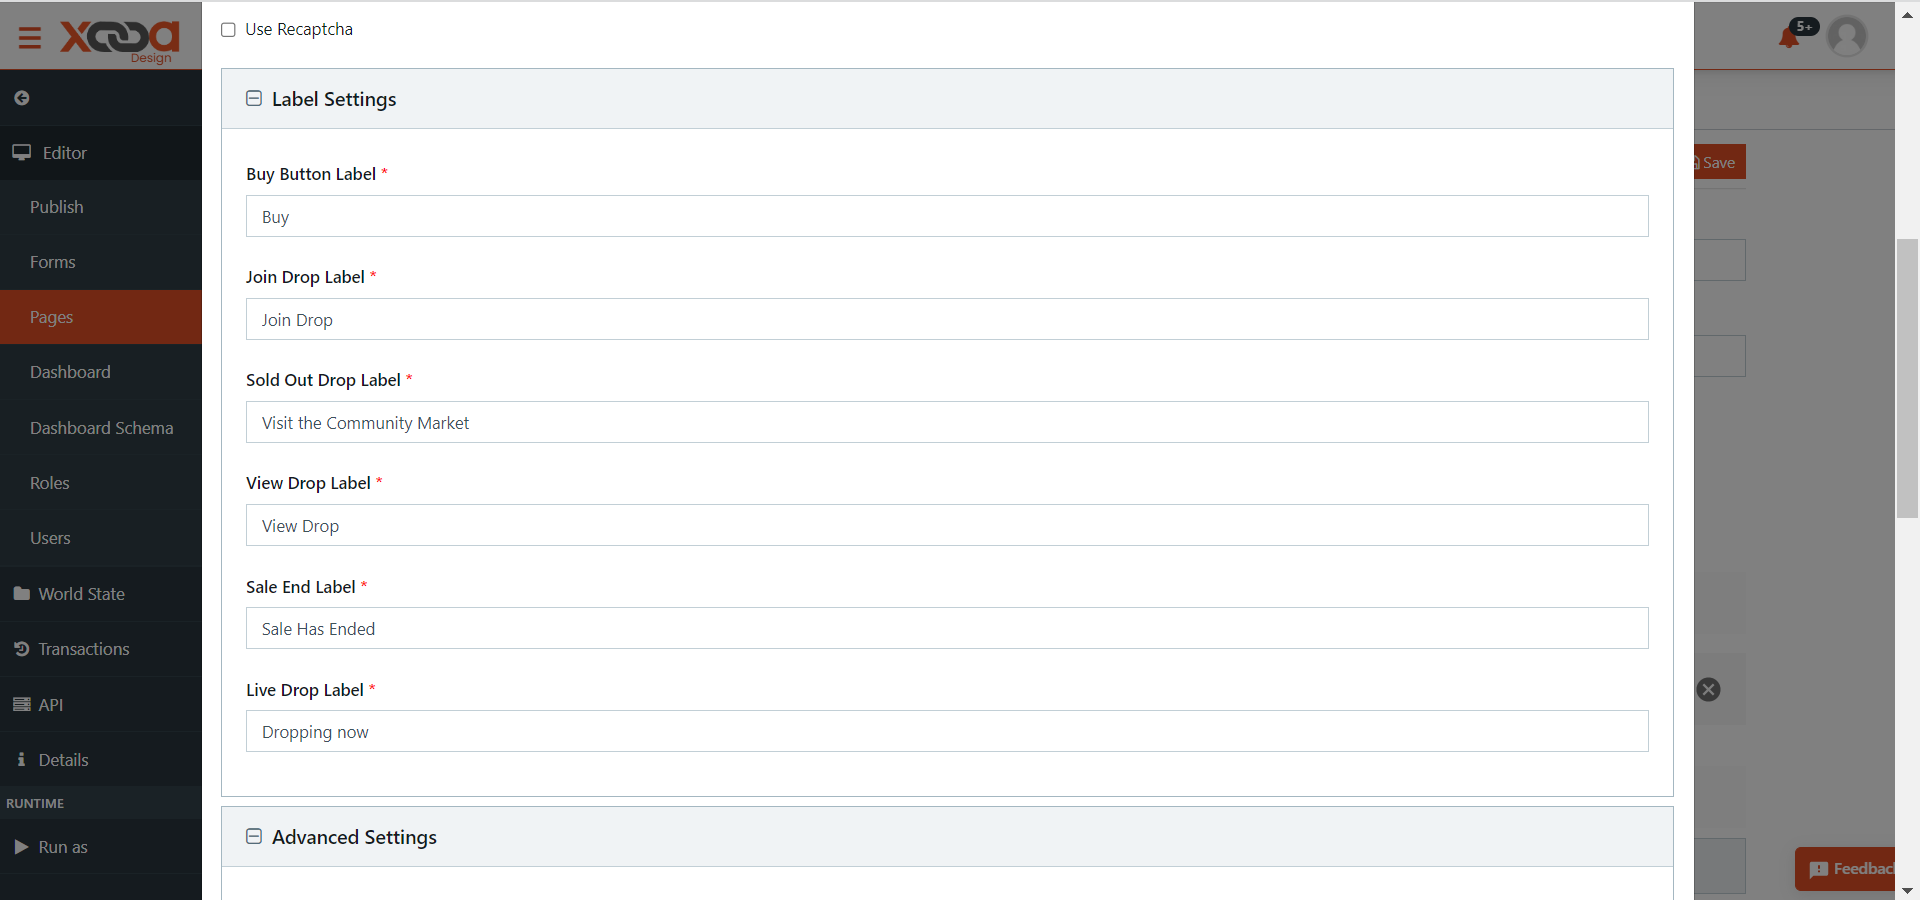
In the Advanced Settings: Public Key - Enter the public key to access the users data in liquid code which has been added while creating the drop.
To know how to add user details using the public key, click here
Sold out drop label link - Enter the link to redirect the user when the drop has ended or is sold out. They will find the NFTs in the general market if the editions are still available.
Join Drop page - Customize the join drop page using the liquid codes. To know more, click here
Drop Card Content - Customize the drop card content that will be displayed in the Drop page. To know more, click here
Query - Use this field to write custom query to fetch the drops. This query will override the above filter of tags and expiration reached.
Given below are some of the sample queries that are currently supported:
Live Status Drop Query
{
  "query": {
    "bool": {
      "must": [
        {
          "bool": {
            "must": [
              {
                "match": {
                  "Status": "live"
                }
              }
            ]
          }
        },
        {
          "match": {
            "InternalDocumentType": "Drops"
          }
        }
      ]
    }
  },
  "sort": [
    {
      "DropTime": "desc"
    }
  ]
}
Different statuses supported in the above query
For Upcoming Drops
“Status”:“published”
For Expired/Soldout Drops
“Status”:“soldout”
For Early Access Drops
“Status”:“early_access”
For Live Drops
“Status”:“live”
For Live Drops with certain tags (Comma separated tags)
{
  "query": {
    "bool": {
      "must": [
        {
          "bool": {
            "must": [
              {
                "match": {
                  "tags": "tag1,tag2"
                }
              },
              {
                "match": {
                  "Status": "live"
                }
              }
            ]
          }
        },
        {
          "match": {
            "InternalDocumentType": "Drops"
          }
        }
      ]
    }
  },

  "sort": [
    {
      "DropTime": "desc"
    }
  ]
}
For LIVE Drops exclude tags
{
  "query": {
    "bool": {
      "must": [
        {
          "bool": {
            "must_not": [
              {
                "match": {
                  "tags": "tag3,tag4"
                }
              }
            ],
            "must": [
              {
                "match": {
                  "Status": "live"
                }
              }
            ]
          }
        },
        {
          "match": {
            "InternalDocumentType": "Drops"
          }
        }
      ]
    }
  },

  "sort": [
    {
      "DropTime": "desc"
    }
  ]
}
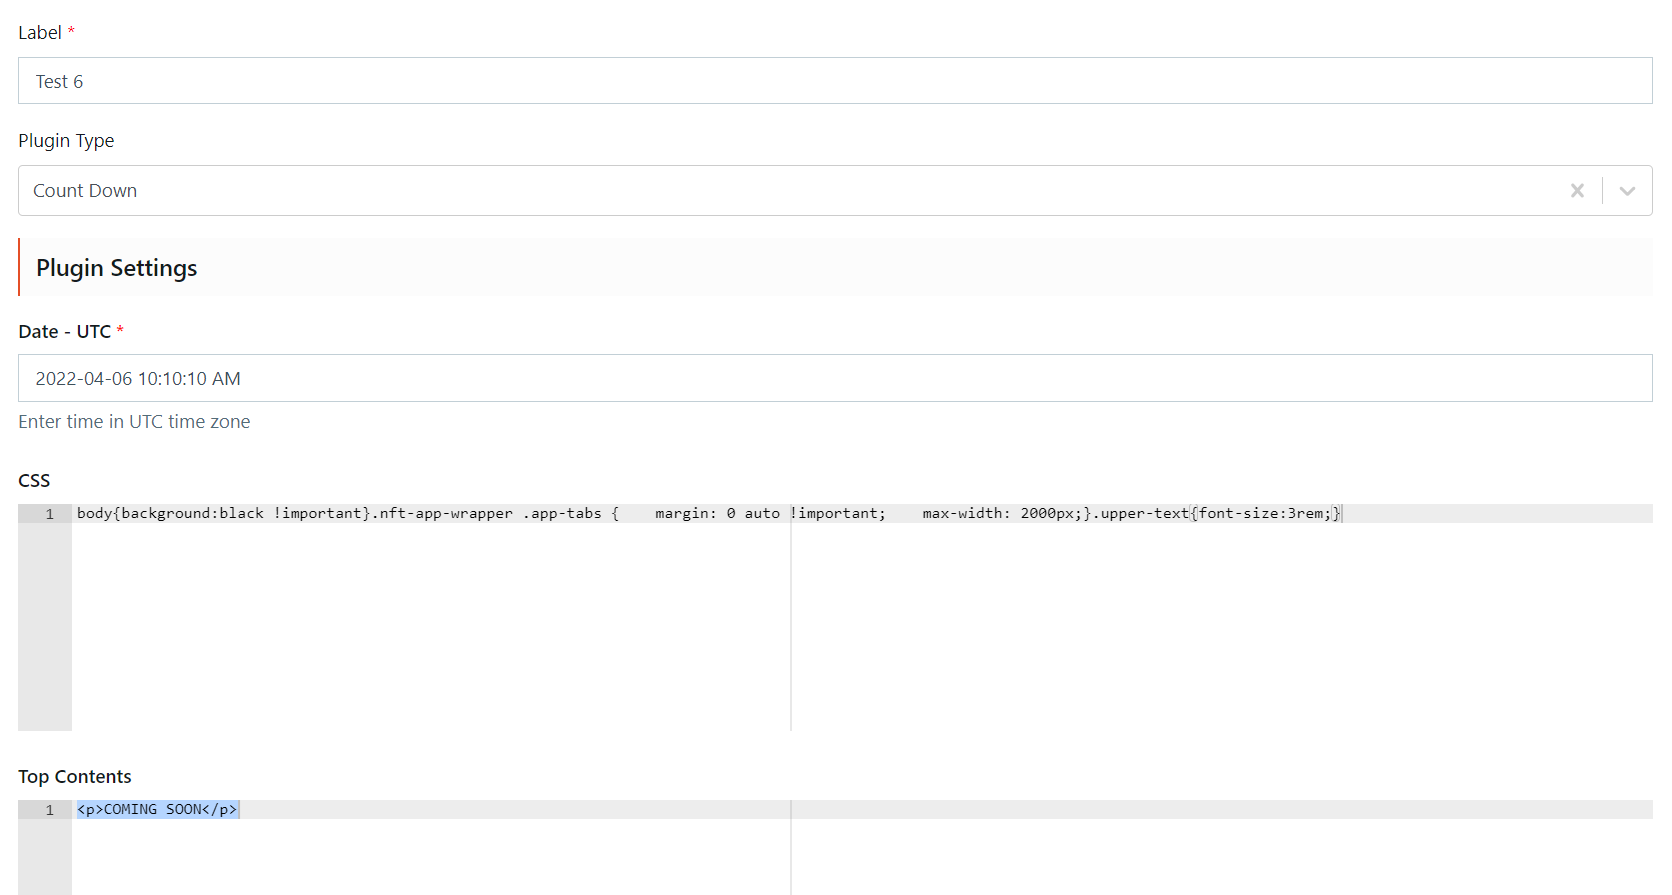
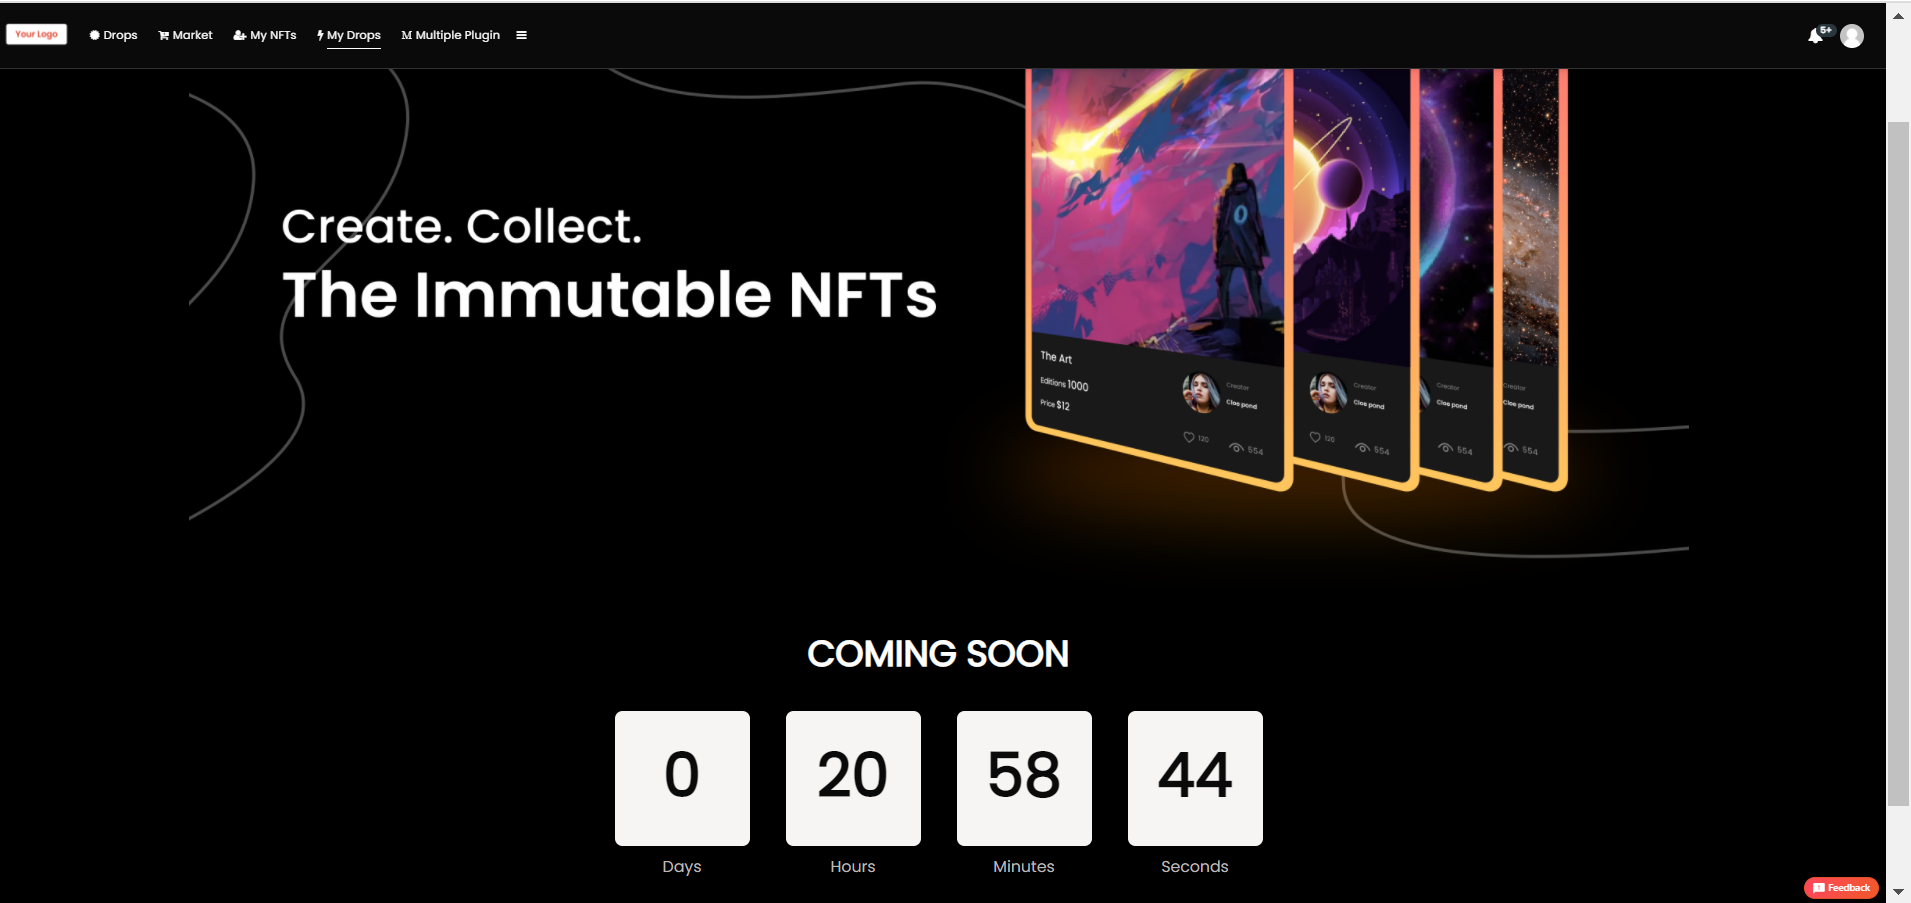
e. Count Down - You can create a countdown and style it to show on a page.
Plugin
Rendered
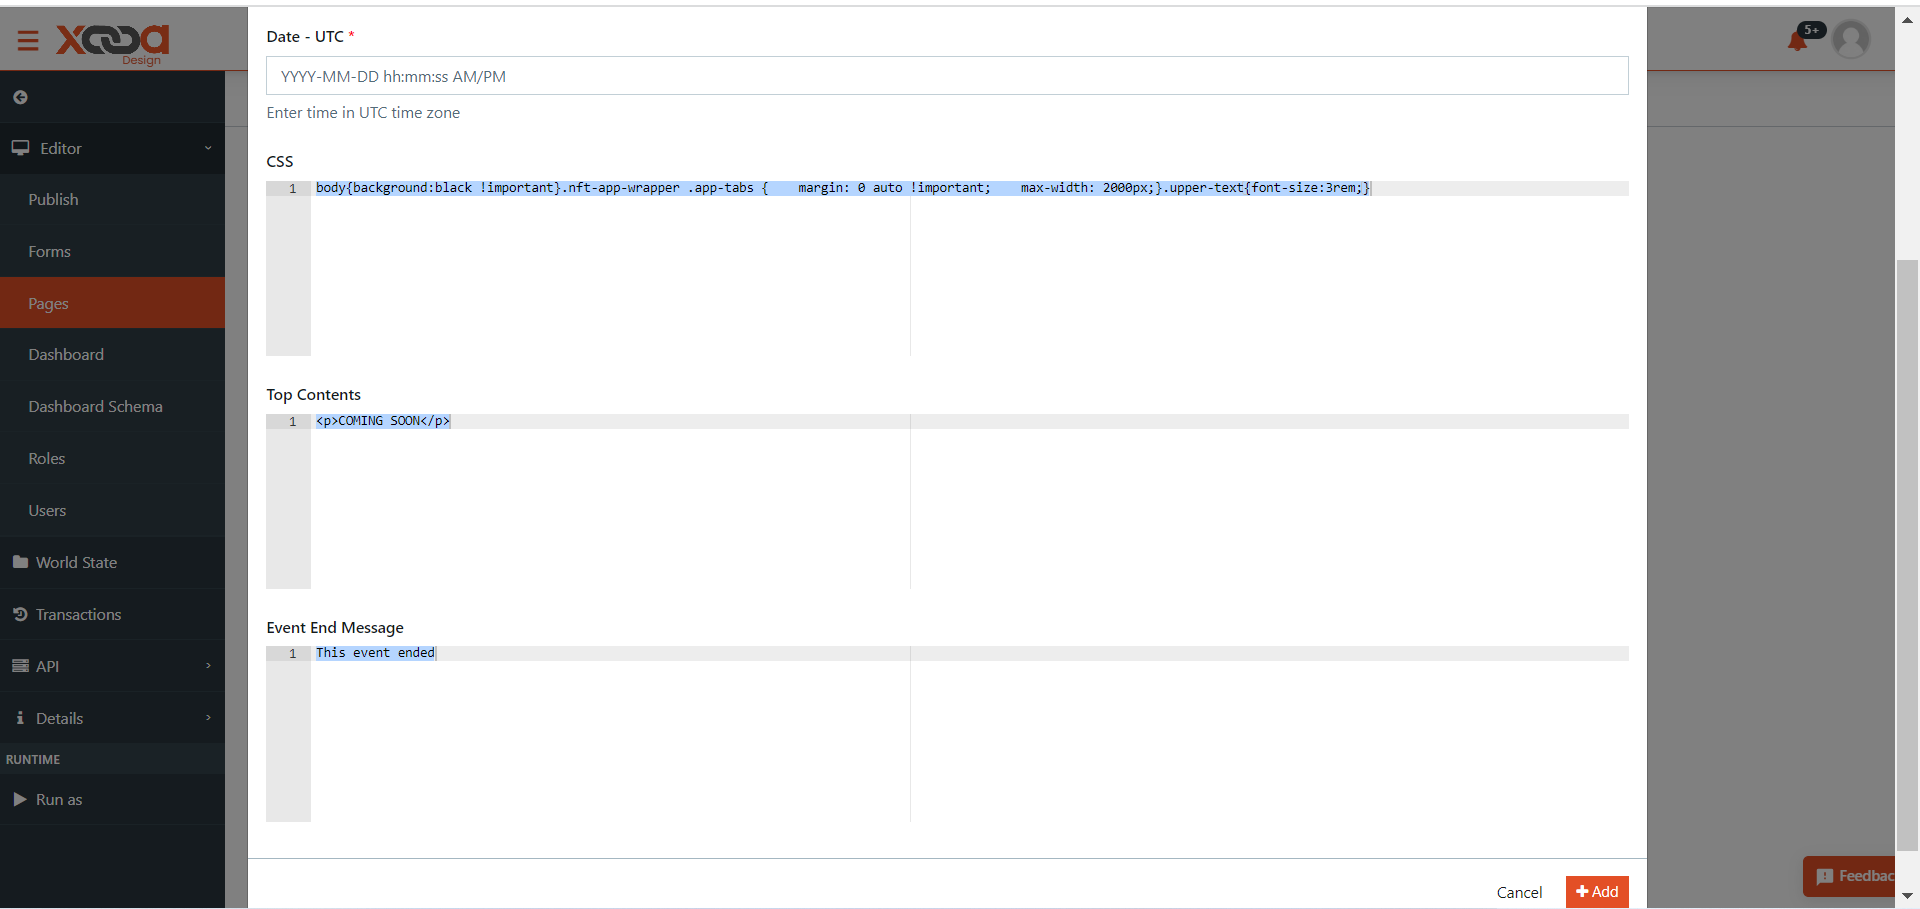
In the plugin settings: Date - UTC - Enter the date, time and year that will be displayed on the drop countdown.
CSS - Add the code to design the drop page.
Top Contents - Add the message that you want to show when the countdown is in progress (or before it begins).
Event End Message - Add the message that you want to show when the countdown ends.
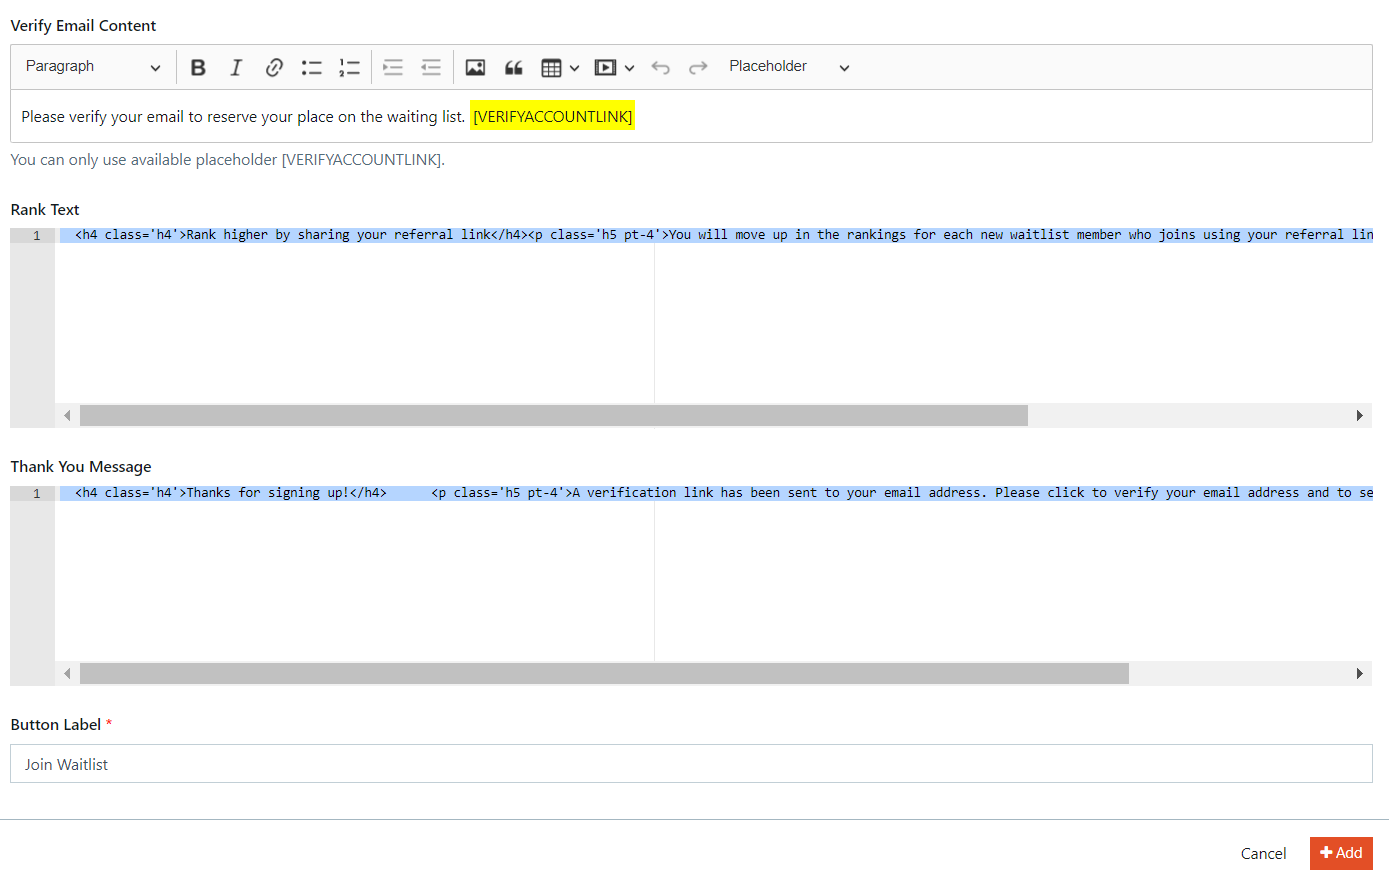
f. Feature Subscription - You can create a waitlist and set user verification emails, send thank you mails post verification, create styles and labels.
Plugin
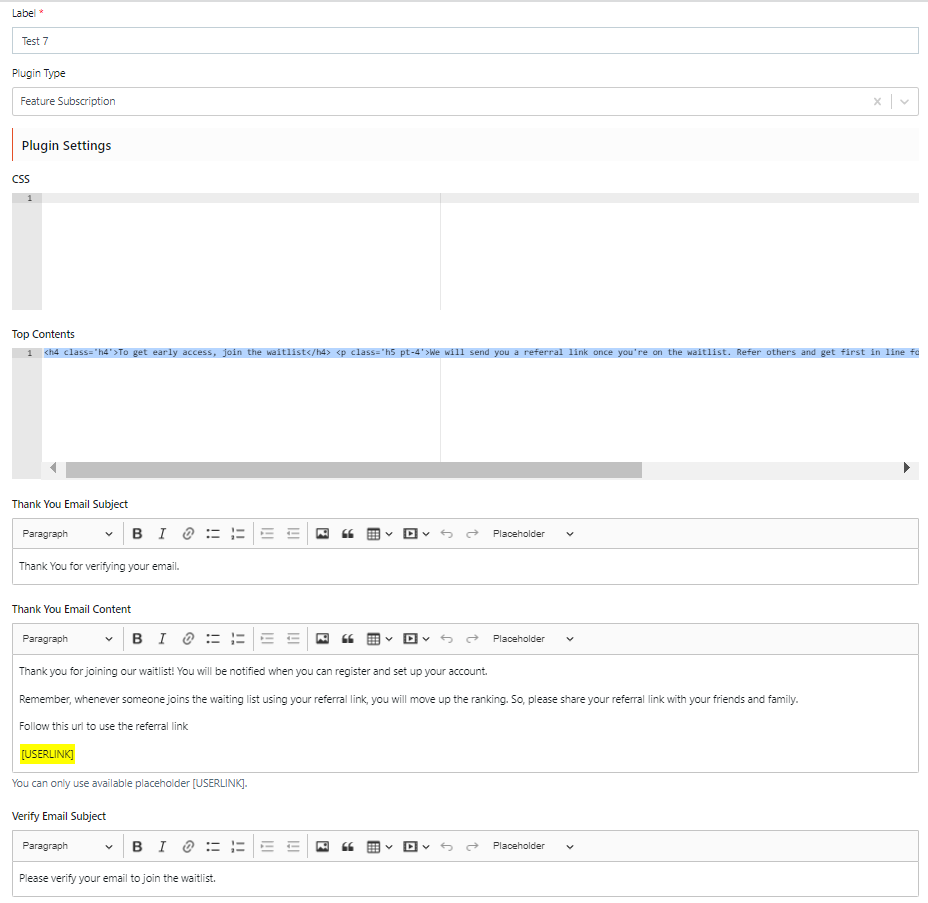
In the Plugin Settings: CSS - Enter the code to design this page.
Top Contents - Add important messages that you want to show on the drop page when the drop is live. 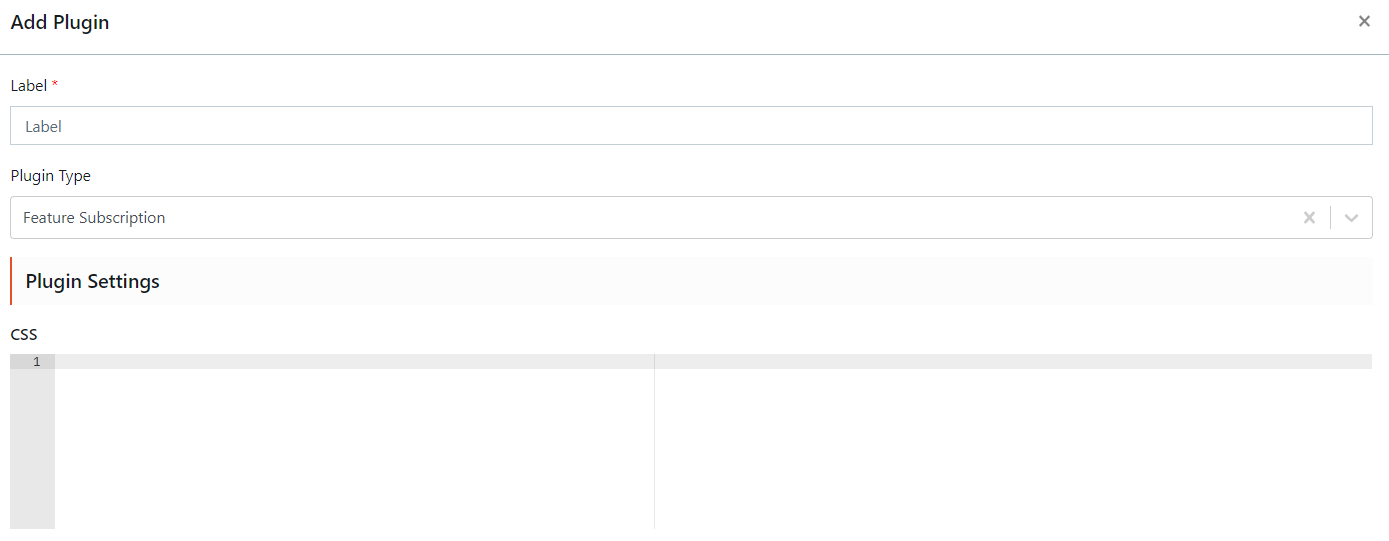
Thank you Email Subject - Set the subject line for the thank you email that will be sent to the buyers.
Thank you Email Content - Create an email message template to send thank you emails to buyers.
Verify Email Subject - Set the subject line for the email that will be sent to the buyers to verify their email. 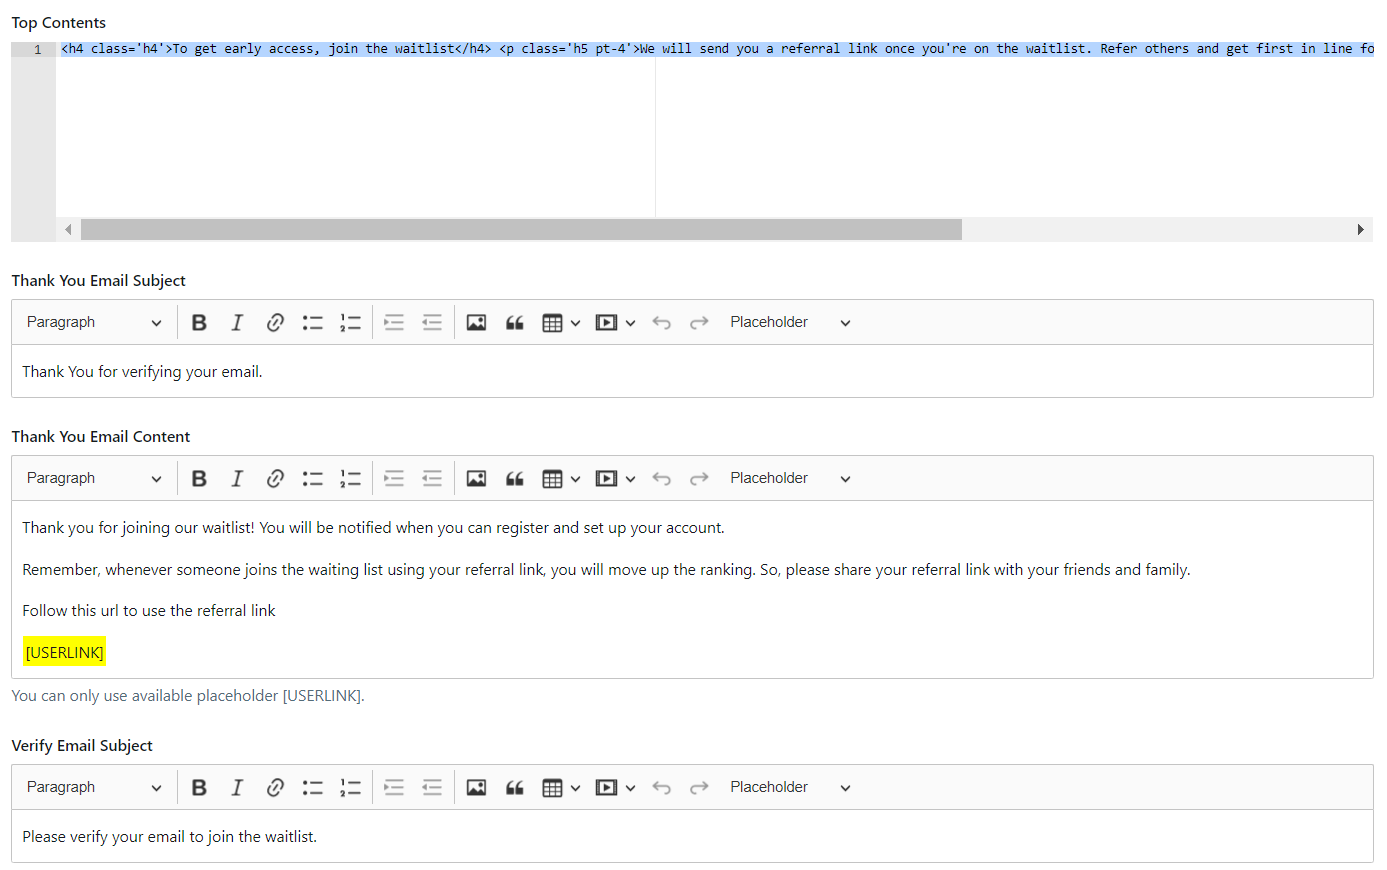
Verify Email Content - Create an email message template to send to the buyers asking them to verify their email IDs.
Rank Text - This message indicates the buyer’s rank in the waiting room queue. It also instructs buyers to share drop information to move up the ranking and gain access to the drop.
Thank you Message - Create an email message template to send to buyers who sign up on the app.
Button Label - This is the label that will indicate the buyers to join the waitlist for a drop.
g. Import NFT - You can import NFTs by providing Contract Address, Owner Address from networks like Ethereum, Rinkeby, Polygon, Ropsten, Mumbai etc.
Plugin
Rendered

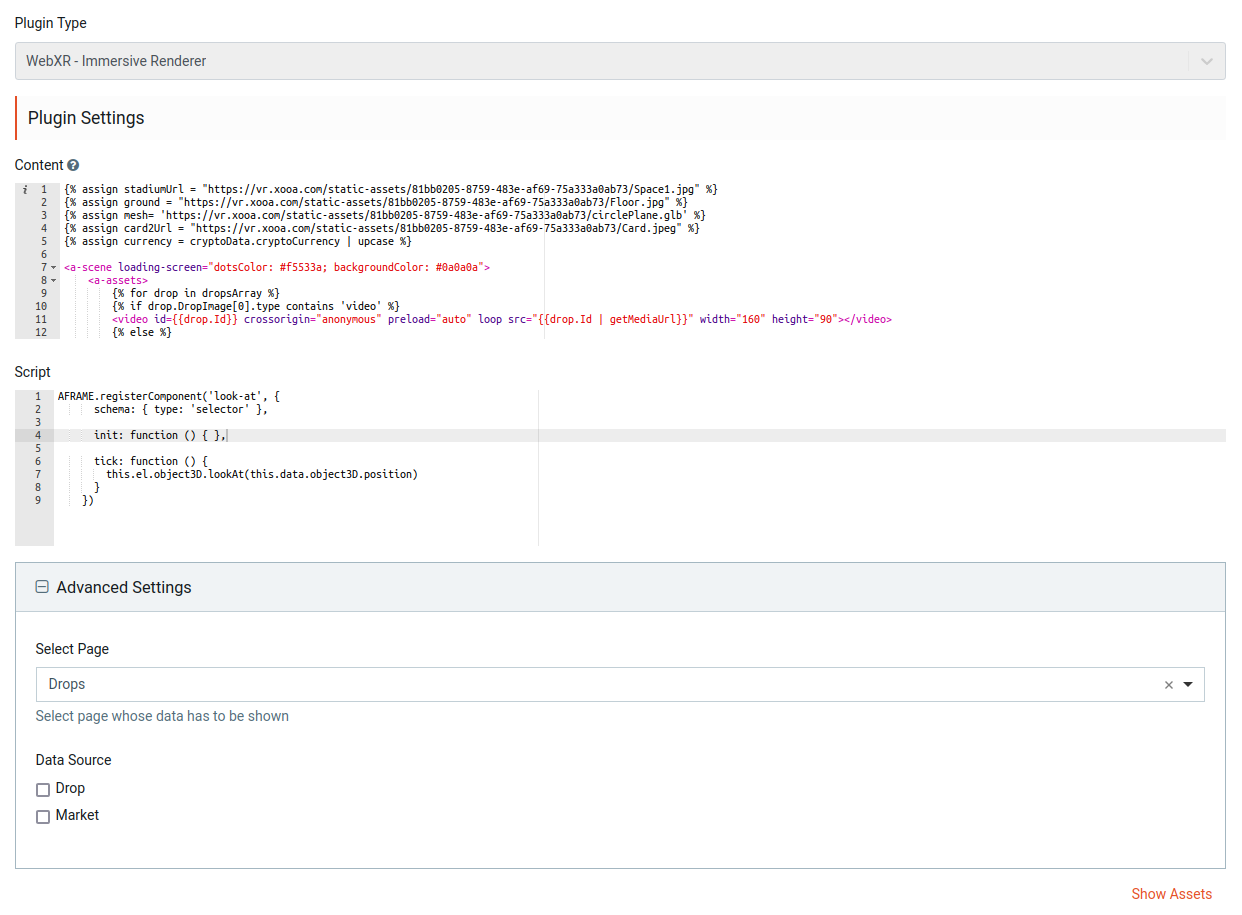
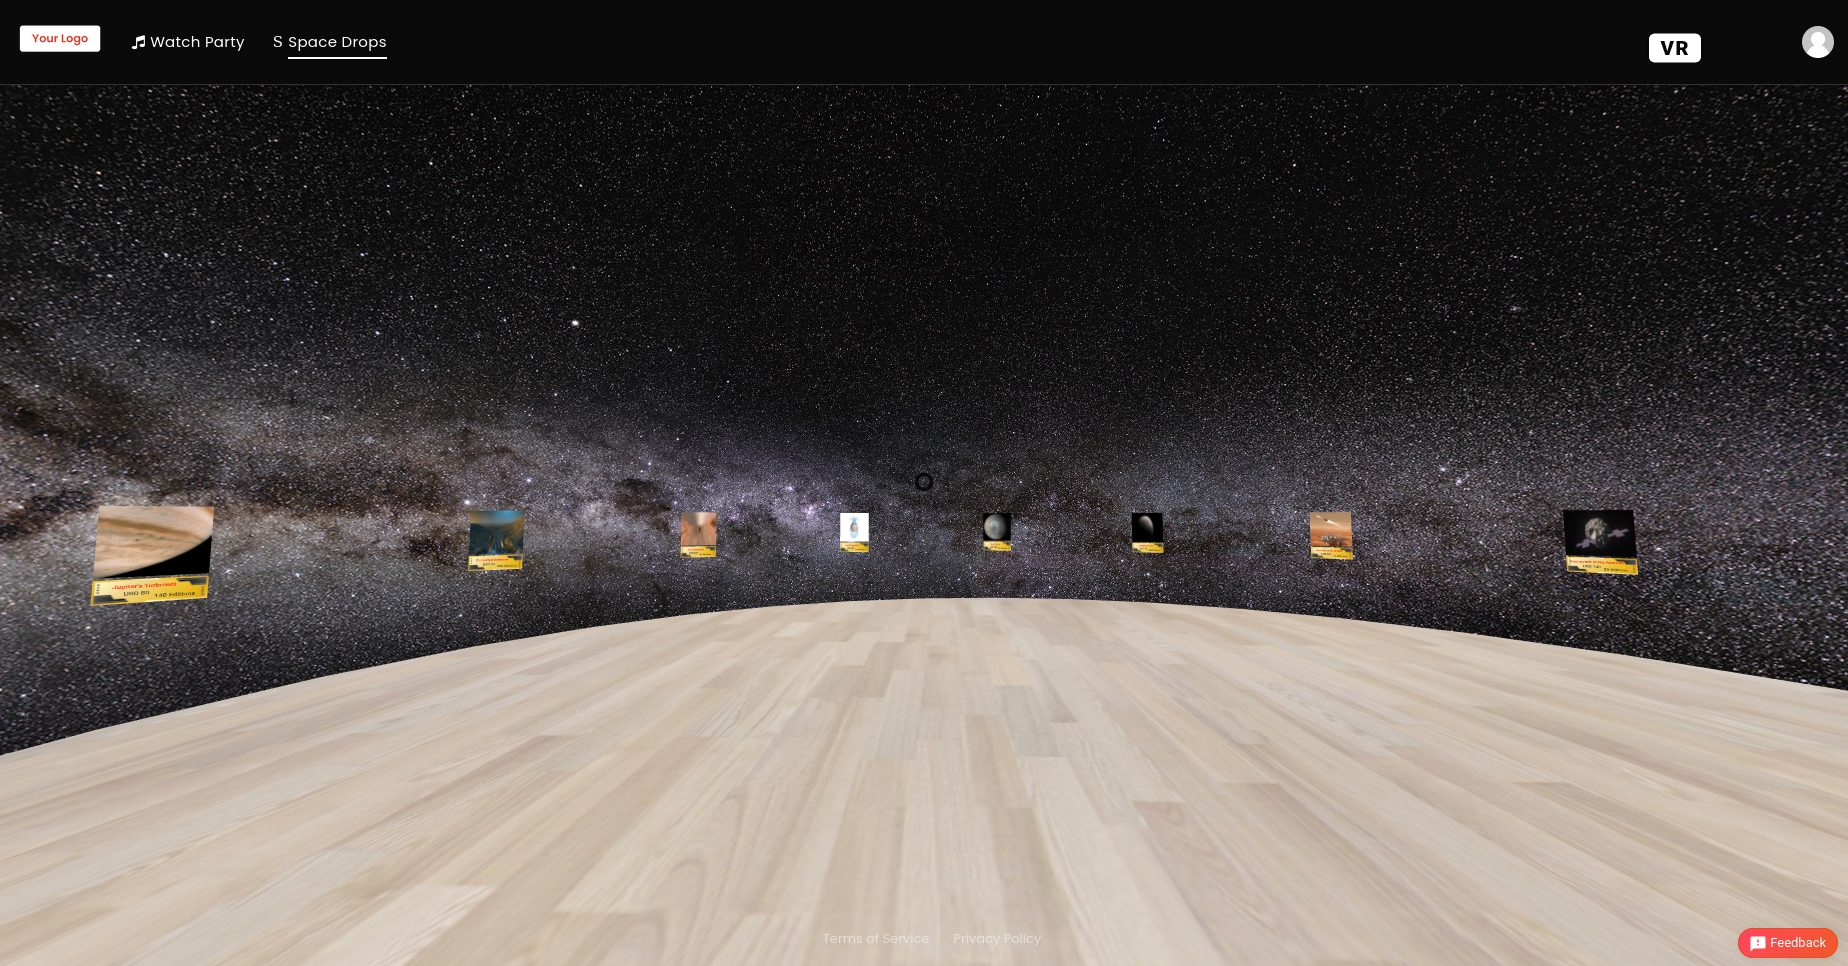
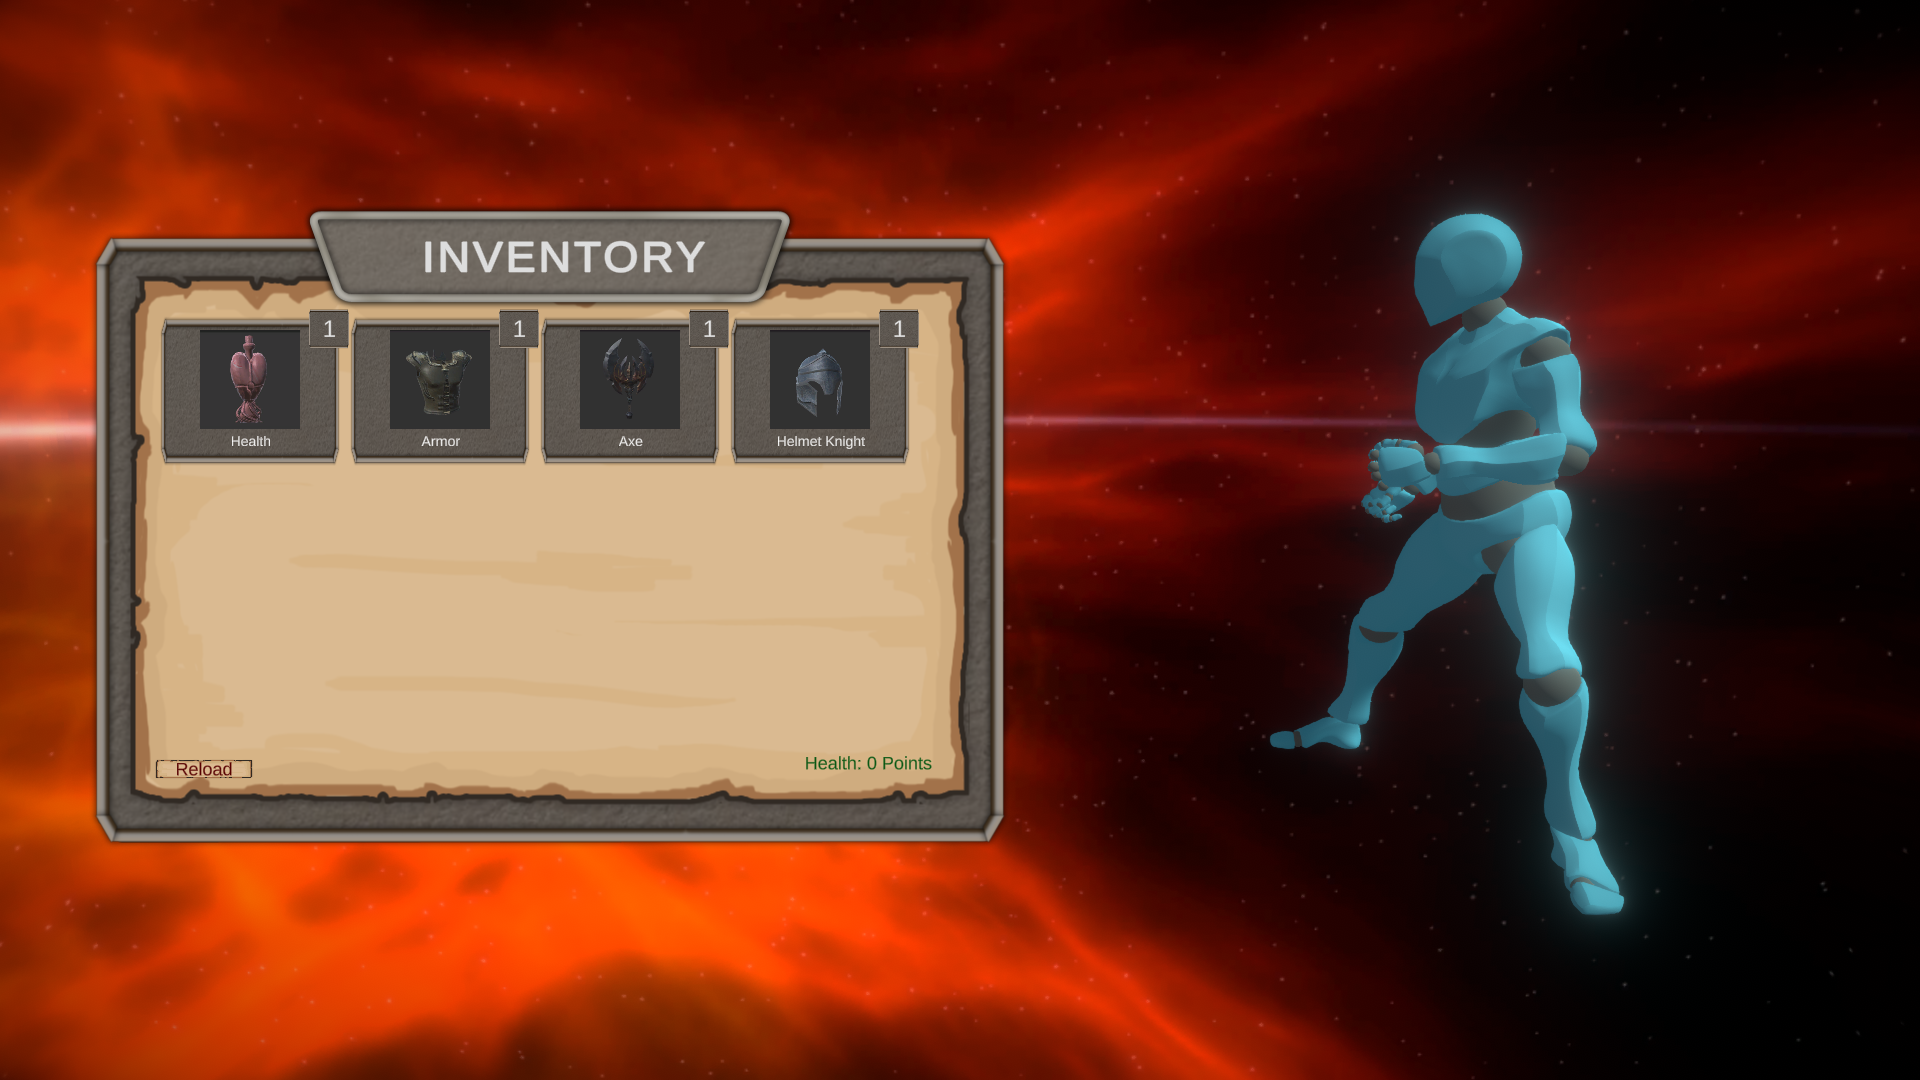
h. WebXR - Immersive Renderer - You can add 3D designs to present virtual worlds or add graphical imagery to the real world.
In the Plugin Settings:
Content - Use liquid code to enter the content that will be displayed on the page. For more information, refer to the A-Frame documentation.
Script - Enter the java script to design the page.
In the Advanced Settings:
Select Page - Select the page to render the design
Data Source:
-
Drop - If you check this, then you can select the drops filter accordingly. Currently, it has Upcoming, Early Access, Live that is checked by default, and Sold out is optional.
-
Market - If you check this, then you can select the secondary market page where this will be displayed.
Click Show Assets - To upload your static assets.
Click Add to save the changes
Plugin
Rendered
i. Unity (WebGL) - You can use this plugin to embed unity webgl app within Xooa runtime application.
Prerequisite
Steps to create Unity Game
-
Go to the design console of the app ->Forms ->Form Builder->from the Basic menu, drag and drop Select
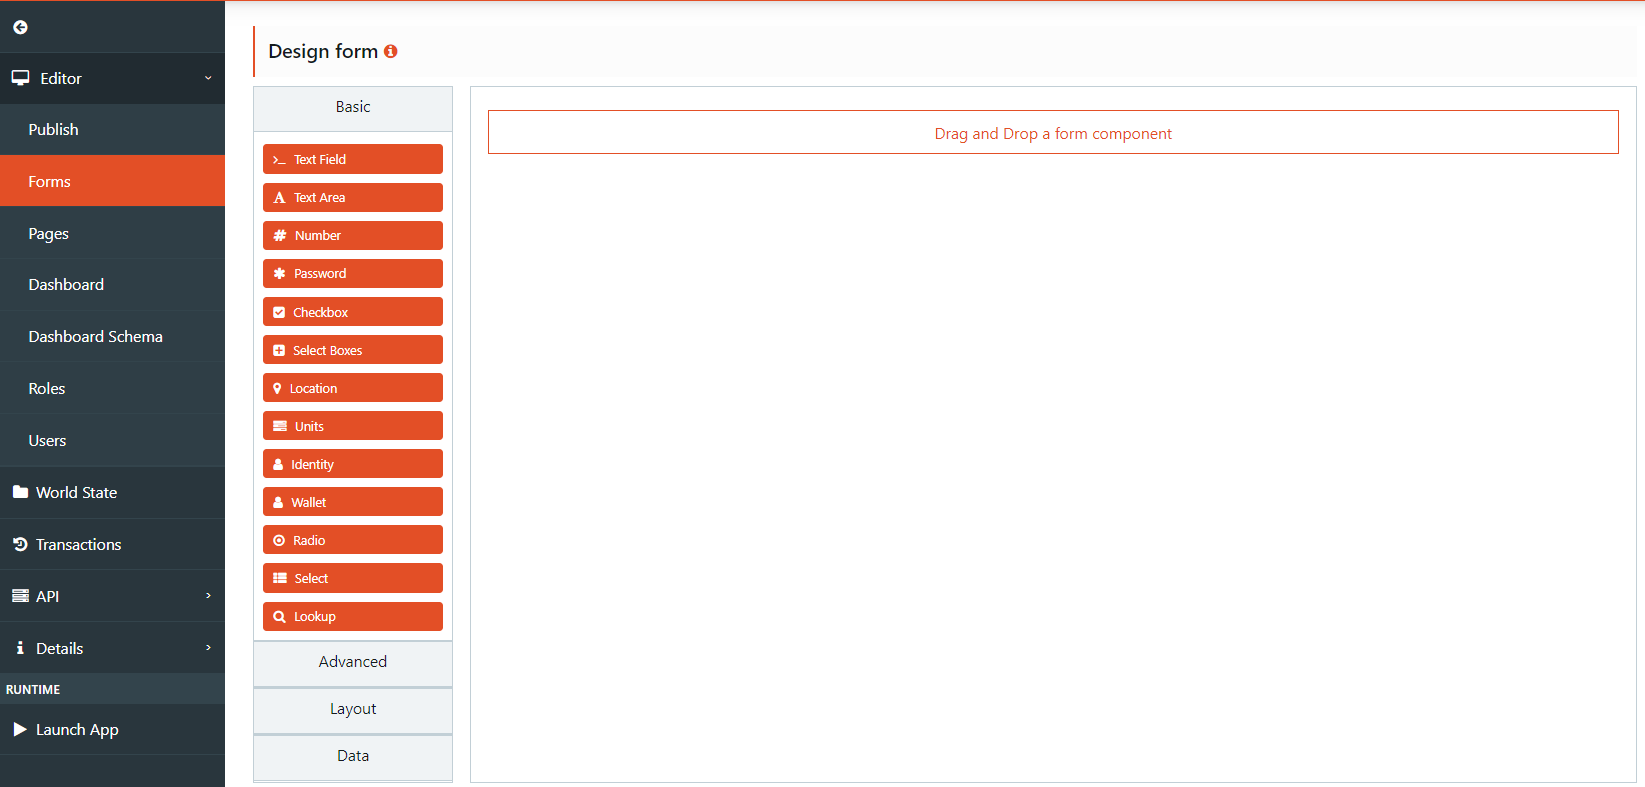
-
In the Select Component popup window, in the Data tab-> Data Source Values, add Yes Label and Yes value ->click Add Another and add No Label and No value
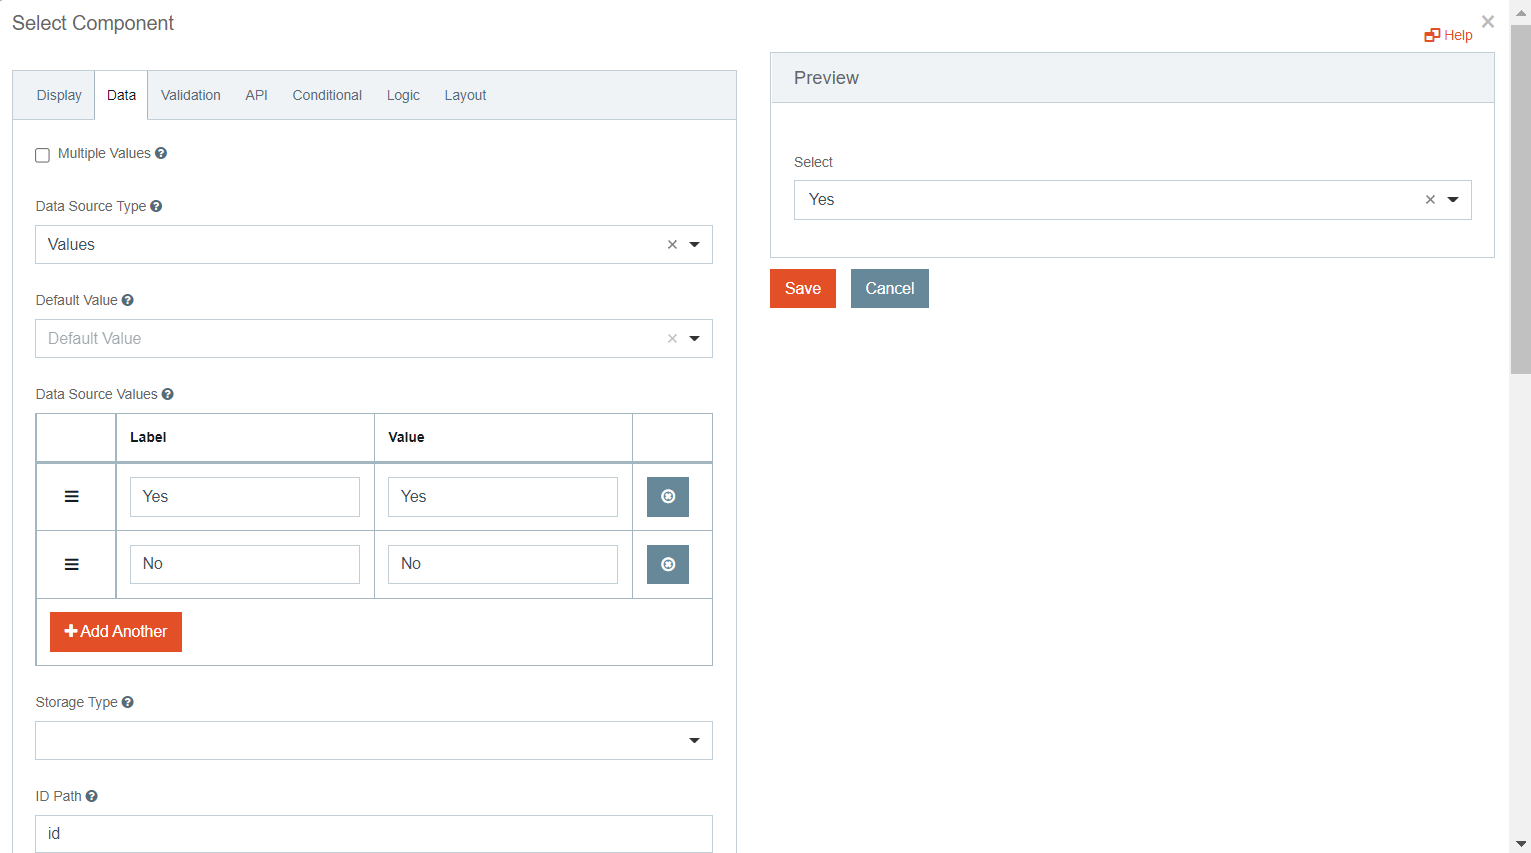
-
Go to the API tab and add API value as properties.isUnityGameObject

-
Click Save
-
-
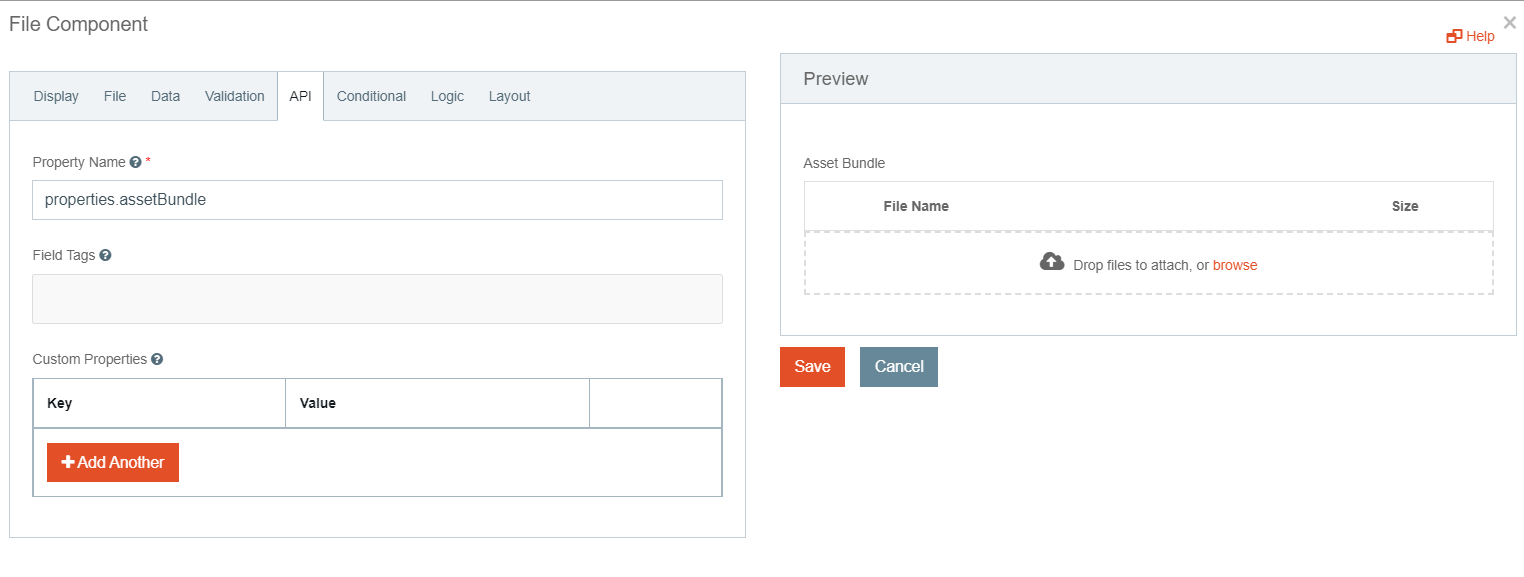
From the Data menu->drag and drop File
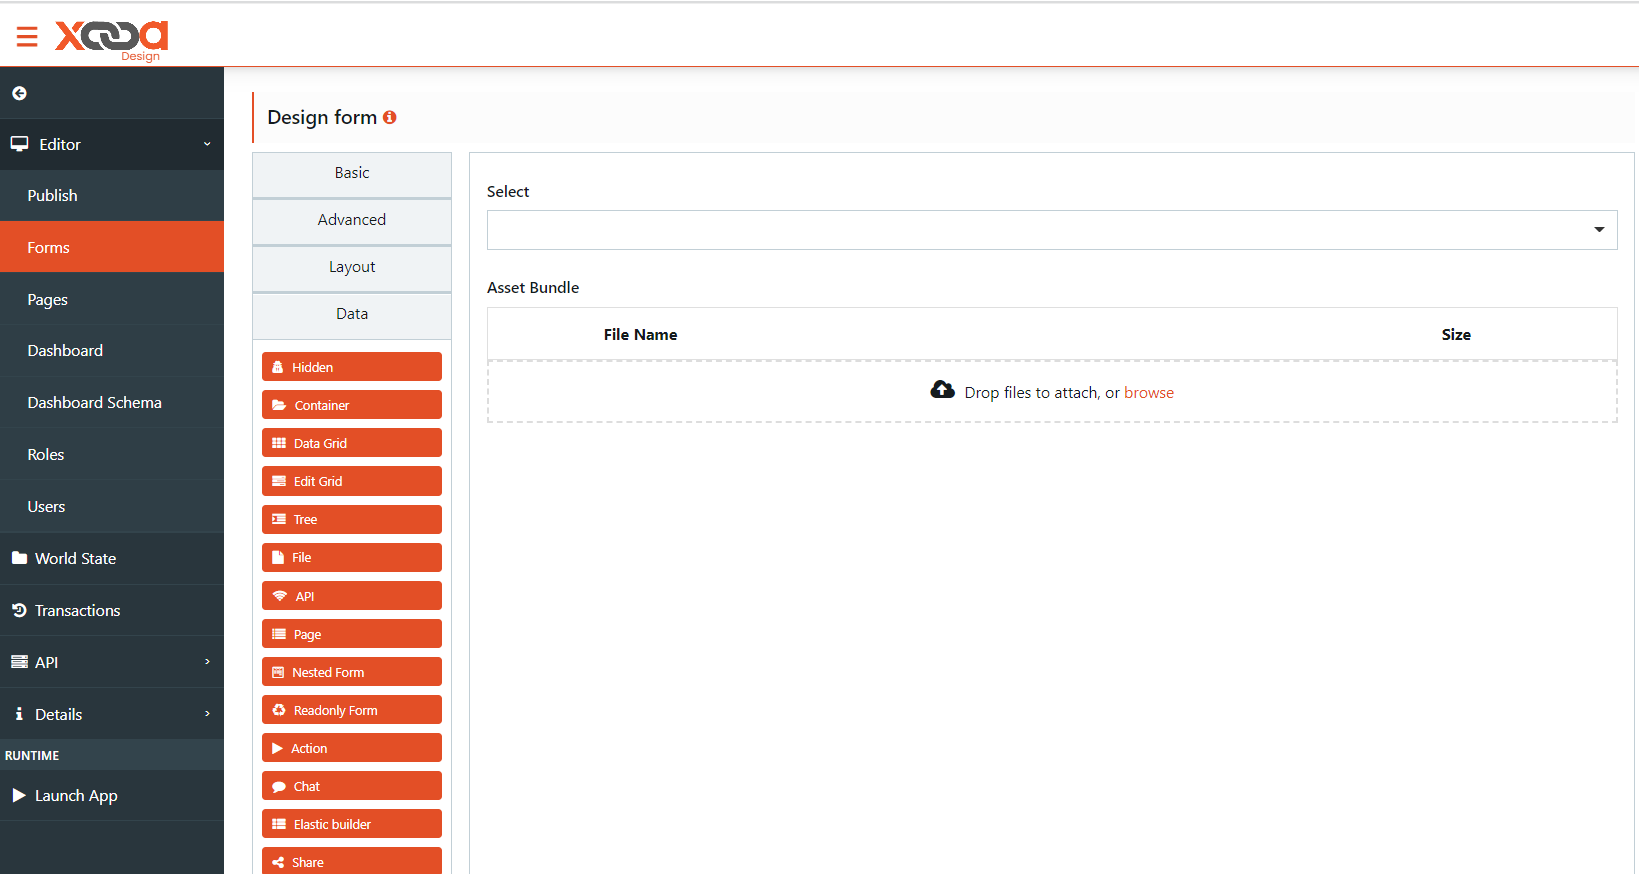
-
Rename label as Asset Bundle
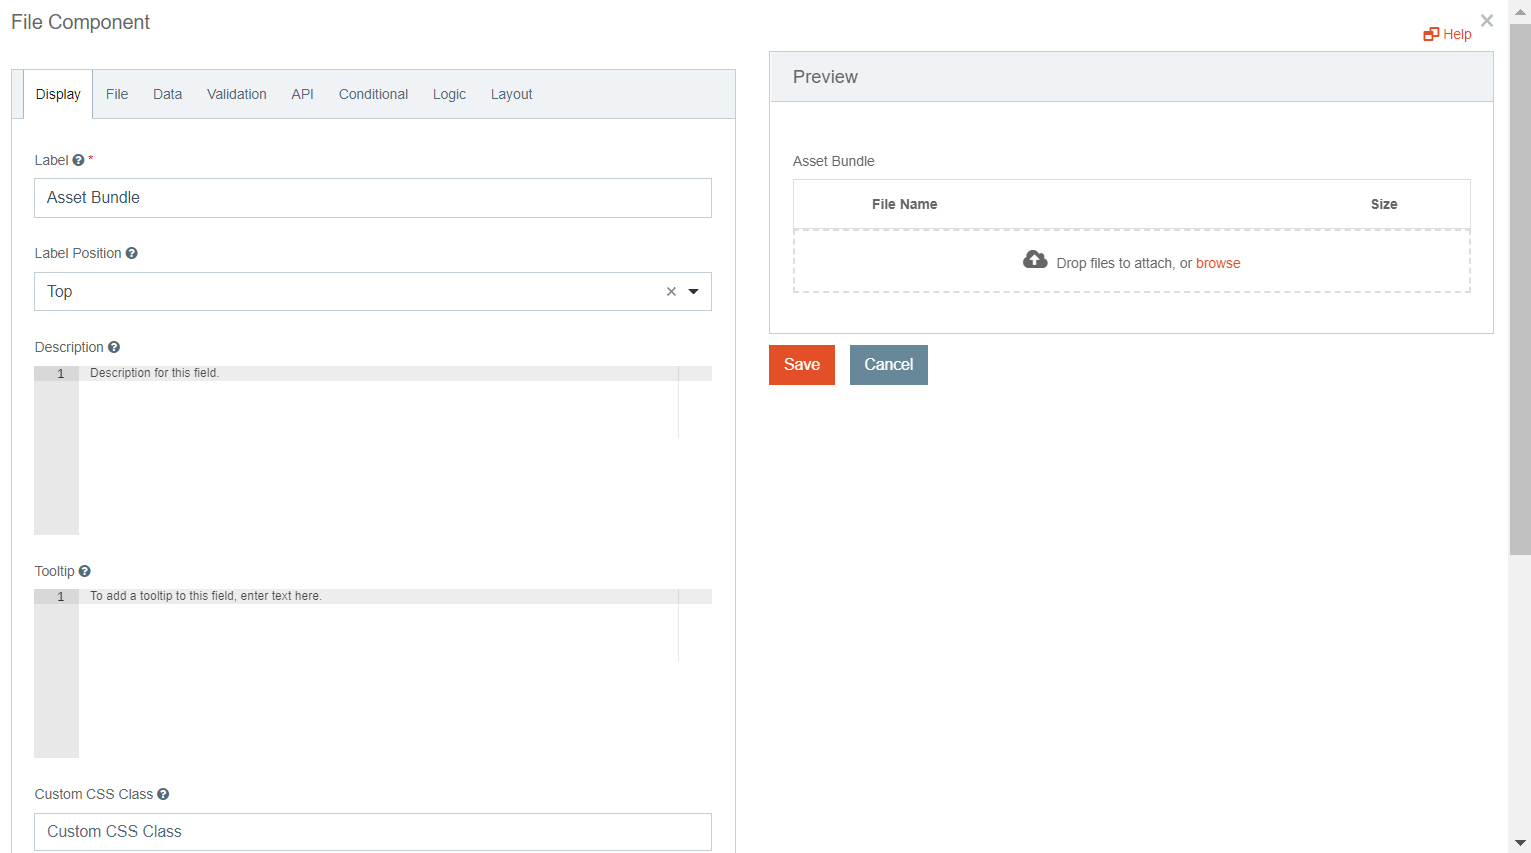
-
Go to API tab and rename as properties.assetBundle -> click Save
-
-
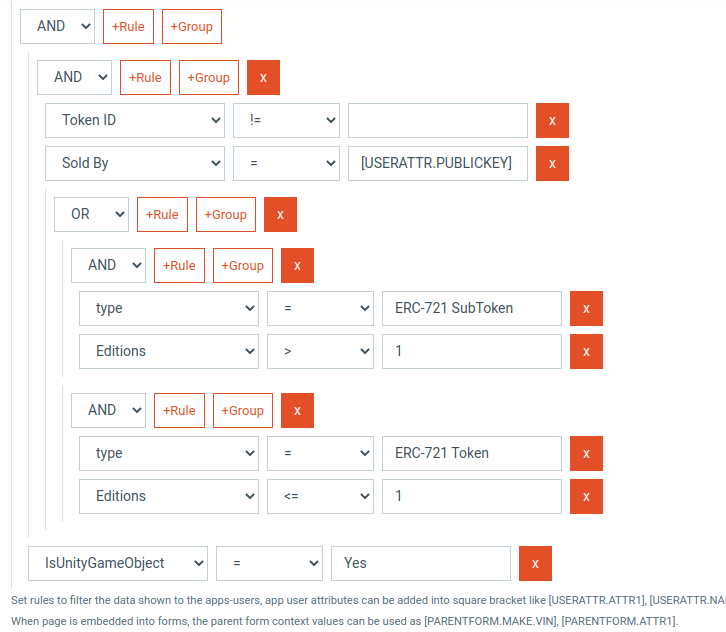
Go to Pages-> Add New->name it as Unity Inventory-> set the Query as given in the screenshot below:
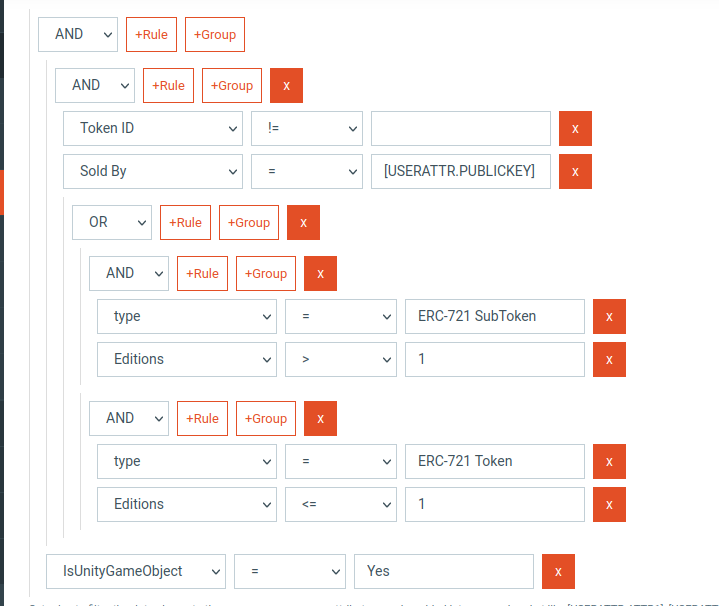
-
Check the Hide page from Navigation menu ->click Save->copy the page ID

-
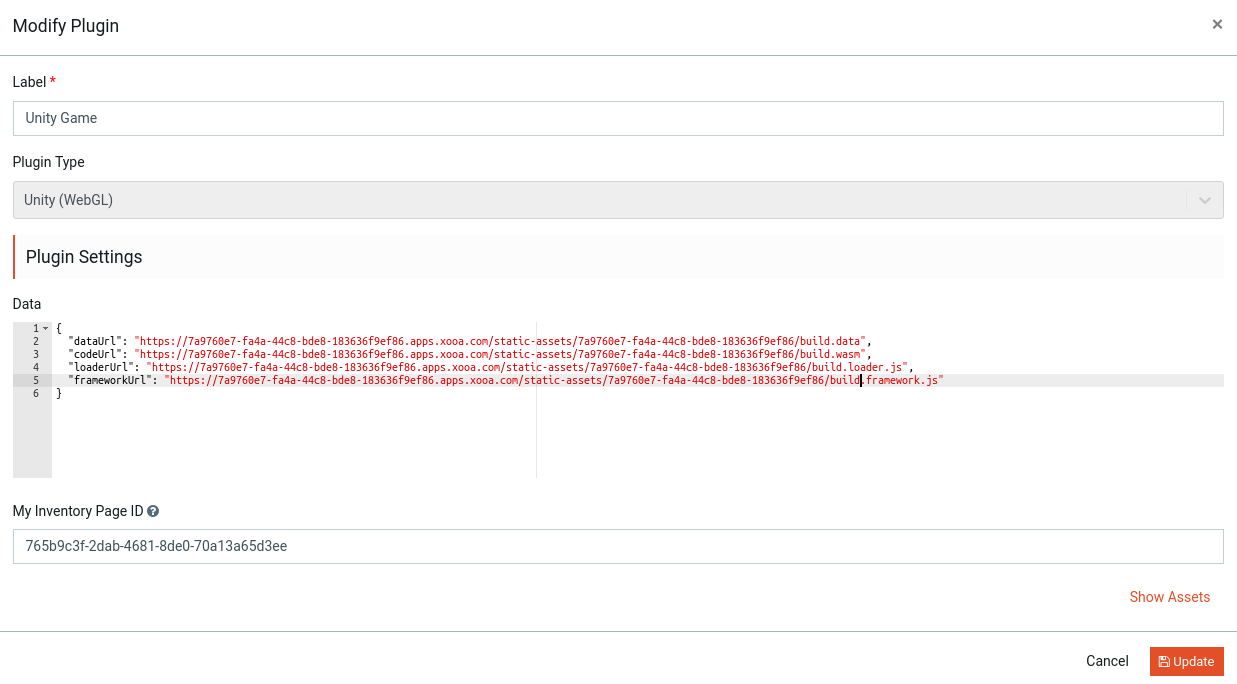
Create a page with Unity WebGL Plugin used in it. Add the page ID in the inventory page ID field. In the Data field, add the links for dataUrl, CodeURI, LoaderUrl, FrameworkURL build while creating WebGL application. Upload the file in static assets and add the links in the following format:
{

  "dataUrl": "<build.data>",

  "codeUrl": "<build.wasm>",

  "loaderUrl": "<build.loader.js>",

  "frameworkUrl": "<build.framework.js>"

}
-
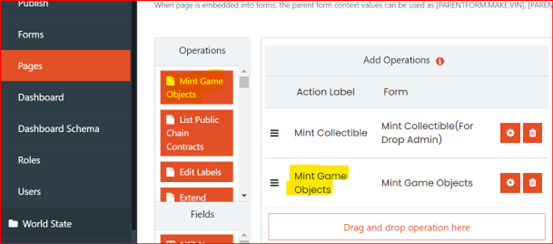
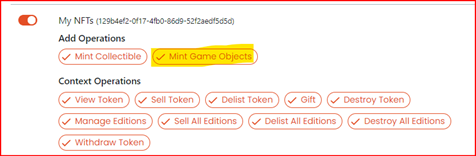
Go to Pages -> My NFTs -> Design -> drag and drop the operations (Mint Game Objects) to Add operations as show in the below screenshot
-
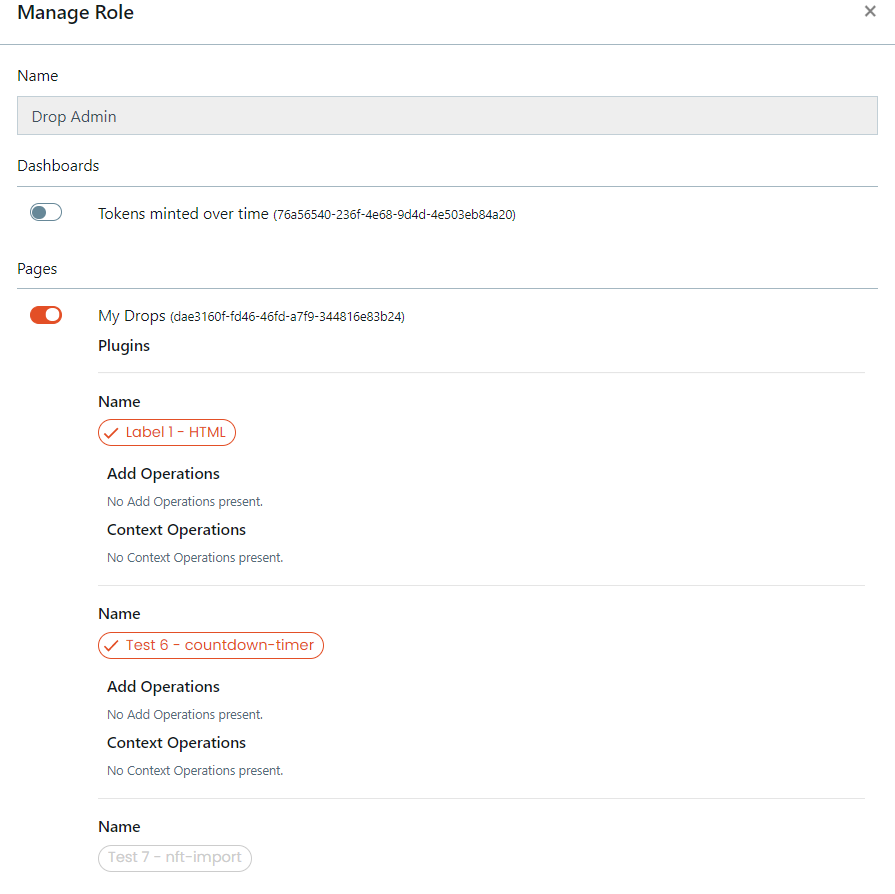
Enable the page under Roles -> Drop Admin -> Edit -> My NFTs -> Enable. Refer to the screenshot given below:
-
Sign in as Drop Admin and verify if the page is visible in runtime.
Steps to create Unity Game page:
-
Go to Pages -> Import Unity Game and Unity Inventory using the JSON files
-
Copy the Page ID of unity inventory from Pages as show in the below screenshot:
-
Click on Design of Unity Game -> Page type -> Plugins -> Edit -> under Plugin Setting -> update Data source URLs
-
Upload the files from the build folder which was generated while creating the Unity WebGL.
-
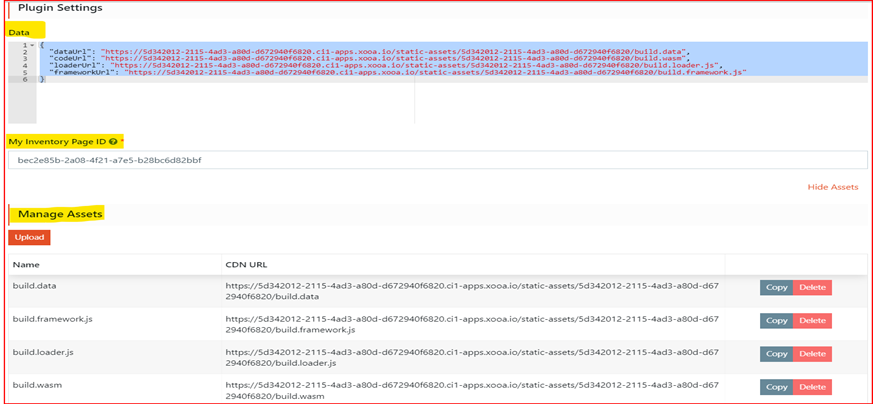
Copy paste all the 4 URLs from Manage Assets to Data and update the My Inventory Page ID with the copied Page ID of Unity Inventory as shown in the below screenshot:
-
Click Update->click Save
-
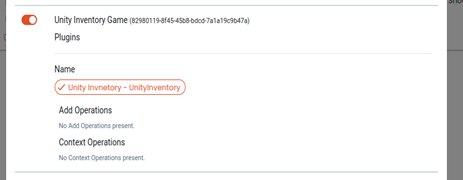
Enable the page under Roles -> Drop Admin -> Edit -> Unity Inventory Game -> Enable. Refer to the screenshot given below:
-
Verify if the Unity Game page is visible under run time console and loading without error.
In the Plugin Settings:
Data - Enter the data that will be displayed on the page.
My Inventory page ID - This is the custom page that provides data to the Unity app. You can create a custom page and a unique ID is generated for the page. Use this ID to enter in this field. Refer the sample screenshots given below.
Click Show Assets - To upload your static assets
Click Add
Plugin
Rendered
j. Promotion - You can configure promotion codes here. Plugin
Note
Plugin types can be added based on customer requirements.
-
Click Add
-
Click the edit icon on the newly added plugin to make changes to the fields
-
Click Update
-
Click Save to save the changes
Steps to modify plugins:
App owners can provide/modify the rights for each plugin type, to be rendered on a page.
-
Click the edit icon on the existing or newly added plugin
-
Drag and drop the operations and fields (available only for List Builder plugin type)
-
Click the Settings icon on each operation/text field to set the rights
-
Click Update
-
Click Save on the edit page
Steps to enable the plugins for each role:
The app owner can modify the rights for each plugin and hide or show the plugins for each role.
-
To enable the feature for a role, go to Roles -> click Edit on that role
-
Scroll down to the newly added page section and click to enable the plugin
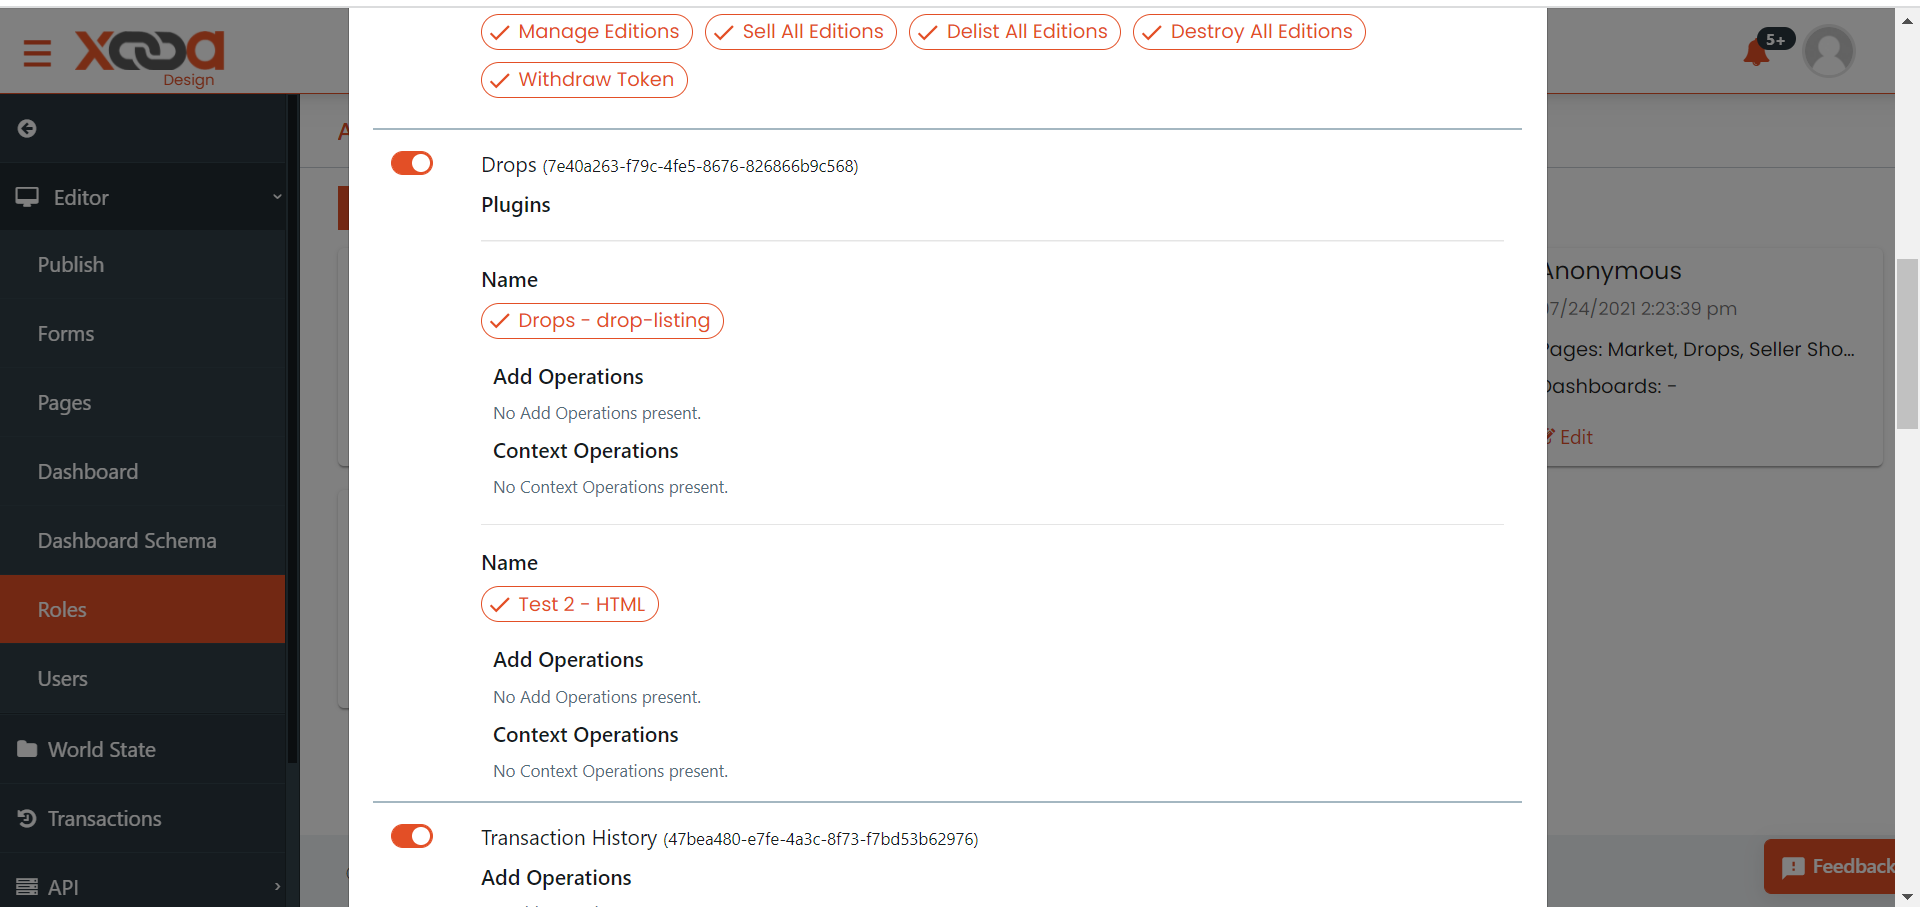
-
Click Save. The plugin will be displayed for that role on the pages where it was added
-
Login to the app as that user (Drop Admin, Admin, NFT User, Moderator or Anonymous) and check the pages to see the newly added plugins.