Card Payments
Stripe Configuration
Follow the steps given below to configure payment settings using Stripe.
Step 1: Sign up on https://stripe.com
Step 2: To test your app, switch between test and live mode
Step 3: Go to Home -> In the Get started with Stripe section, hover over the publishable key to copy the link and click view button to view and copy the secret key.
Alternatively, you can find the keys in Home -> click Developers button on the right-hand side -> click API Keys in the navigation menu on the left -> view Publishable Key and Secret Key. Switch between test mode and live stripe mode to view test/live keys.
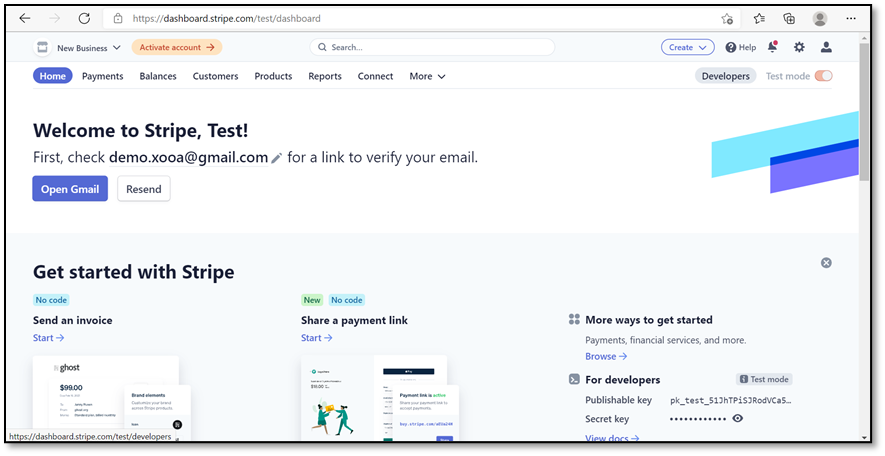
Step 4: To configure Branding:
-
Click Settings at the top right corner
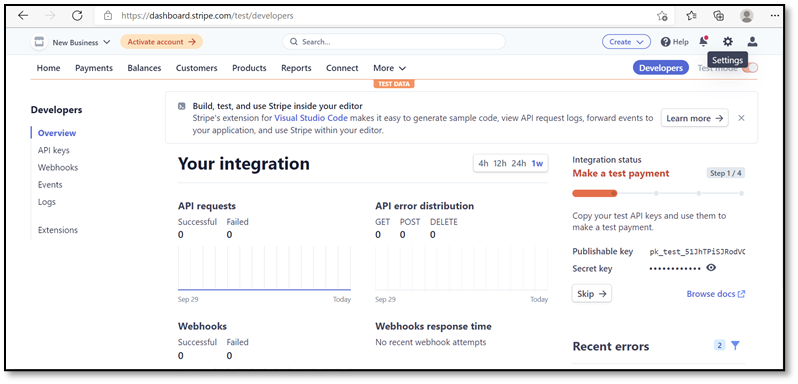
-
Under Business Settings section -> click Branding
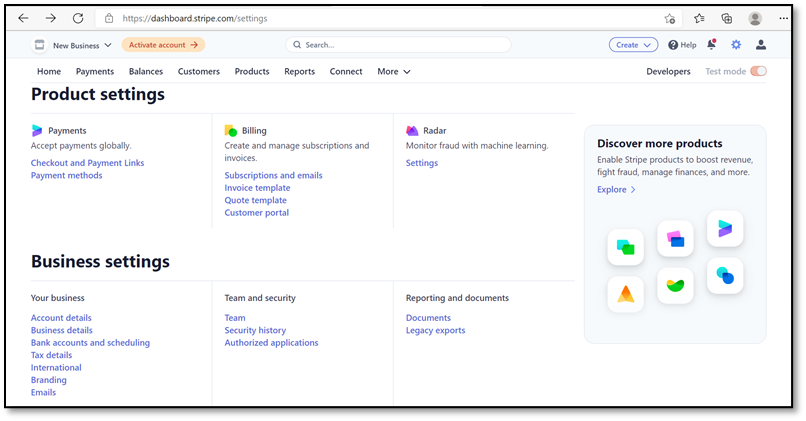
-
Complete branding settings for your marketplace and Save changes
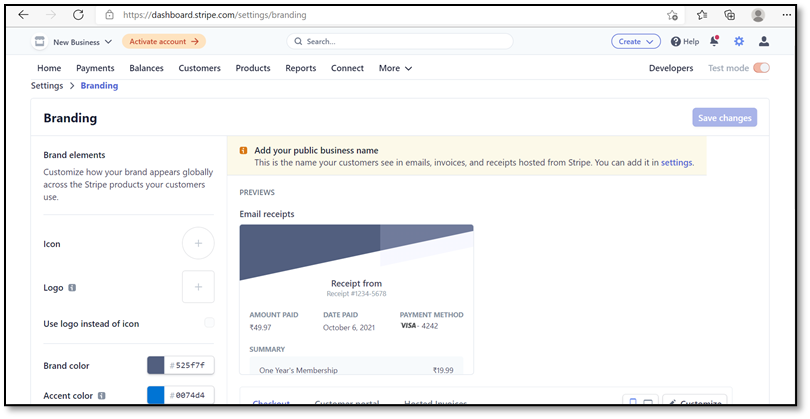
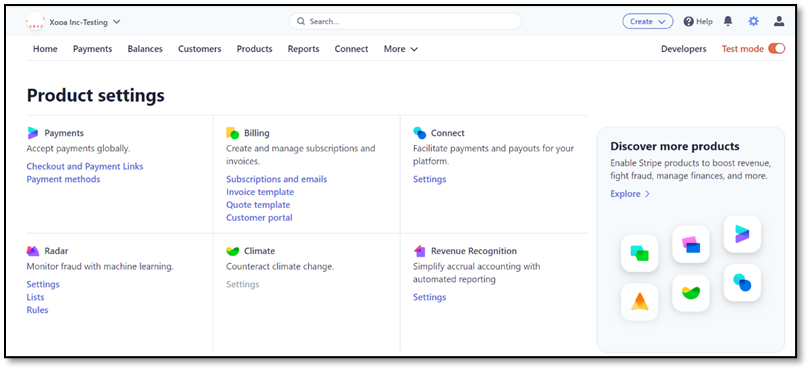
- To complete express settings, select the countries you want your marketplace to deal with. Go to Settings from the home page under the Connect section -> click Settings
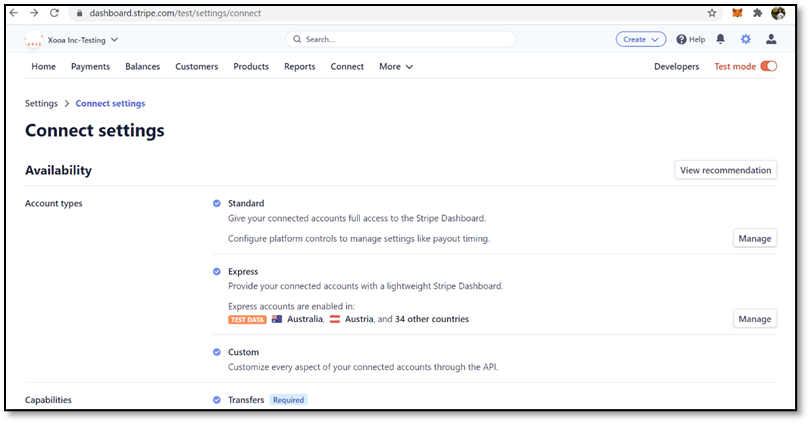
- Account Types -> click Manage
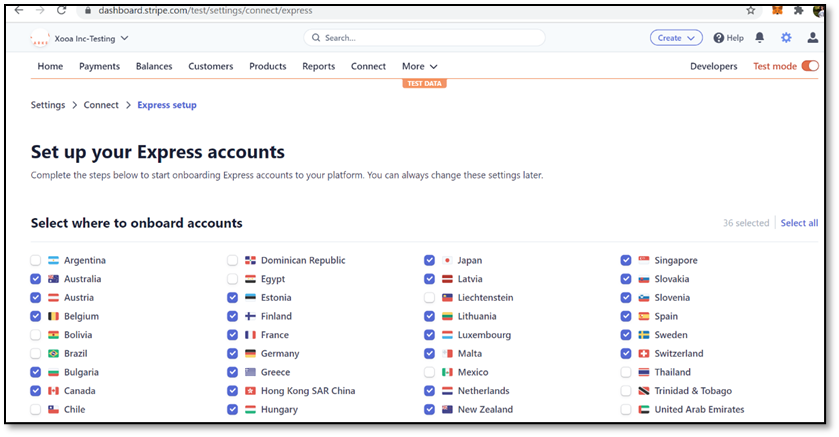
- Select the countries from the list
- Add the products to each country as per requirement and Save changes.
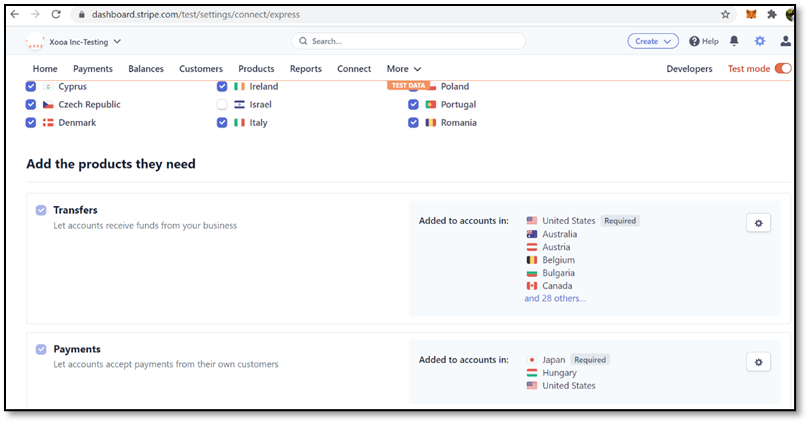
The Stipe account is now set for transactions. Users can switch between test/live mode to get the publishable and secret keys and settings.
Crypto Payments
To enable crypto payments on your app:
- Go to Design Console –> Publish –> Payment and Fees section
- Check the Enable Crypto Payments field and add the Public Address of your Metamask wallet
- Click Save
Fees
The platform fee can be configured in the design console under the Payment and Fees section. Platform fee is the sum of the transaction cost incurred by Stripe and Xooa for processing each transaction, and the margin set by the marketplace owner.
The platform fee can be set for both:
-
The Initial Sale Platform Fee (in %) refers to the first gross NFT sale charged to the seller
-
The Secondary Sale Platform Fee (in %) refers to the subsequent gross NFT sale charged to the seller