Geo blocking using Azure
Geo blocking can be enabled through Web application firewall.
Refer below steps to configure and enable the Geo blocking as per the requirement.
- Login to Azure Portal
- Go to Web Application Firewall policies
- Click on Create. Follow below steps for configuration.
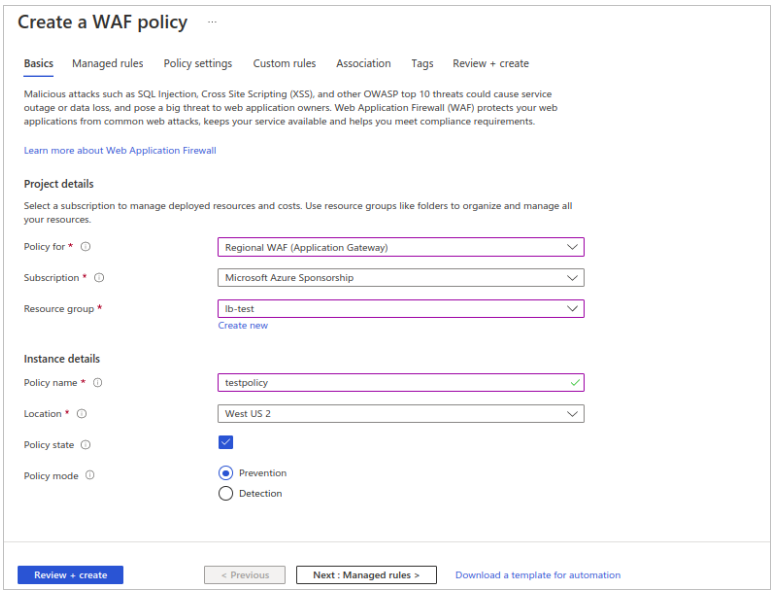
- Select application gateway for ‘Policy for’ ( Regional WAF (Application Gateway))
- select appropriate subscription.
- Resource group – select your appropriate resource group (resource group created / used while configuring the Application gateway)
- Policy Name – Give appropriate policy name.
- Location – Select the appropriate location (Use location same as load balancer)
- Tick on Policy state.
- Select Policy mode as detection.
- Click on Next: managed rules.
-
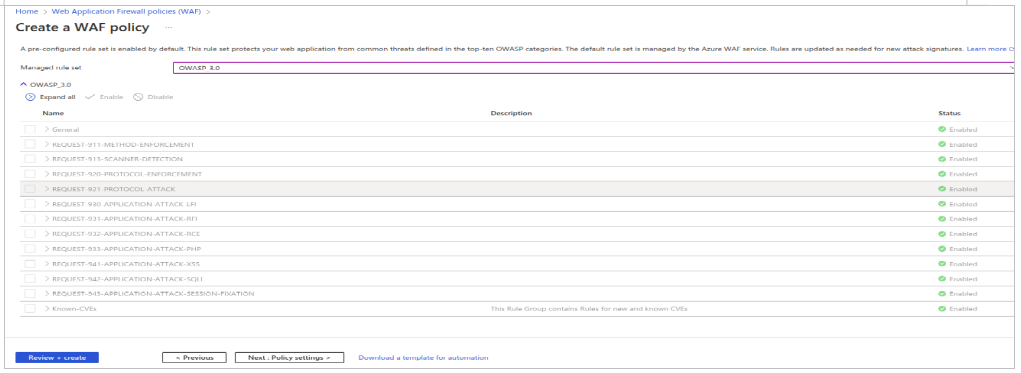
In Managed rule set, select OWASP_3.0 and then click on Next: Policy Settings
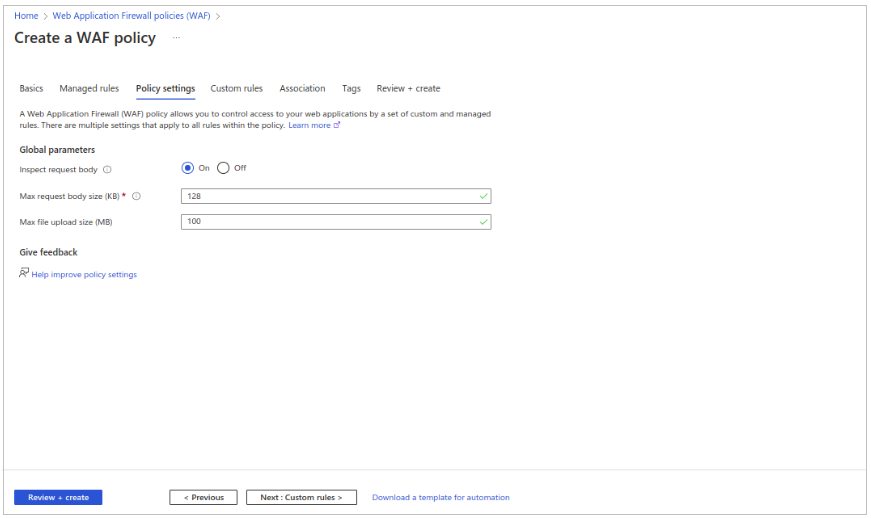
- Configure policy setting as per the below parameters.
- Inspect request body – On
- Max request body size (KB) - 128
- Max file upload size (MB) - 100
- Click on Next: custom rules
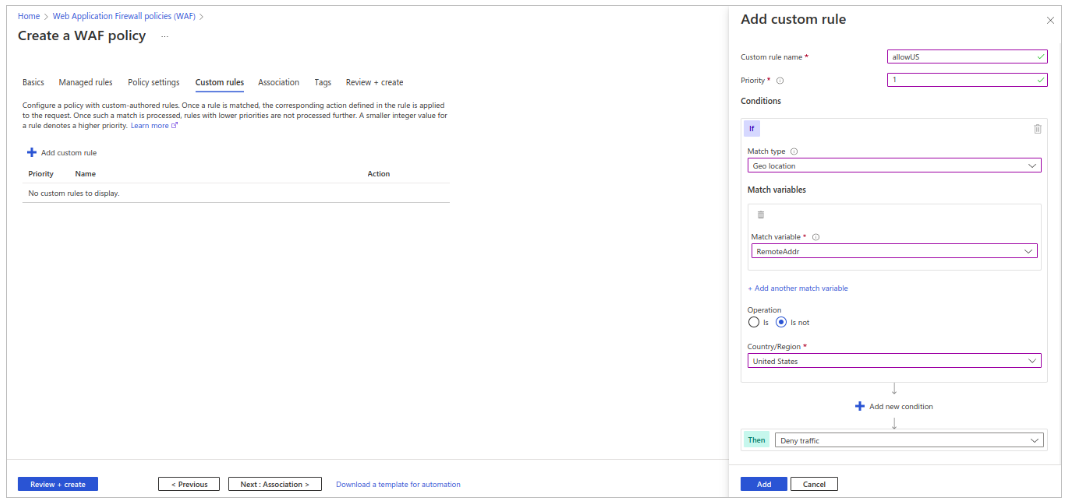
- Refer below steps to configure custom rules.
- Click on add custom rules.
- Give appropriate rule name.
- Set priority as 1.
- In Match type select Geo Location.
- In Match variable select RemoteAddr.
- Select ‘is not’ in the operation.
- Select the required countries for which access is required.
- Finally select ‘Deny traffic’ in Then.
- Click on add.
- Again click on add custom rules to add another rule ‘blockEvilBot’ and follow the steps mentioned in below images.
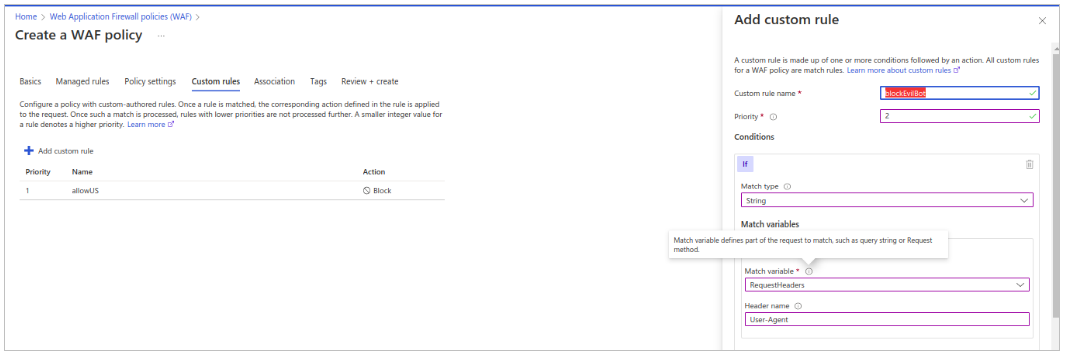

- Click on add to complete the rule addition.
- Once both the rules added, click on Next: Association.
-
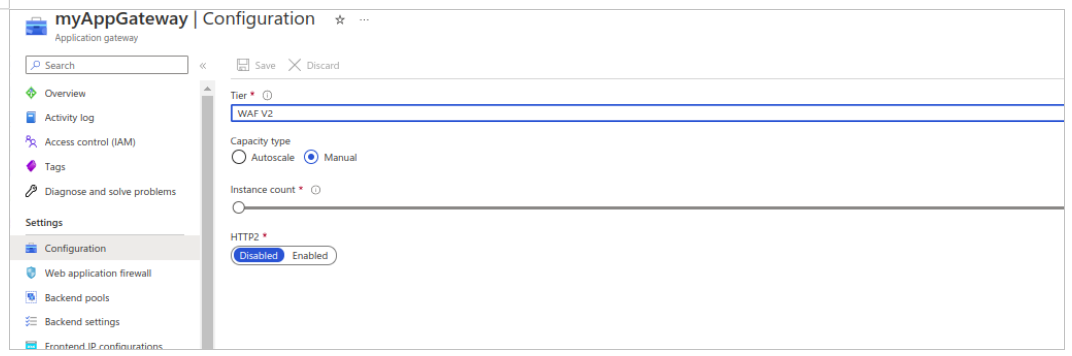
Navigate to application gateway which you have configured for custom domain setup and change the application gateway tier to WAF V2 from configuration, refer below image.
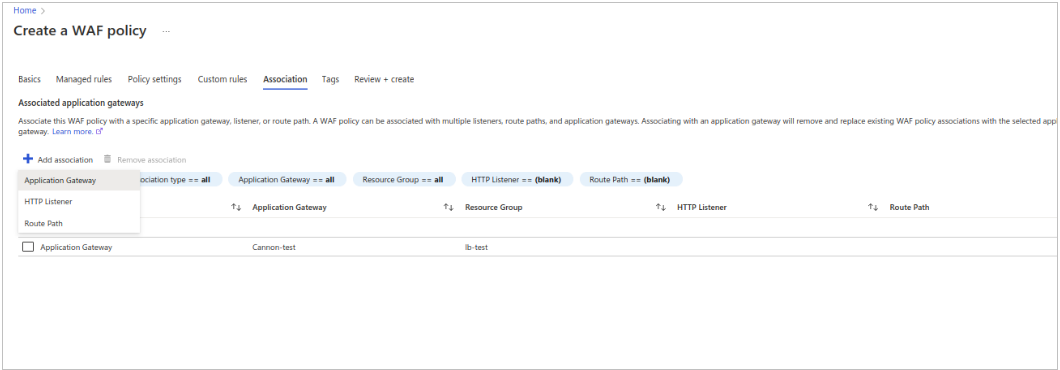
- For configuring Associated application gateways,
- Click on add associations.
- Use Application gateway.
- Select appropriate application gateway from dropdown and then click on Add.
- Click on Next: Tags , Here you may give appropriate tags for easy identification
- Click on Next: Review + create and verify the configuration
- Click on create to complete the WAF policy creation.
Geo blocking using AWS
Geo and Tor restrictions
If you want to restrict access to your application from Tor and whitelist/blacklist users from specific countries, follow the configuration steps given below. This section is divided into two parts:
-
Deploy CloudFormation stack and integrate with Cloudfront distribution (which you created in Custom Domain section) to block access from Tor.
-
Configuring WAF ACL Rules to whitelist/blacklist specific countries as per your requirement.
Blocking Application access from Tor browser:
The AWS WAF (Web Application Firewall) service can be integrated with AWS CloudFront to block access requests from unintended sources. You can use the following CloudFormation solution template offered in AWS solutions
Note
This template creates:
- Multiple AWS Lambda functions
- an AWS WAFv2 Web ACL
- an Amazon S3 bucket
- and Amazon CloudWatch custom metric You will be billed for the AWS resources used, if you create a stack from this template.
This template provides multiple parameters for preventing web-based attacks, of which we will be only using the IP reputation lists option to block access from Tor. Since the rest is beyond the scope of this document, you can refer to AWS documentation for further information.
Given below are the steps to implement this solution:
-
To deploy this solution, you can download the cloudformation template from here
-
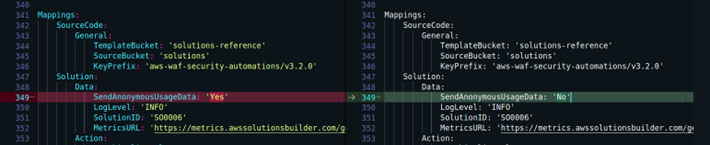
This solution includes an option to send anonymous operational metrics to AWS which is by default enabled. To disable this option, make the following changes to the downloaded template: under Mappings section - disable the SendAnonymousUsageData flag
-
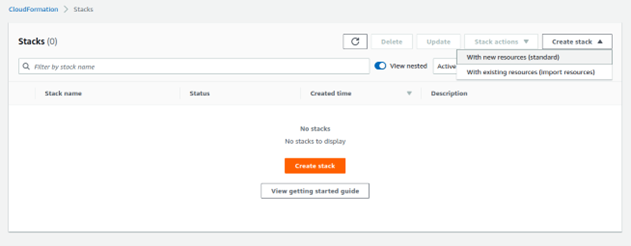
Navigate to CloudFormation service dashboard from your AWS Management console (N. Virginia region), and click on Create stack -> With new resources (standard)
-
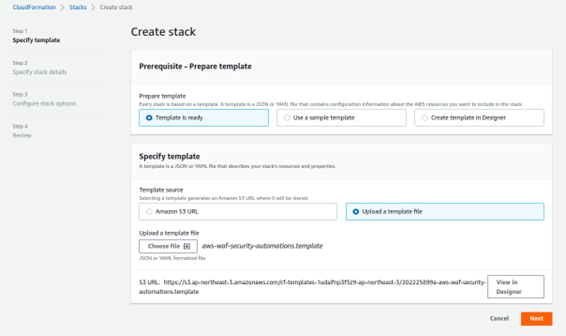
Click Template is ready -> Upload a template file -> and choose the template file you downloaded in step 1 -> click Next
-
Specify a stack name
-
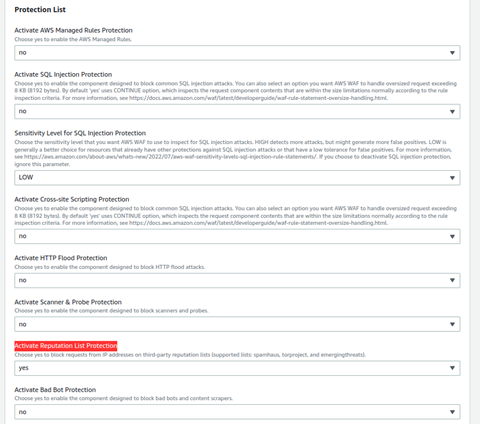
Under Parameters -> Protection List, choose no for all the parameters except for Activate Reputation List Protection since we want to use only this feature to block Tor access. Choose yes for Activate Reputation List Protection parameter.
-
Under Log Monitoring Settings section, select the Endpoint Type as CloudFront

-
Keep everything else as default and click Next
-
Add tags if required -> click Next
-
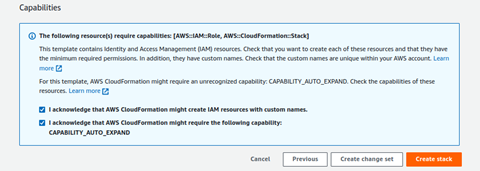
Review the configuration, check acknowledgements and then click Create stack
-
View the status of the stack in the AWS CloudFormation console in the Status column. You should receive a status of CREATE_COMPLETE in approximately 15 minutes. This is a nested stack that will deploy 2 stacks - one parent and a child stack. Check the Resources tab to view all the deployed resources.
-
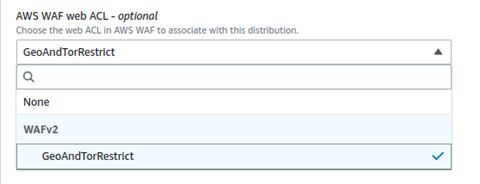
Navigate to your CloudFront distribution. Under the general tab of your distribution, click Edit under the Settings section
-
Under AWS WAF web ACL parameter, select the WAF ACL created by the cloudformation stack you deployed above
-
Click Save changes
This will block access from Tor browsers on your cloudfront distribution/s.
Geo restrictions using AWS WAF Service
-
Navigate to AWS WAF service dashboard and click on Web ACLs. Select Global(CloudFront) option to view it
-
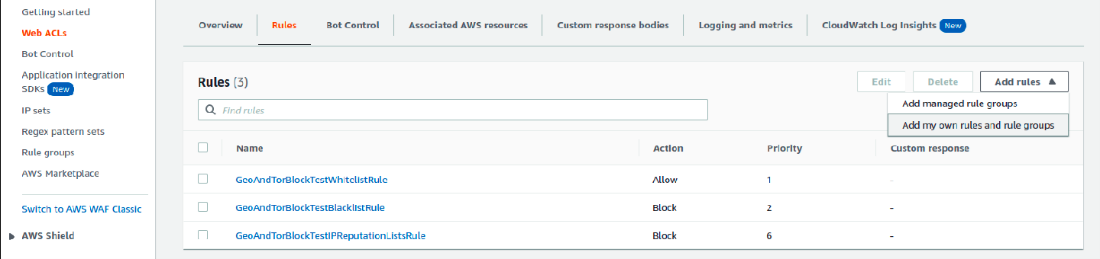
Click on the ACL Name which you have integrated with cloudfront in the above steps -> go to the Rules tab -> Add Rules -> Add my own rules and rule groups
-
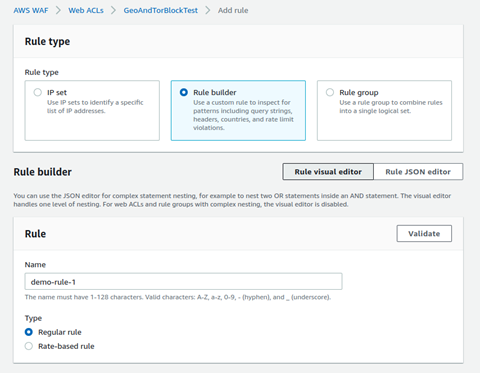
Select Rule builder as Rule type. Give a rule name
-
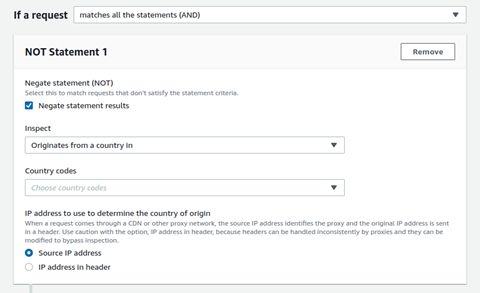
In front of If a request option, select: matches all the statements (AND)
-
If you want to blacklist specific countries: in Statement 1 section, select Originates from countries in from the Inspect drop down. Then select the required countries, to be blacklisted as per your requirement, from the Country codes option.
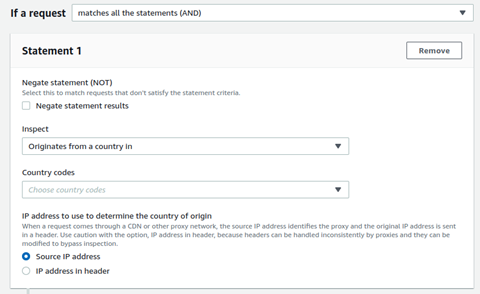
-
If you want to whitelist specific countries: in Statement 1 section, enable the Negate statement (NOT) checkbox and select Originates from countries in from the Inspect drop down. Then select the required countries, to be whitelisted, from the Country codes option.
-
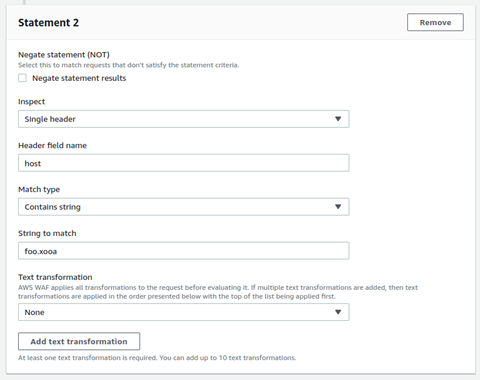
In Statement 2 section, select Single header from the Inspect drop down. Type host in Header field name text-box. For Match type, use Contains string. In String to match text-box type your custom domain name. For example: if your custom-domain name is foo.xooa.com, then type foo.xooa.
-
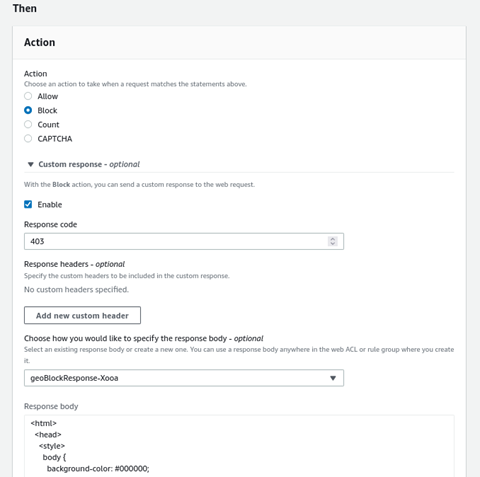
Under the then section, choose Action as Block
-
(Optional) Further, you can also configure response body and response code, by enabling the custom response checkbox and related configuration
-
Click Save Rule