Event-Actions
Xooa provides various system defined events. The actions are executed when the associated events are triggered. The admin can configure customized actions against pre-defined set of events so that, when an event is triggered, the corresponding action is executed by the system. If required, the admin can also configure new system defined events along with actions based on specific requirements. By default, the following events are available in the design console.
| Event | Description |
|---|---|
| New user registration (Sign up) | This event is triggered when a new user registers with the application. |
| Successful NFT purchase from drops | This event is triggered when a user successfully purchases an NFT from the drop. |
| Successful pack purchase from drops | This event is triggered when a user successfully purchases a pack of NFTs from the drop. |
| Successful NFT purchase from secondary market | This event is triggered when a user successfully purchases an NFT from the secondary market. |
| Email change | This event is triggered when a user updates the email id. |
| Bid Accepted | This event is triggered when a bid is accepted by the seller. |
| Claim | This event is triggered when a collector claims a promise configured for an NFT. |
| Bid Placed | This event is triggered when a bid is placed by the seller. |
| Bid Cancelled | This event is triggered when a bid is cancelled by the seller. |
| Out Bid | This event is triggered when a bidder outbids another bidder. |
| Payment failure | This event is triggered when a user fails to make payment during the purchase of an NFT. Note: For this event, an email action is not available. |
| Marketing Emails Opt-In | This event is triggered when a user accepts to receive marketing emails during the sign-up process. |
| Successful KYC | This event is triggered when a user’s KYC is verified successfully. |
| Incomplete KYC | This event is triggered when a user fails to provide mandatory documents for verification of KYC. |
| Drop started | This event is triggered once the drop is live to the public. Note: For this event, an In-App Notification action is not available. |
| Drop ended | This event is triggered once the drop has ended. Note: For this event, an In-App Notification action is not available. |
| Early access drop started | This event is triggered when a drop with early access is live to the public. Note: For this event, an In-App Notification action is not available. |
| On signup auth code | This event is triggered when a user signup to the application with an authentication code. Note: For this event, an In-App Notification action is not available. |
| Generation of claim URL | This event is triggered when a claimable drop URL is generated. Note: For this event, an In-App Notification action is not available. |
| Generation of expired claim URL | This event is triggered when a claimable drop URL is expired. Note: For this event, an In-App Notification action is not available. |
Based on the requirement, for all the above-mentioned events the admin can define the following action types:
- In-App Notification: It is a notification that appears to users who have the application already open whenever an event occurs.
- Email: An email is sent to the user when a particular event occurs.
- Webhook: It is used to integrate with external system such as Zapier, Make, Shopify, Mailchimp, Sendgrid, and many other systems whenever an event occurs.
- By default, there are In-App Notification/Email/Webhook actions defined for the events. Based on the requirement, the admin can add/update the actions of the events accordingly.
- Multiple action types can be configured for an event. For example, for an event there can be one or more In-App notification/email/webhook actions or a combination of In-App notification, email and webhook actions.
Add an In-App-Notification action to an event
- The fields which are available to configure an In-App Notification action are similar for all events. The admin provides necessary information within the fields based on the requirement of the event.
- The list of placeholders is based on the usage of events. If necessary, expand the placeholder, and select the appropriate placeholder from the available dropdown list.
- Fields with an asterisk (*) symbol are a mandatory field.
The admin must follow the below steps to add an In-App Notification action to an event.
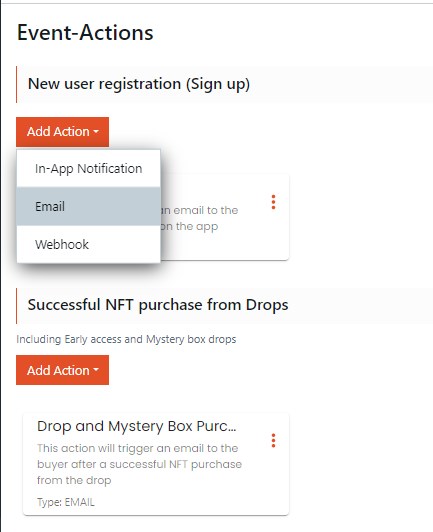
- From the design console, navigate to Editor > Publish > Event-Actions.
- Click Modify from the Event-Actions.
- Click Add Action on the applicable event and select In-App Notification.
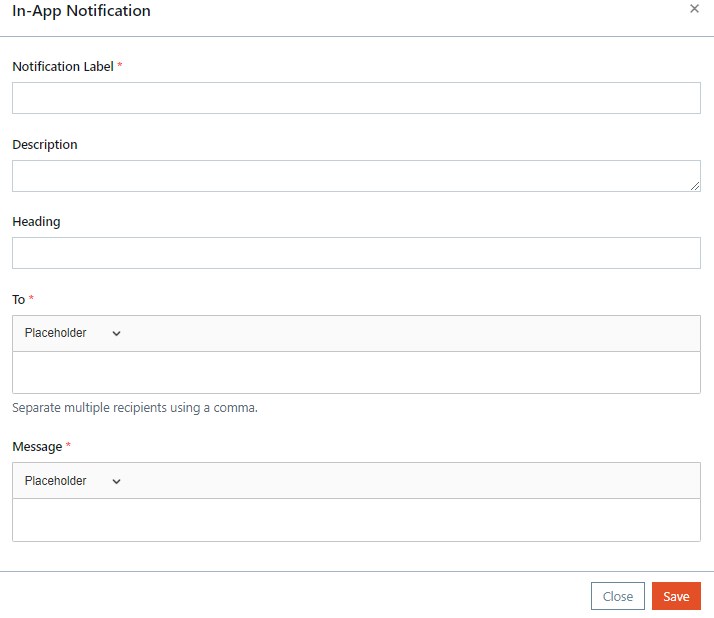
- The admin must provide the following information on the In-App Notification popup page.
- Notification Label*: Provide a suitable name to the notification template.
- Description: If required, provide a suitable description about the purpose of the template. The description is displayed on the label card.
- Heading: Provide a heading to the notification. This is displayed when a user clicks on the bell icon in the application.
- To: Provide an applicable placeholder based on the requirement of the event.
- Message*: Provide the text/placeholders that is displayed as a message when the In-App Notification is sent to the applicable user account.
- Click Save to save the details of the In-App Notification action to the event.
-
The newly created In-App Notification action is displayed on the Event-Actions page under the chosen event.
Add an email action to an event
- The fields which are available to configure an Email action are similar for all events. The admin provides necessary information within the fields based on the requirement of the event.
- The list of placeholders is based on the usage of events. If necessary, expand the placeholder, and select the appropriate placeholder from the available dropdown list.
- Fields with an asterisk (*) symbol are a mandatory field.
The admin must follow the below steps to add an email action to an event.
- From the design console, navigate to Editor > Publish > Event-Actions.
- Click Modify from the Event-Actions.
- Click Add Action on the applicable event and select Email.
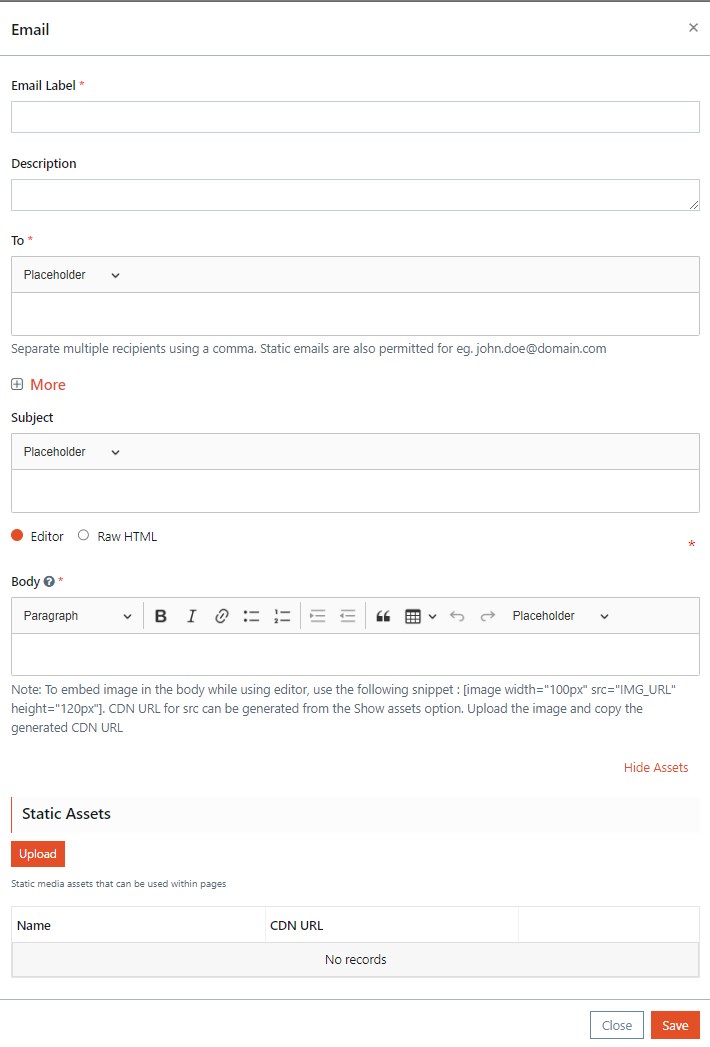
- The admin must provide the following information on the Email popup page.
- Email Label*: Provide a suitable name to the email template.
- Description: If required, provide a suitable description about the purpose of the template. The description is displayed on the label card.
-
To*: Provide an email ID to whom the notification must be sent when an event is triggered. Click More to provide the following information.
- Cc: Provide email IDs to whom the notification must be sent when an event is triggered.
- Bcc: Provide email IDs to whom the notification must be sent when an event is triggered.
Multiple recipients can be added by using a comma. Static emails are also permitted. For example, john.doe@domain.com.
- Subject: Provide the text that is displayed as an email subject when the notification email is sent to the applicable email ids.
-
Body*: Provide the text that is displayed as an email body when the notification email is sent to the applicable email ids. The admin can provide the text in the two following formats:
- Editor: By default, this option is selected for body text. It provides the ability to add, remove, and change the characters or words from the available options.
- Raw HTML: It is a plain text without any code specific or content management specific tags or markup.
-
Show Assets: If required, the admin can upload the static assets in the Body of the text. Click Show Assets and follow the below steps to upload and add the asset to the body text.
- Click Upload to upload an image.
- Once the image is uploaded, copy the CDN URL.
- To embed the image in the body, use a snippet ([image width=”100px” src=”IMG_URL” height=”120px”]) and copy the CDN URL in the IMG_URL.
- Click Save to save the details of the email action to the event.
-
The newly created email action is displayed on the Event-Actions page under the chosen event.
Add a webhook action to an event
- The fields which are available to configure a webhook action are similar for all events. The admin provides necessary information within the fields based on the requirement of the event.
- The list of placeholders is based on the usage of events. If necessary, expand the placeholder, and select the appropriate placeholder from the available dropdown list.
- Fields with an asterisk (*) symbol are a mandatory field.
The admin must follow the below steps to add a webhook action to an event.
- From the design console, navigate to Editor > Publish > Event-Actions.
- Click Modify from the Event-Actions.
- Click Add Action on the applicable event and select Webhook.
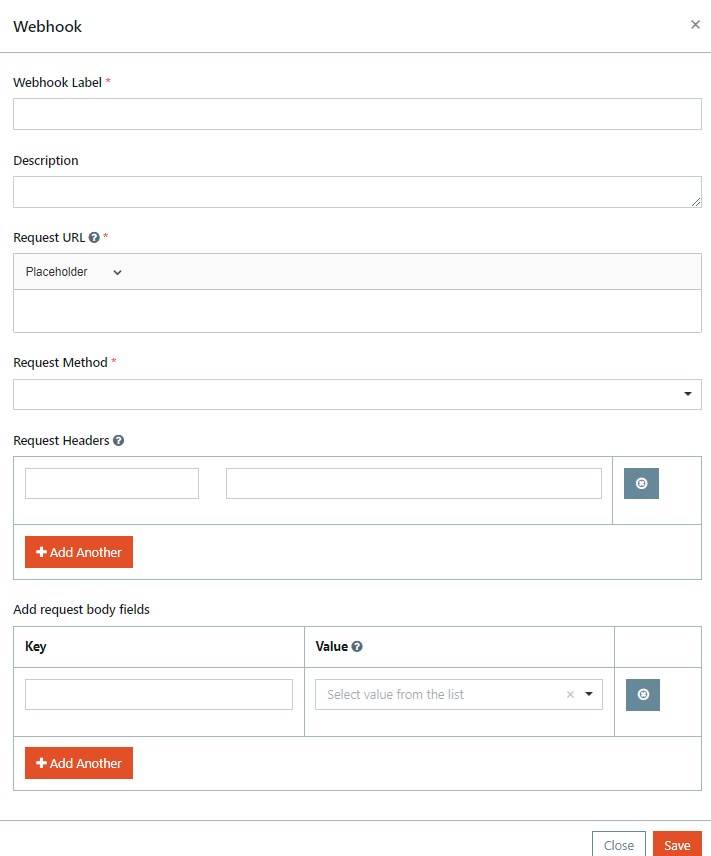
- The admin must provide the following information on the Webhook popup page.
- Webhook Label*: Provide a suitable name to the webhook template.
- Description: If required, provide a suitable description about the purpose of the template. The description is displayed on the label card.
- Request URL*: When an event is triggered on the application, it serializes data about the event and sends it to the webhook URL from the action application. The data is sent through the webhook URL. For example, a sample URL request of Mailchimp is https://us14.api.mailchimp.com/3.0/lists/c3cf8abd5478/members and Zapier is https://hooks.zapier.com/hooks/catch/12526621/bwskc98i/. Copy and paste the URL in the Request URL text box.
- Request Method*: Select POST, PUT or PATCH from the available dropdown list depending on their API requirement. All the three methods are used to upload the data.
- Request Headers: This section is used to represent the meta-data associated with the API request and response. The admin can add a header name and link an API key which is used for authorization purposes. If configuring for Mailchimp, then click the help icon and follow the steps given in it to generate the API key.
- Add request body fields: Add the data that must be sent to the webhook.
- Click Save to save the details of the webhook action to the event.
The newly created webhook action is displayed on the Event-Actions page under the chosen event.
Add a new event
By default, the application provides pre-defined system events. If the admin wants to configure new system defined event, follow the below provided steps:
- From the design console, navigate to Editor > Publish > Event-Actions.
- Click Modify from the Event-Actions.
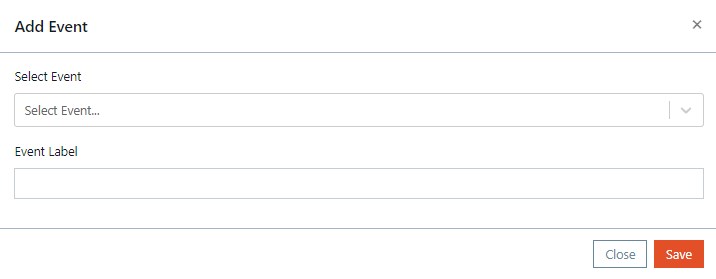
- Click Add Event to create a new event.
- Select an event from the Select Event dropdown list available in the Add Event popup page. The following events are available in the dropdown list.
- gift
- reject
- sellToken
- approve
- Provide a suitable name for the event in the Event Label text box.
- Click Save to save the event.
-
Once an event is added the admin can configure the action (In-App Notification/Email/Webhook) to the event. For more information, refer to Add an In-App-Notification action to an event, Add an email action to an event and Add a webhook action to an event.
Edit an In-App Notification/Email/Webhook action of an event
The admin must follow the below steps to edit an In-app notification/email/webhook action of an event.
- From the design console, navigate to Editor > Publish > Event-Actions.
- Click Modify from the Event-Actions.
- Click
 symbol and click Edit to open the Email/Webhook popup page.
 - Make the required changes and click Save to save the updated changes to the action. For more information about the fields, refer to Add an In-App-Notification action to an event, Add an email action to an event and Add a webhook action to an event.
Delete an In-app notification/Email/Webhook action of an event
The admin must follow the below steps to delete an In-app notification/email/webhook action of an event.
- From the design console, navigate to Editor > Publish > Event-Actions.
- Click Modify from the Event-Actions.
- Click symbol and click Delete.
- A popup Are you sure you want to delete this action is displayed and then click Yes to delete the action.
Disable an In-app notification/Email/Webhook action to an event
The admin must follow the below steps to disable an In-app notification/email/webhook action of an event.
- From the design console, navigate to Editor > Publish > Event-Actions.
- Click Modify from the Event-Actions.
- Click symbol and click Disable.
- A popup Are you sure you want to disable this action is displayed and then click Yes to disable the action.