Sign-In Settings
The admin can apply the following settings from the Sign In Settings card of the application:
Single Sign On
Steps to integrate the marketplace with Auth0
Configure App URL in Auth0
- Sign-in to Auth0 account and copy the Domain ID from the Auth0 console.
- Sign-in to your White-Label NFT marketplace design console.
- Click Sign In Settings in the Publish page.
- Select Enable SSO check box.
- Paste the Domain ID that you copied from the Auth0 console.
- Go back to the Auth0 console and copy the Client ID and paste in the Client ID field in the marketplace.
- Click Save.
- Copy the URL under the client ID field.
- Go to the Auth0 console –> Settings –> Application URLs.
- Paste the URL address in the following sections:
- Allowed Callback URLs
- Allowed Logout URLs
- Allowed Web Origins
- Allowed Origins
- Click Save changes.
Create App User using API
- On the left-hand panel, go to User Management –> Users and click Create User.
- Fill in the details and click Create. Your user ID is created.
- Go back to the design console of your marketplace –> click API –> Identities.
- Copy the Public Key from the newly created ID (usually shown at the top of the result).
- Click API –> Sandbox –> click Explore APIs to open Xooa API Explorer page.
- Paste the API Token in the field and click the arrow next to the field.
- Go to Identities page –> click Add New.
- Give a name and set the API Access Permission to Read+Write.
- Click Create.
- Copy the API Token from the popup and paste the API Token in the field.
- Click the arrow next to the field. A message will confirm the authorization.
- On the same page, go to App User –> List roles –> click TRY.
- Copy the ID for NFT User.
- Paste it in the user parameters–>Roles field in the API Explorer’s Create page.
- Copy your user id from the Auth0 console and paste it in the email ID field in the API Explorer’s Create page.
- Go to the Auth0 console –> Applications –> click Applications –> copy Domain ID.
- Paste the domain ID as the “@ ID” (replace xooa.com).
- Click TRY and check the keys in the popup.
Verify Mint Token using API
- Go to API Explorer –> NFT –> Mint Token –> fill in parameters –> click TRY.
- Copy the token id from the Mint Token popup page. Copy it in Notes.
- Go to NFT –> Transfer –> paste the token id that was copied.
- Go to App Users–>List roles –> copy the email parameter.
- Go to NFT –> Transfer –> paste the email parameter in the ‘To’ field –> click Try.
- From the design console Launch App –> NFT User –> Sign In.
- Go to NFT Wallet –> click to view the token.
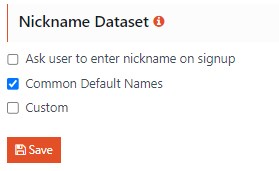
Nickname Dataset
When a new user registers on the app a random nickname is assigned. Application owners can change the auto-generated profile names to render nicknames of their choice or customize it based on business requirements. The admin can select the following nickname settings based on the requirement.
- Ask user to enter nickname on signup: During signup the user can provide the nickname as per the requirement.
- Common Default Names: By default, this option is selected in the application. Based on the requirement, the admin can uncheck this option.
- Custom: The admin can customize the names as per the requirement. Click Use Sample to use the sample template names.
The JSON file contains a minimum of 10 and a maximum of 1000 names.
Click Save to save the settings.
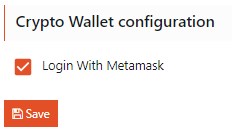
Crypto Wallet Configuration
The admin can apply the following settings in the Crypto Wallet configuration section of the Sign In Settings card.
- Select Login With Metamask check box to login the metamask account and link the crypto wallet.
-
Click Save to save the settings.
Idle Session Timeout
The admin can apply the following settings in the Idle Session Timeout section of the Sign In Settings card.
- Enter a numeric value in the Idle session timeout (in Min) text box for an idle session timeout.
- Click Save to save the settings.
