Event-Actions Framework
As an app admin, you can configure customized actions against pre-defined set of system events so that, when an event is executed, the corresponding action is triggered by the system. For example, when a user signs up, a notification email is triggered to the user. When a user purchases an NFT from a drop, using the webhook feature, you can send the notifications to different apps/platforms. Currently, we support Zapier and Mailchimp.
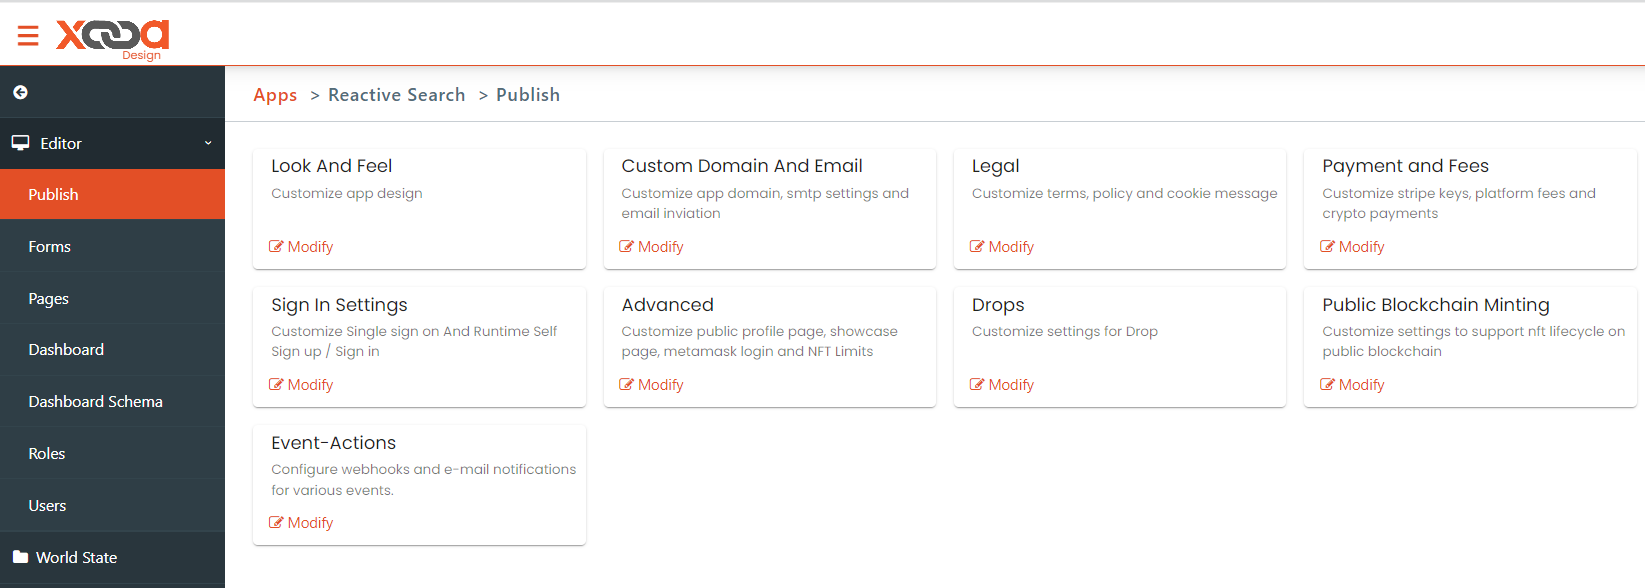
In the design console, go to Publish->Event-Actions->Modify. The app has some default email templates configured. However, you can configure Email or Webhook event-actions based on business requirement.
Event-Actions Framework - Email
Steps to configure Event-Action Framework - Email
-
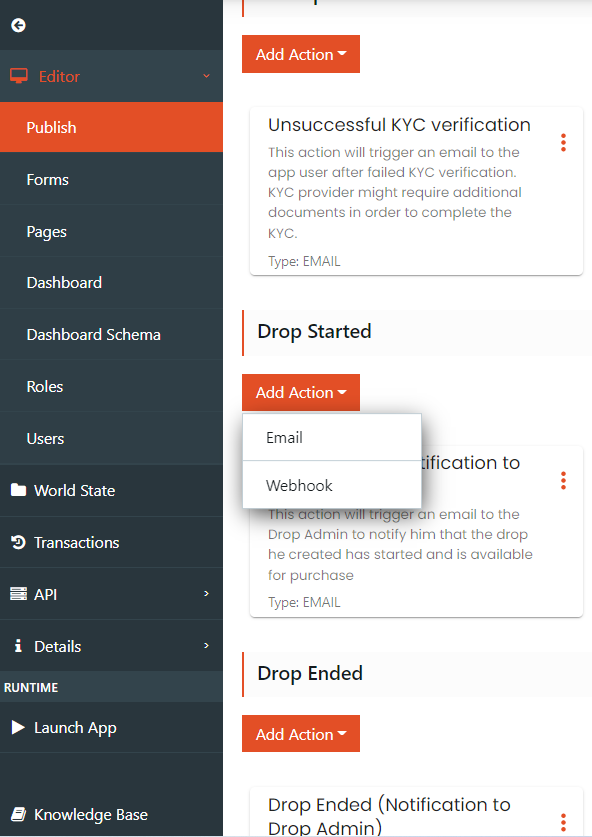
Go to the pre-defined Event. You can either edit the given default template or click Add Action to add a new action.
-
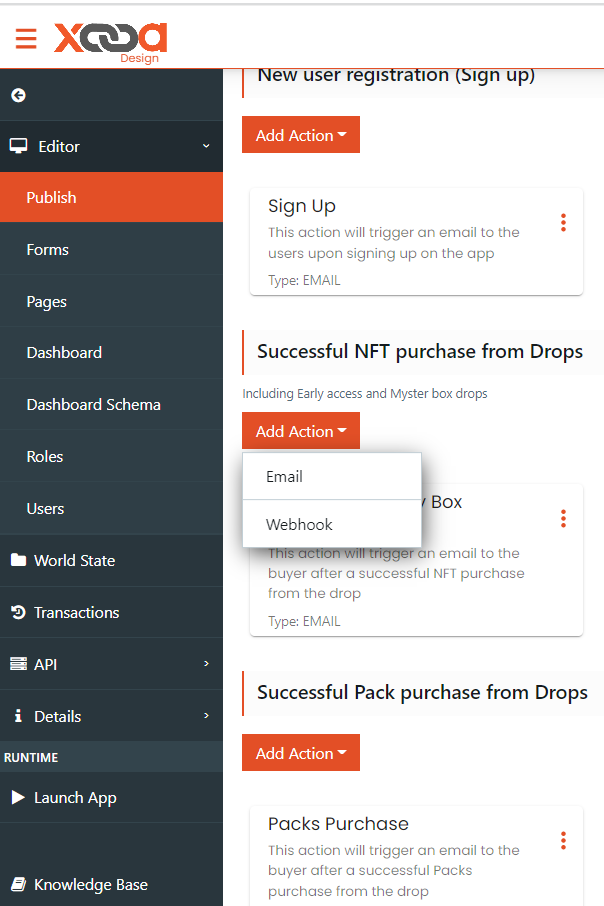
Click Add Action ->select Email
-
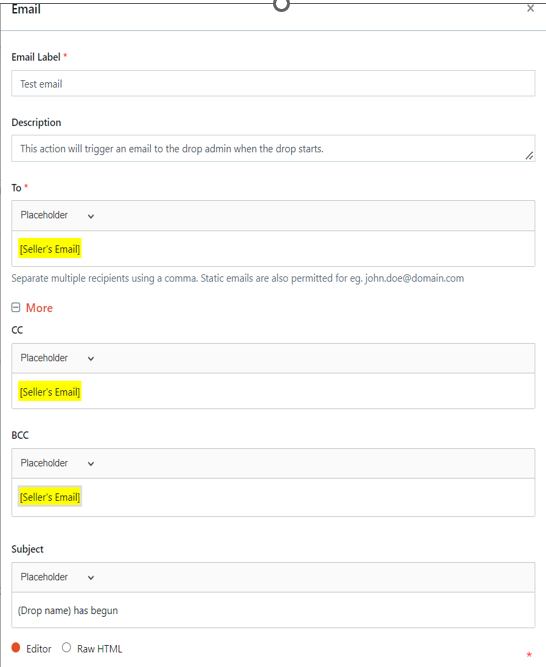
In the Email popup, fill in the fields with necessary information:
- Email Label: Give a desired name to the email template
- Description: Give a small description about the purpose of the template. This will be displayed on the label card.
- To: Enter the Seller’s email ID and any other email ID to whom the notification has to be triggered when the event occurs.
- Click More to expose more fields.
- Cc: Enter email IDs to whom the notification has to be triggered when the event occurs.
- Bcc: Enter email IDs to whom the notification has to be triggered when the event occurs.
-
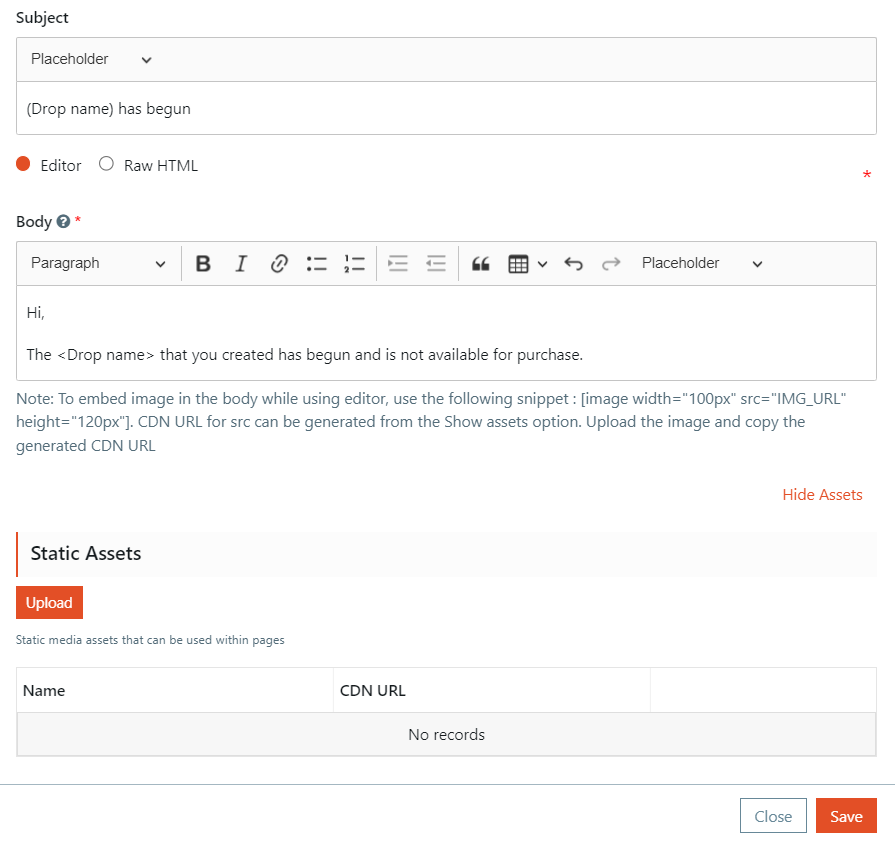
Subject: Enter the subject line that will be displayed when the notification email is sent. you can set the body of the email either using the Editor option which is set by default or select Raw HTML.
- Body: Write the required email message.
- Click Show Assets to upload your static assets. This is an optional feature. Read the note given below the Body field.
- Click Save
The newly created email action will be displayed in the Event-Actions page under the chosen event.
Event-Actions Framework - Webhook
Steps to configure Event-Action Framework - Webhook
To create an account either on Zapier or Mailchimp, click the  icon and follow the documentation links given in it for each.
-
Click Add Action->select Webhook
- In the Webhook popup, fill in the fields with necessary information:
- Webhook Label: Give a desired name to the webhook.
- Description: Give a small description about the purpose of the template. This will be displayed on the label card.
- Request URL: When an event is triggered on the application, it serializes data about the event and sends it to the webhook URL from the action application. The data is sent through this webhook URL. Click the icon and follow the steps given in it to create a webhook link. Copy and paste the URL here.
- Request Method: Select POST, PUT or PATCH method depending on their API requirement. All three are used to upload the data.
- Request Headers: This section is used to represent the meta-data associated with the API request and response. You can add a header name and link an API key which will be used for authorization purposes. If configuring for Mailchimp, then click the icon and follow the steps given in it to generate the API key.

- Add request body fields: Add the data that must be sent to the webhook.
- Click Save

The newly created webhook action will be displayed in the Event-Actions page under the chosen event.
When you successfully purchase an NFT from a Drop, the action set by you will be triggered. If an email action is set, then an email notification will be sent to the recipients. If a webhook action is set, then you can find the message displayed in your webhook platform (Zapier or Mailchimp). Furthermore, you can use the data received through webhook and continue to share the message to other apps such as Gmail, Slack etc.