Snapshots
The snapshot feature allows the drop admin to select NFTs and identify the list of users who own the selected NFTs. Once a snapshot is created and executed, the drop admin can download a .csv file that provides the list of email addresses and wallet addresses who own the NFTs.
Create a Snapshot
Note
- The user role must be a drop admin to access the Create Snapshot form of the application.
- Fields with an asterisk (*) symbol are a mandatory field.
The drop admin must follow the below steps to create a snapshot:
- Click Snapshots from the menu.
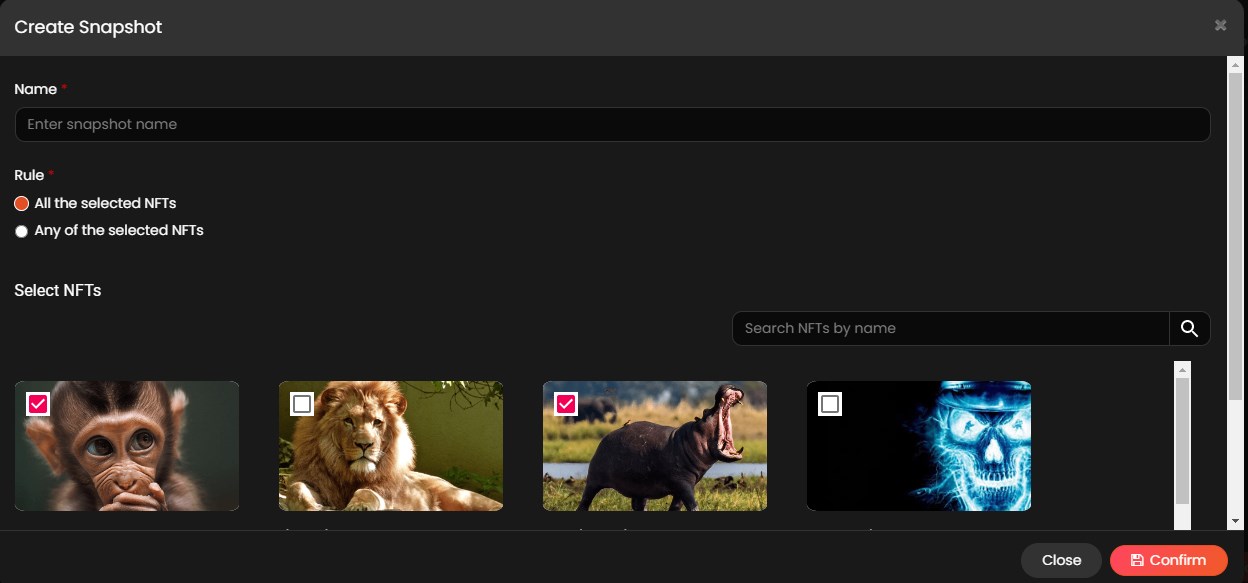
- Click Create Snapshot from the Snapshots page and provide the information in the following fields.
- Name*: Provide a name for the snapshot.
- Rule*: Select one of the following rules to create a snapshot.
- All the selected NFTs: If this option is selected, the drop admin can get the list of users who own all the selected NFTs.
- Any of the selected NFTs: If this option is selected, the drop admin can get the list of users who own any of the selected NFTs.
- Select NFTs*: Based on the requirement, the drop admin must select one or more NFTs from this field.
- Click Confirm to create a snapshot.
Manage Snapshots
Once the drop admin creates a snapshot, the drop admin can manage the actions available in the snapshot. The following actions can be performed once a snapshot is created.
View a Snapshot
The drop admin must follow the below steps to view a snapshot:
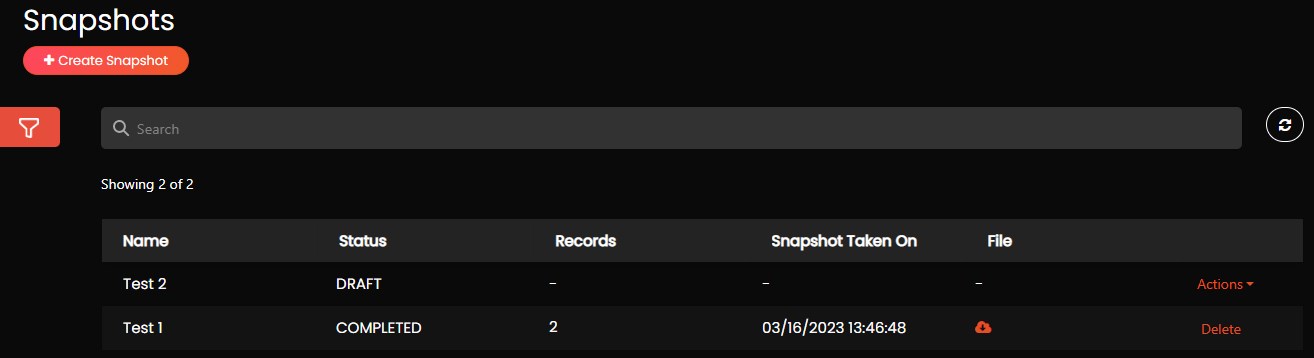
- Click Snapshots from the menu to view the snapshots if they are already created. The drop admin can view the following details:
- Name: Provides the name of the snapshot.
- Status: Provides the active status of the snapshot. The drop admin can find one of the following statuses in the table.
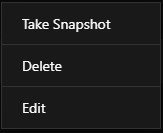
- DRAFT: This status is displayed when the drop admin creates a snapshot. When a snapshot is in DRAFT status, the drop admin can perform Take Snapshot, Delete, and Edit actions of the snapshot.
- IN PROGRESS: This status is displayed when the drop admin performs Take Snapshot action to extract the email address and wallet address of the users who own the NFTs. Once the details are extracted, the status is changed from IN PROGRESS to COMPLETED.
- COMPLETED: This status is displayed when the application has extracted all the email addresses and wallet addresses of the users who own the selected NFTs. The drop admin can download the .csv file of the snapshot.
- Records: Provides the number of users who own the selected NFTs.
- Snapshot Taken On: Provides the date and time when drop admin performs Take Snapshot action.
- File: Allows the drop admin to download the .csv file. Click
 symbol to download the .csv file of the snapshot.
- If required, the drop admin can enter the snapshot name in the Search field and search for the snapshot.
- If required, click on the
 symbol and provide the following details:
 - Snapshot Taken On: Provide the start and end dates of the snapshot and press Enter keyboard button. It will display the list of snapshots taken on the provided dates.
- Wallet Address: Provide the web3 wallet address in this field and press Enter keyboard button. It will display the list of snapshots where the provided web3 wallet addresses are available.
- Email: Provide the email address in this field and press Enter keyboard button. It will display the list of snapshots where the provided email addresses are available.
- If required, click
 refresh button to refresh the snapshot list.
Take a Snapshot
The drop admin must follow the below steps to execute a snapshot:
- Click Snapshots from the menu.
-
Click Actions on the created snapshot and click Take Snapshot from the available options.
- A pop up Do you want to take a snapshot now? is displayed. Click Confirm to take a snapshot.

Delete a Snapshot
The drop admin must follow the below steps to delete a snapshot before it is executed:
- Click Snapshots from the menu.
-
Click Actions on the created snapshot and click Delete from the available options.
- A pop up Are you sure you want to delete this snapshot? is displayed. Click Delete to delete the snapshot.

Edit a Snapshot
The drop admin must follow the below steps to edit a snapshot:
- Click Snapshots from the menu.
-
Click Actions on the created snapshot and click Edit from the available options.
- Make all the required changes to the snapshot edit form and click Save to update the form.
Download the csv File of a Snapshot
The drop admin must follow the below steps to download .csv file of a snapshot:
- Click Snapshots from the menu.
- Click symbol on the created snapshot to download .csv file of a snapshot. The file is saved in the Downloads folder.
Note
The downloaded file is available with the name_ss_hh_mm_ss_dd-mm-yyyy format.
Delete Snapshot
The drop admin must follow the below steps to delete a snapshot after it is executed:
- Click Snapshots from the menu.
- Click Delete on the created snapshot.
- A pop up Are you sure you want to delete this snapshot? is displayed. Click Delete to delete the snapshot.