Lists
Lists provides a list of some identified users with their email and web3 wallet addresses to access and purchase/claim drops. The drop admin creates a regular/claimable drop with Allowlist so that only users available on the list can access and purchase/claim the NFTs from the drop.
NOTE
The regular drops are visible to all the users, but only the users on the list can access and purchase the NFTs from the drop.
Create a List
NOTE
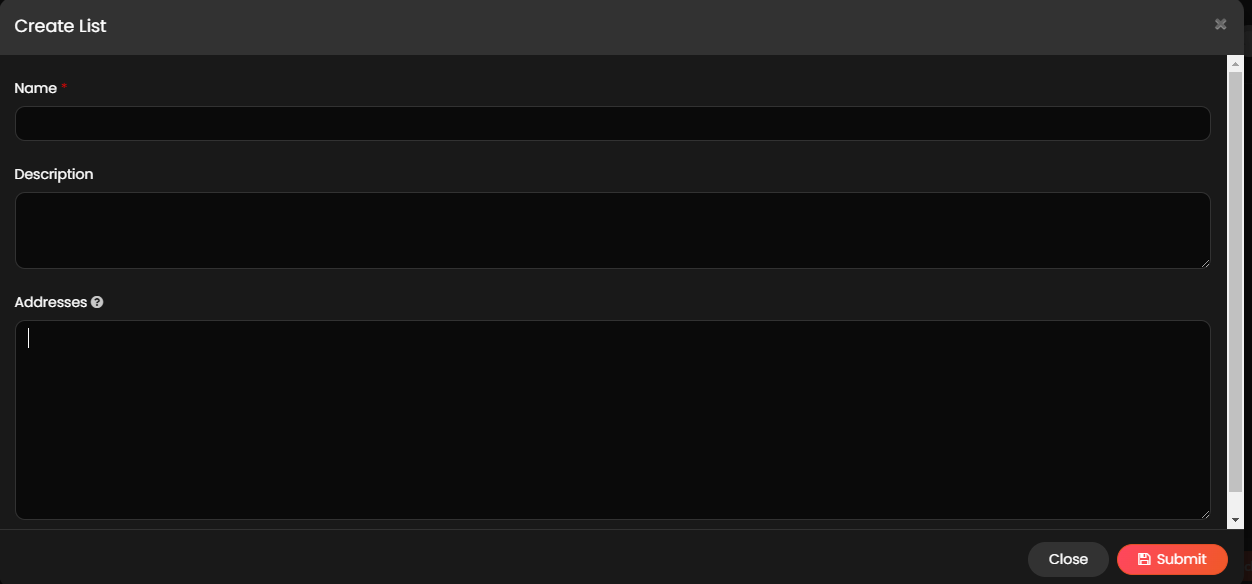
- The user role must be a drop admin to access the Create List form of the application.
- Fields with an asterisk (*) symbol are a mandatory field.
The drop admin must follow the below steps to create a list:
- Click Lists from the menu.
- Click Create List from the Lists page and provide the information in the following fields.
- Name*: Provide a unique name for the list.
- Description: Provide a suitable description to the list.
- Addresses*: Provide an email address or web3 wallet address based on the list requirement.
NOTE
If multiple addresses are added to the list, make sure that each address is added in a separate line.
- Click Submit to create a list.
Add a List to a Regular Drop
NOTE
- The user role must be a drop admin to add a list to a regular drop.
- The drop admin must create a list with email address or web3 wallet address before adding a list to a regular drop. For more information, refer to Create a List.
- The drop admin must mint NFTs with Future Drop before creation of a regular drop. For more information on minting NFTs, refer to Mint NFTs.
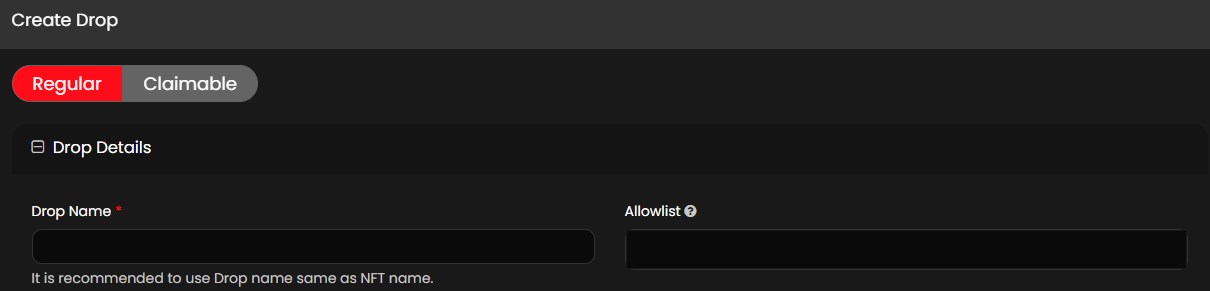
The drop admin must follow the below steps to add a list to a regular drop.
- Click My Drops from the menu.
- Click Create Drop from the My Drops page.
- Click the Regular option available in the Create Drop form.
- From the Drop Details section, select the list from the Allowlist dropdown list to add a list to a regular drop.
NOTE
Based on the requirement, the drop admin can select multiple lists from the available lists.
- Provide all the details in the required fields to create a regular drop. For more information, refer to Create a Regular Drop.
Manage Lists
Once the drop admin creates a list, the drop admin can manage the email address or web3 wallet address available in the list. The following actions can be performed once a list is created.
View a List
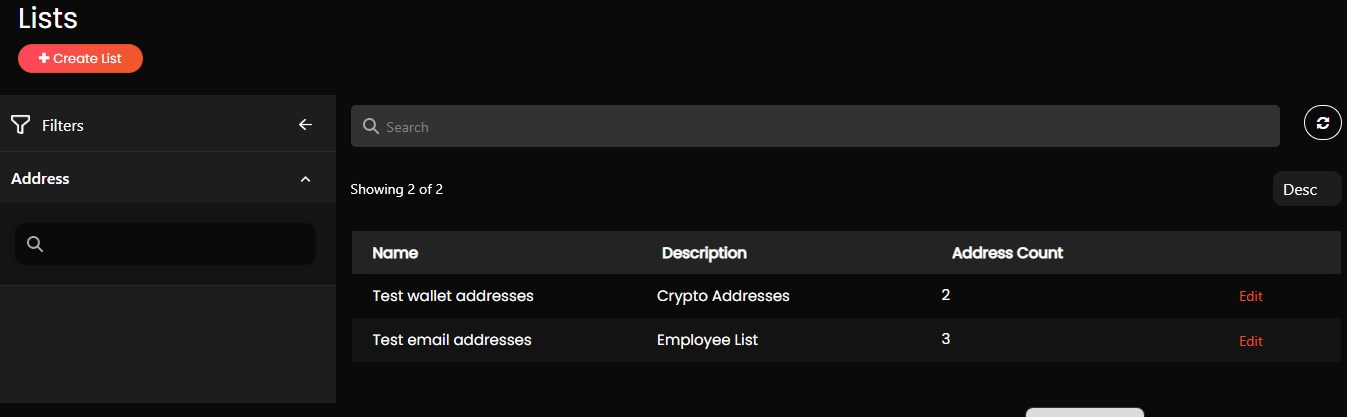
The drop admin must follow the below steps to view a list:
- Click Lists from the menu to view the lists if they are already created. The drop admin can view the following details:
- Name
- Description
- Address Count (provides the total number of email address or web3 wallet address available in the list)
- If required, the drop admin can enter the list name in the Search field and search for the list.
- If required, click on the
 symbol and provide the necessary email address or web3 wallet address in the Address field and press Enter keyboard button. It will display the lists where the provided email address or web3 wallet address are available.
 - If required, click
 refresh button to refresh the list.
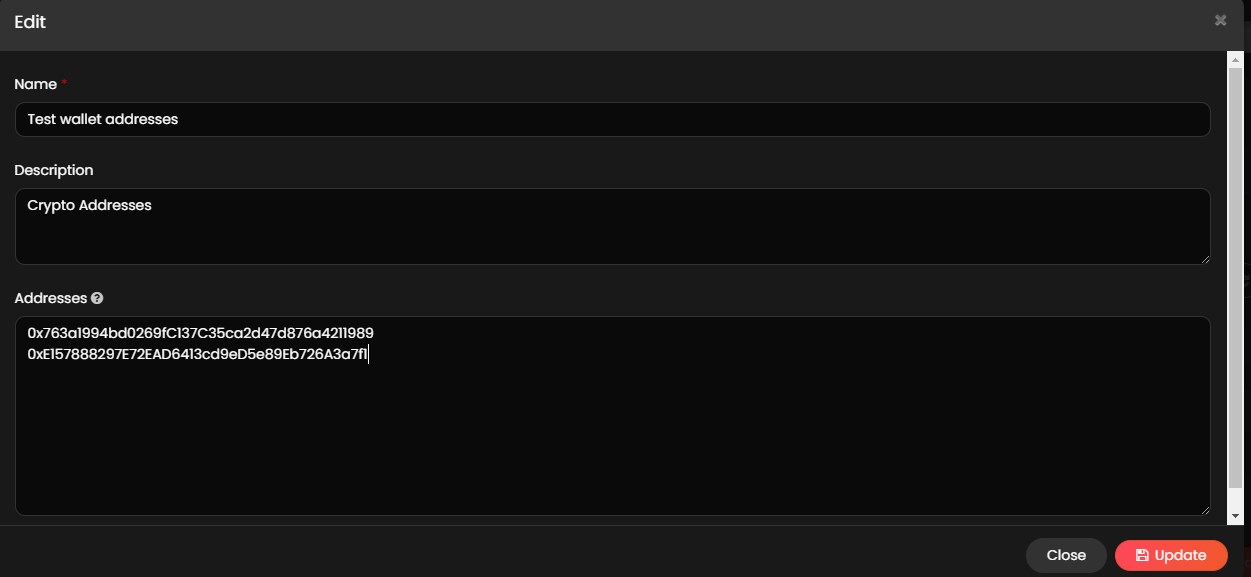
Edit a List
The drop admin must follow the below steps to edit a list:
- Click Lists from the menu.
- Click Edit on the applicable list.
- Make all the required changes to the list form and click Update to update the list.